ZBrushCentral

zMapper: Normal Map Seams

Thanks in advance for you help J

1st off the stats:

  • PC with Windows XP Pro
  • 4GB of Ram
  • My model started out in 3Ds Max 2009
  • Zbrush 3.1
  • Texture size is 2048x2048
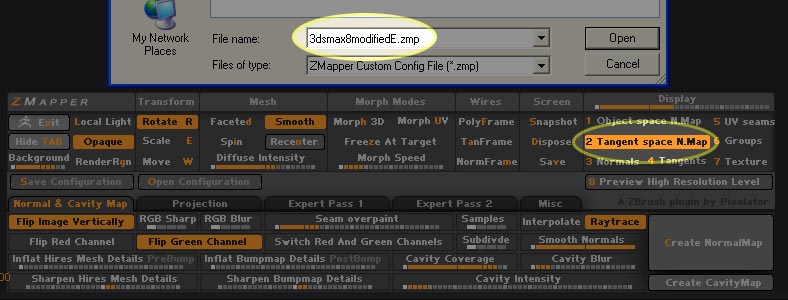
  • zMapper
  • 3dsmax8modifiedE.zmp
  • 2 Tangent space N.Map

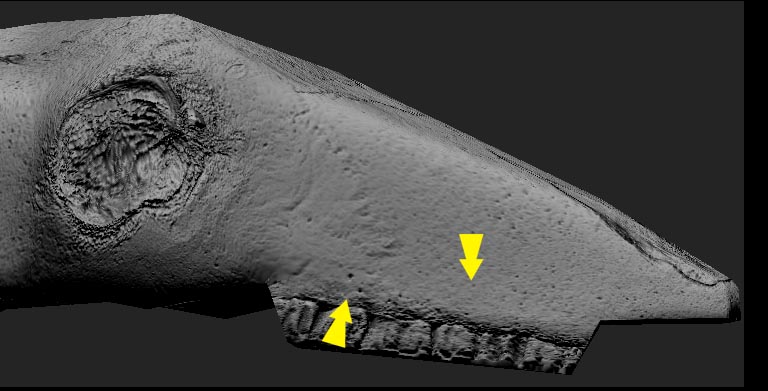
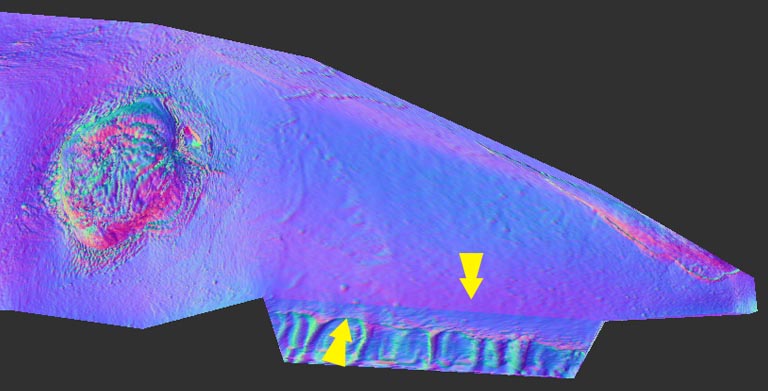
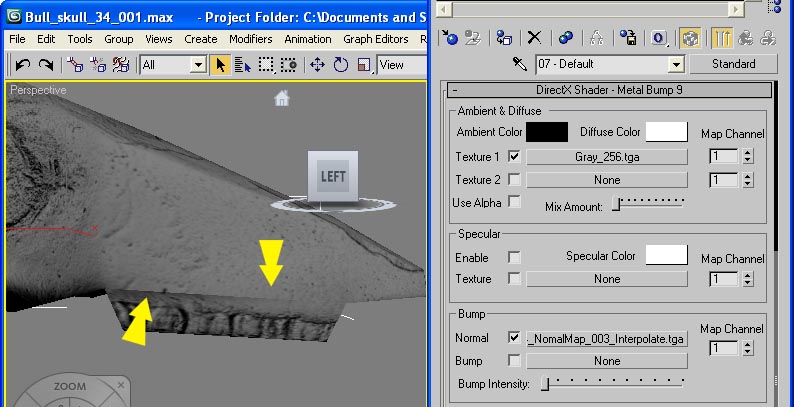
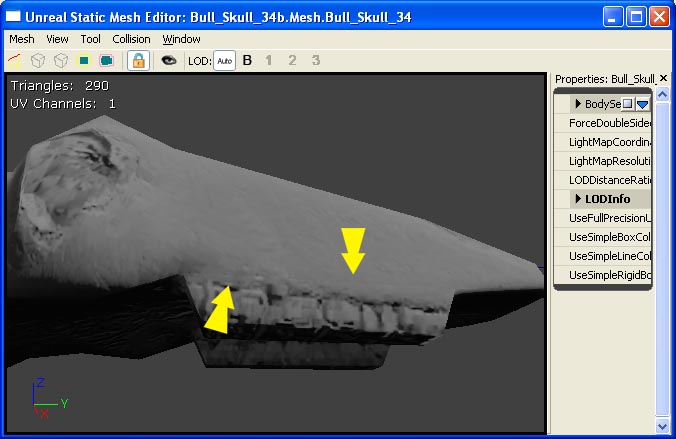
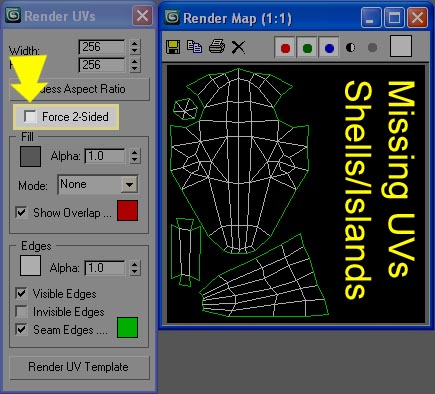
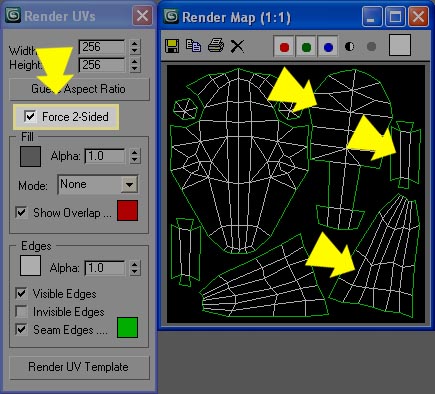
When I use these settings (See image) in zMapper I get seams in my Normal Map but, I do not see them in zMapper right after rendering in the zMapper viewer on the gray scale model. I see the seams all over but the best example is in the upper jaw area (See images). I must be missing something here. I hope some one can help me out? :slight_smile:

Repro Steps:

  • Note: My model started out in 3Ds Max 2009
    Step 1 = Drop down to the lowest level
    Step 2 = Morph Target -> Switch
    Step 3 = Click on zMapper
    Step 4 = Click on “2 Tangent space N.Map”
    Step 5 = Load the 3dsmax8modifiedE.zmp
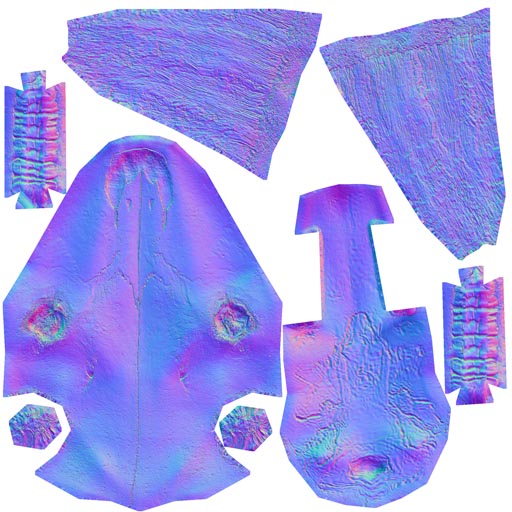
    *Note: This is where the normal map can be seen in zMapper right after rendering (See Image)
    Step 6 = Exit zMapper
    Step 7 = Flip texture in V
    Step 8 = Render -> Click on Flat - to see the seam in the normal map (See Image)

  • Notice the seams

zMapper_Settings.jpg

Attachments

zMapper_just_after_Render.jpg

zMapper_Normal_Map_Texture.jpg

zMapper_Normal_Map.jpg

This is the nature of tangent maps. The math behind them results in those seams at UV edges.

The best solution is to UV the model so that the seams are hidden.

There’s also a tutorial here for how to fix the seams after the map has been made: http://www.zbrushcentral.com/zbc/showthread.php?t=56882

I am not seeing any seams in your images below. can you post images of the acutal seams?

but yes Aurick is right in his response. usually you can not 100% avoid seams because of the nature of tangent space maps and how there is no standard for how they are rendered yet.

Thanks aurick & --E-- for the quick response :slight_smile:

–E-- to your response to not seeing any seams I have made 2 images from 3Ds Max 2009 & Unreal Tournament 3 Editor to better show the seams. *Note the color map/texture is gray.

Attachments

3Ds_Max_Gray_Seams.jpg

UT3_Gray_Seams.jpg

I found my seams issue: Turns out that I had flipped some the UV islands in 3Ds Max. I am still having a small seam issues but, I will put it in another post.

To identify this issue in 3Ds Max of flipped UV islands there are 2 ways to do it:

  1. Do a render to texture if parts are missing flip them in the “Edit UVWs” tool.
  2. Use the “Render UVs” tool and turn off the “Force 2-Sided” (See Image)

Attachments

Edit_UVWs_Tool_Off.jpg

Edit_UVWs_Tool_On.jpg

From looking at your model, it seems possible to me to connect the UV “shell” of the teeth on to the skull’s shell, this would eliminate any seams. Always try to make the biggest UV shell you can, remember Relax and projection tools mean there will be no noticable strecthing, unless your texture size is very low…

Hi TrackZ,

Not sure what you mean here “Relax and projection tools” can you give me just a little more detail on where these are at and how you like to use them?

Thanks
-=Jesse=-