I know you all asked for my render settings, but they are the defaults one.
So I’ve got nothing to tell you about that…
But here’s the process of getting the material to look that way, hopefully it will be useful to some of you and maybe answer your questions.
First thing you do is go to www.antropus.com and download the clayshader under the freebies section.
It’s packed with lights, with all the settings ready for you.
For the render settings all you need to do is click “shadows” on.
That’s it, I didn’t change nothing else in the render palette.
So it all comes down to light and material tweaking.
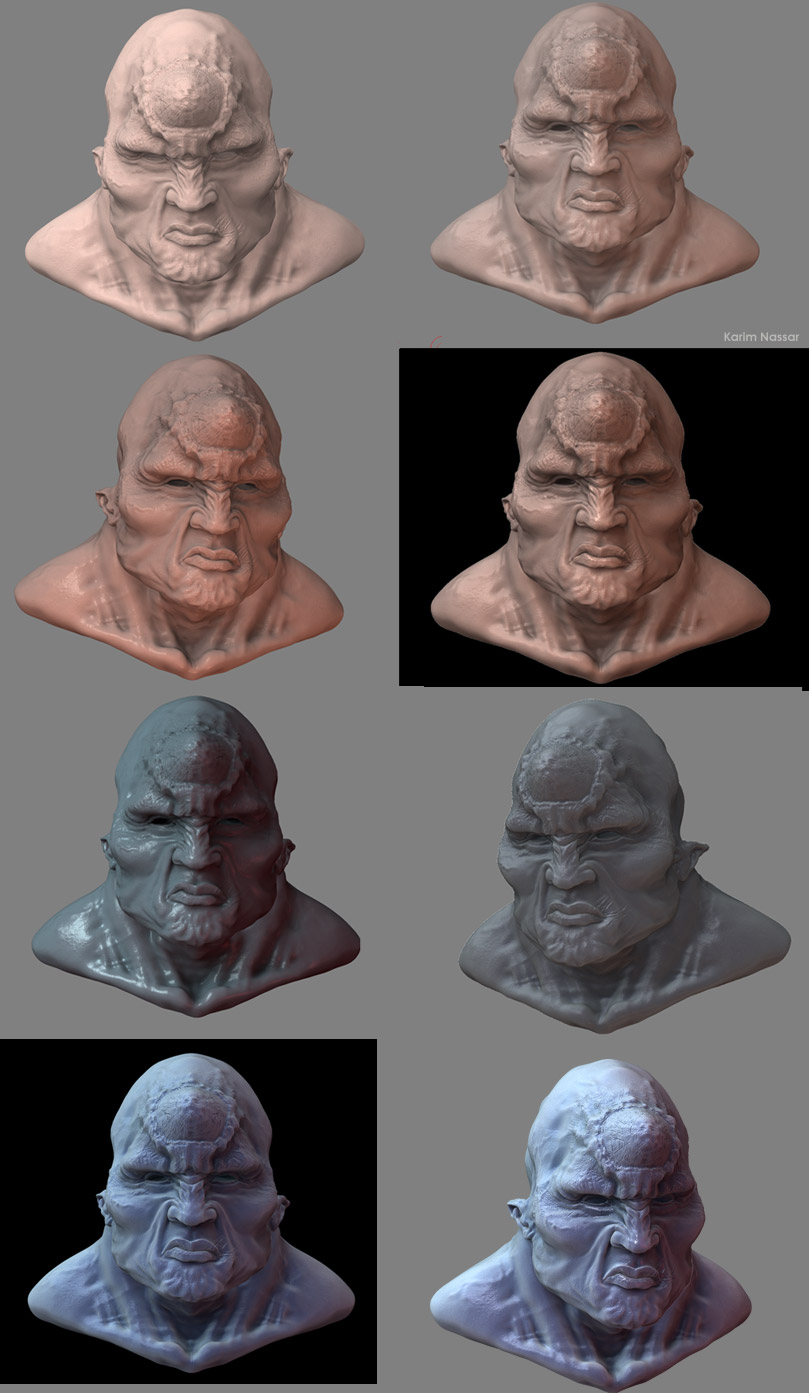
Here you can see samples of test renders going from left to right of the process of getting what I wanted.
The first one is what you will get by default wih antropuses material and lights.
[attach=41820]compdz7.jpg[/attach]
Here’s the process:
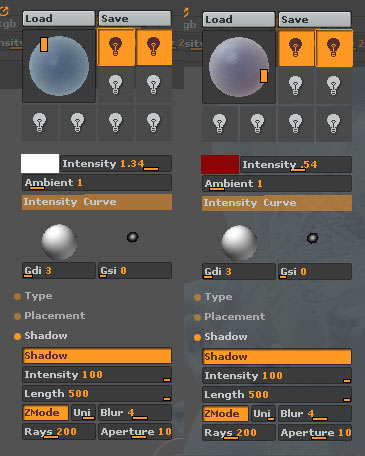
Regarding the lights:
Regardless of basic intensity, placement and ambient, the important part of the light setup is the darker light of your scene.
In this case the one on the right.
To fake sss put a light with a color adapted to your model.
For example if you have a whity, pink model, put a dark red light on the right.
So that it looks like it is the models actual color and not a light coloring it.
It will make it look like the light on the left made it through a little part of the model thus illuminating it and making it look whity pink.
While the other part in the dark wasn’t hit by the light and thus being dark red ( when in fact the material is dark pink). See image 4.
You can play with hot and cold contrast, wich I did in my render ( blue vs red).
So play around with it until you get good results.
Here the one I used on my model if you care (shadow settings are defaults):
[attach=41821]lightsrq8.jpg[/attach]
About the materials:
Play with the cavity intensity,color, and colorize. (under S2)
Do the same as with the lights, if it’s whity pink, make the cavity dark red it will make it look sss as well.
Tweak the cavity colorize and intensity slider to get what you want.
Then tweak the diffuse value and specular value to your taste.
To get the different speculars on the model (as on the nose) check antropuses picasso tutorial:http://www2.zbrushcentral.com/picasso/tutorial.htm
The renders you will get will be not so contrasted and appear to have a grey film on them.
Bring them to photoshop tweak the levels and it goes away.
So that’s it, I adjusted the levels, colors, and contrast in photoshop.
I did also put some photo grain and blured some parts to get the photo zoom effect.
As you can see, credits to antropus for the great material.
hope it was useful
Attachments

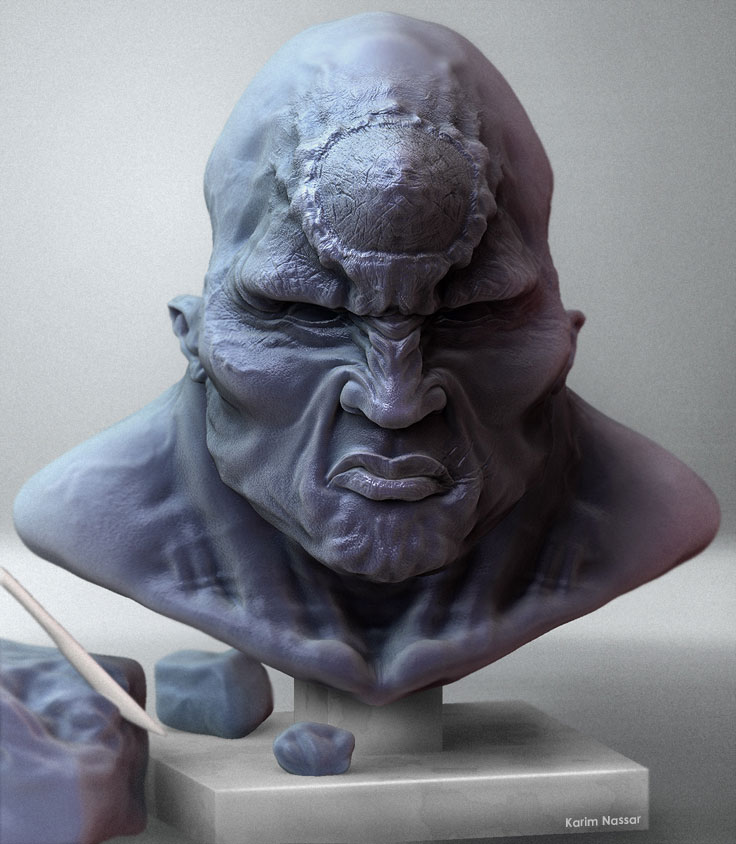

 The ‘real sculpture’ set up is excellent and ZBrush render impressive - for a moment I thought it was a genuine sculpture. A very good material you’ve used.

