ZBrushCentral

Tileable texture question [Answered]

Hello,

I’ve just recently purchased Zbrush and am trying to do some tileable ground textures with it.
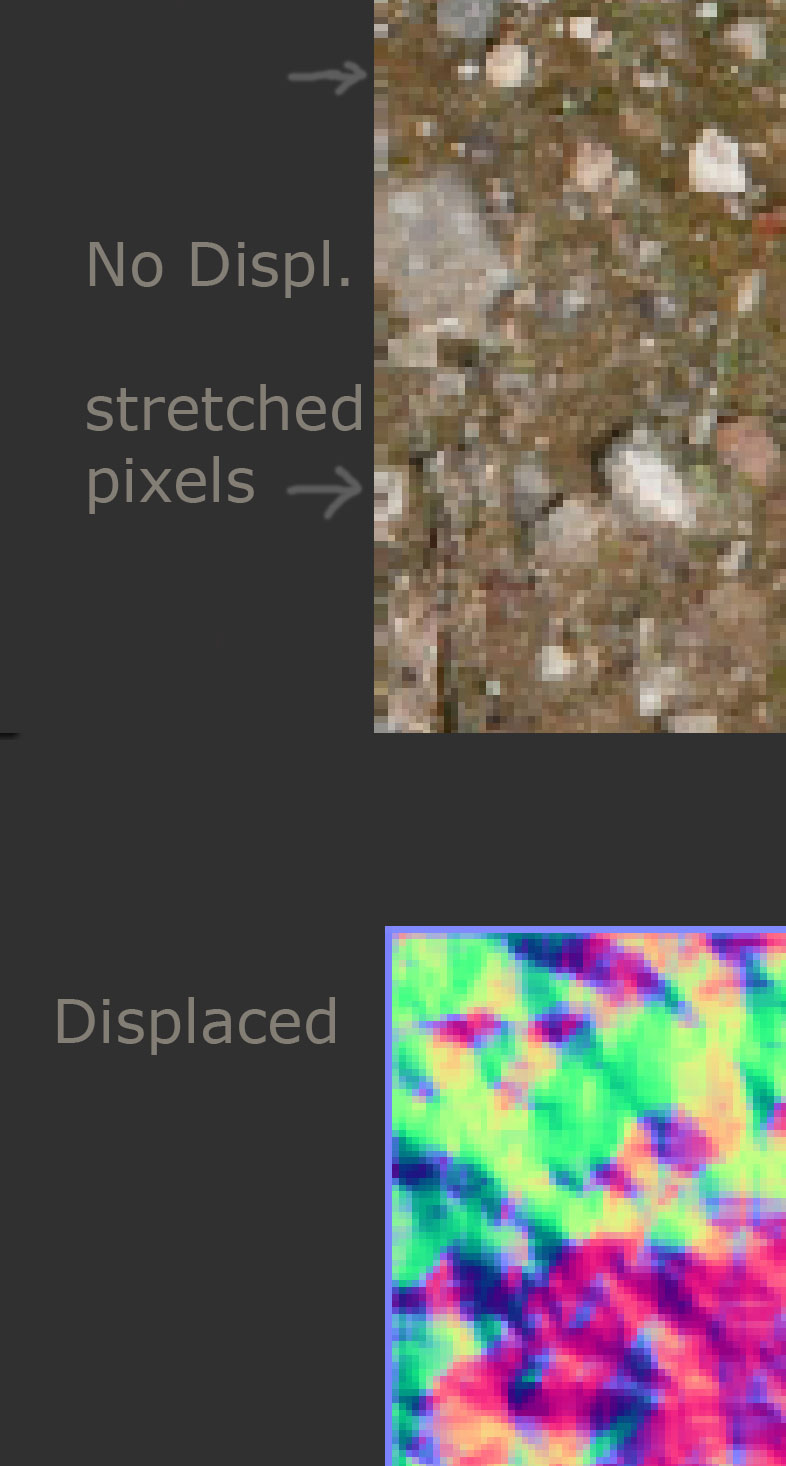
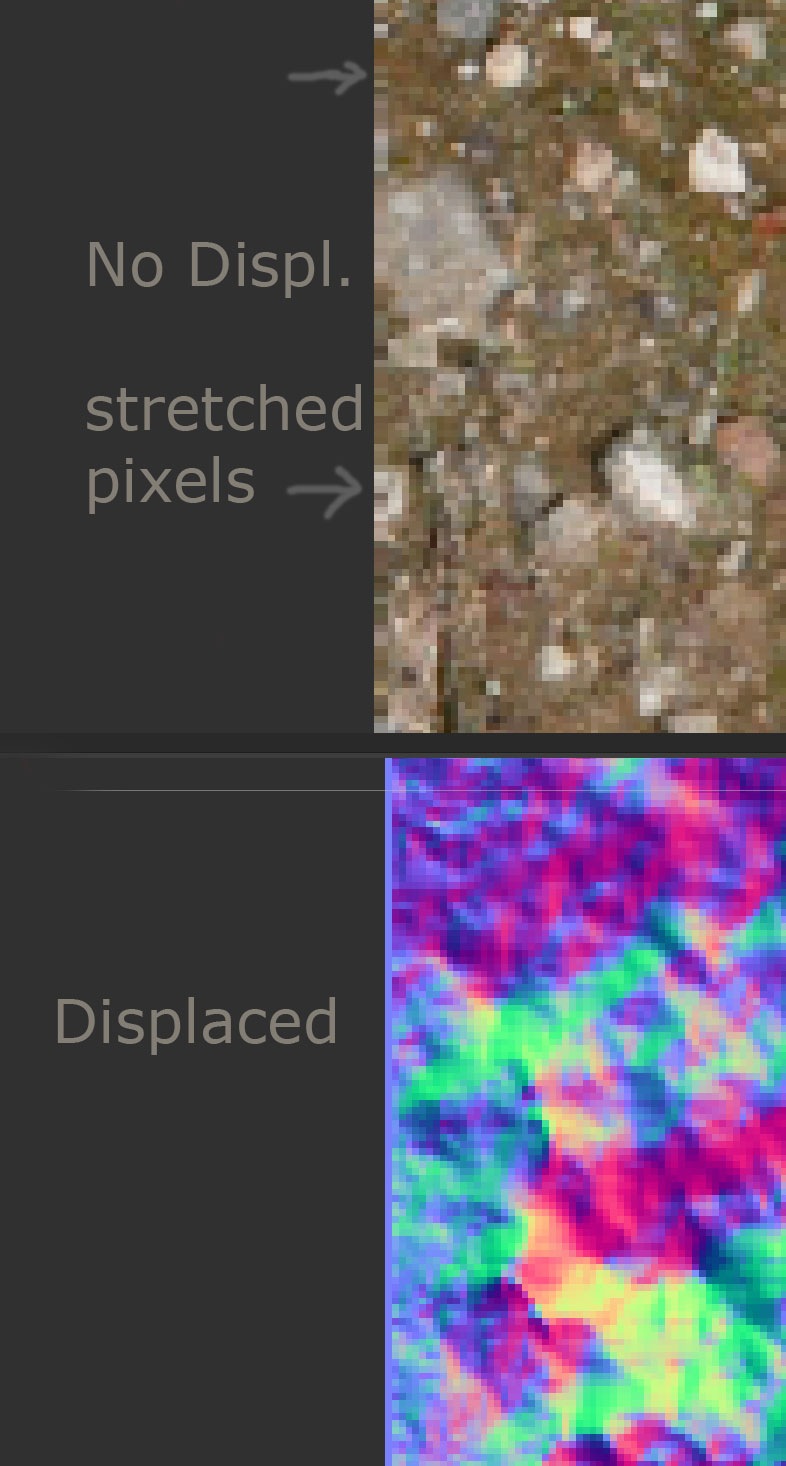
I’m following this Eat3d rubble tutorial where he displaces the base plane before adding the other tools to ground.

Procees is this:
Load 3d plane -subd to 4 mil (smooth off)
apply uvp on lowest subd
apply texture
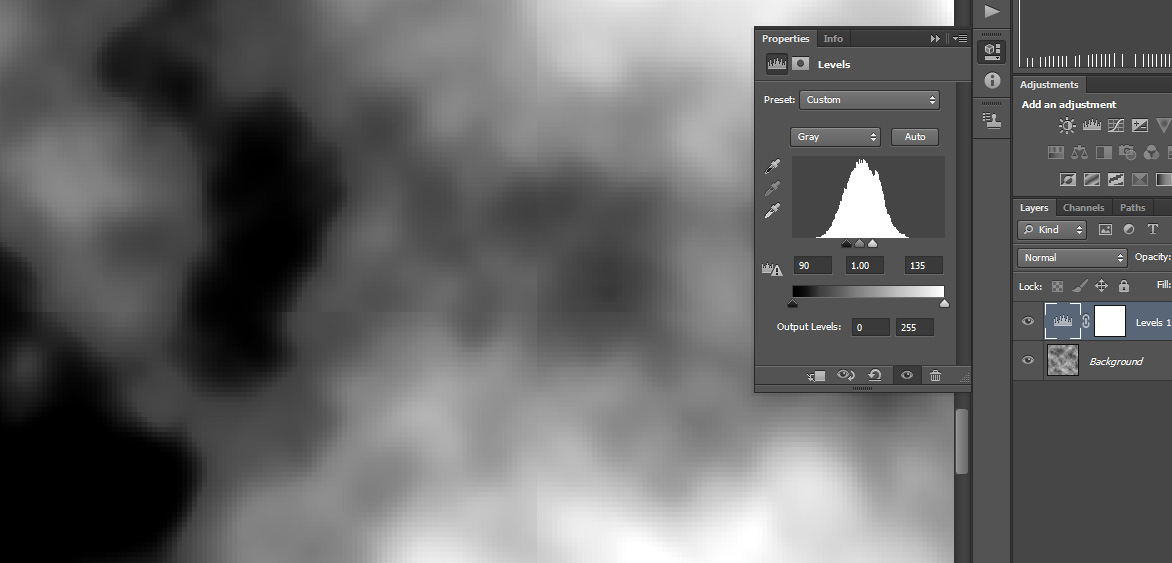
load my tiling displacement image
apply displacement 0.2
~ to see tiled image.

My question is, is there a fix for the ugly seam that happens once the displacement is applied? (oddly the guy in the video doesn’t have one) I’ve dl’d the seamless texture script but it doesn’t fix the displacement seam that occurs.

thanks for any help.

pics or it didn’t happen.

This is the normal map offset to see the seam. it’s a best render and zapplinked.

seams.jpg

When using the ~ key in ZBrush to check the tiling then you should not see any seams. If you are, then it is most likely a fault with the displacement image.

If all is good when checking using the ~ key then you need to use the pluginto export an image from the canvas. Although Best Render reduces the seams it may not get rid of them entirely. Using GrabDoc as in the video is fine for the depth map but will not work for anything added to the Texture palette. The same applies to the MRGBZGrabber.

Yes the seam shows when using the tilda key but my displacement texture is tiling perfectly. It’s a 2048 flattened grayscale 16bit psd. I’ve checked it many times to make absolutely sure it doesn’t have a seam.

here’s a screen using tilda
seams_usingTilda.jpg

I can’t upload the displacement map as it’s too big. 5mb.

It seems to be the application of the displacement that’s causing the problem.
Your script (thank you btw) works great beyond this point but the damage is done before then.

more info: My canvas is 2048 as is the displ map. (I had a way bigger seam when the map was 1024 and the canvas 2048)
I was hoping that was the problem but no…it’s better but still there.

edit: If you have time, in PS render clouds and use it as a displacement, it’s essentially what I’m using. Tilda, zoom in and you should see a seam.

Many thanks, that’s useful. I think there are two possibilities:

  1. The UVs are causing the border, possibly because the UV Map Border slider is not set to 0 (though I don’t think this has any effect…).
  2. When framing the plane on the canvas it is being placed slightly larger than the canvas size, so that the overlap causes the seams.

Of these two I think (2) is the most likely. You can check and reset the framed plane quite easily:

  1. In Edit mode, frame the plane by pressing F or Frame button.
  2. Turn off Edit mode and turn on Scale mode. The Gyro should appear in the middle of the canvas.
  3. In the Transform palette, click on the Info sub-palette to open it. There will be three sliders - X, Y and Z.
  4. Set the sliders so that they are half the canvas width. So for 2048 make sure they are 1024. (Note that this method will actually only work up to 2048 canvas size as the sliders only go to 1024.)
  5. Switch to Move mode and do the same for the X and Y sliders. This makes sure the plane is in the center of the canvas.

You can then test the tiling again using the ~.

HTH,

Hmm I gave that a shot Marcus but still have the seams.
My uv’s were applied with 0 map border UVP and everything you suggested was set to 1024.

However I did notice when drawing out my uv’d plane on the canvas prior to displacing, I zoomed in on an edge (without framing) and the pixels were stretched for about 3 pixels on the left edge. With a normal map material applied it’s one pixel left and top. Not sure if this is just a drawing bug or the uv’s actually aren’t correct. It’s pretty wierd.

edit: come to think of it, I guess this happens because I haven’t done a render.

Edges.jpg

Attachments

Edges.jpg

That’s a problem with your UVs.

Try this:

  1. Load a tiling image into the Texture palette.
  2. Change the Document size to same as the image dimensions.
  3. Select the image in the Texture palette and then press Texture>Image Plane>Load Image.
  4. Switch to Draw mode and check the tiling with the ~ key.

The image tiles fine using your image plane method but when I subdivide to 4 mil and apply Displ the seam returns.

Marcus does displacement work for you? ie. no seams?
Everything tiles nicely for me except the displacement.

OK, yes I do have seams when I do the displacement. They are slight but noticeable. It is definitely something to do with the way the displacement is generated, as I tried duplicating the plane as a second subtool and moving it to the right - there was still a seam between the two.

However, I discovered that there is a solution (though I’m not sure exactly what is going on). If I subdivide the plane one more time before generating the displacement I don’t get the seams. So, for example:

  1. For an alpha of 2048x2048 (and a document of the same dimensions) I subdivided the plane to 16 million.
  2. For an alpha of 1024x1024 I subdivided the plane to 4 million.

There is one further thing I will mention. You can also bypass the whole plane-displacement thing by:

  1. Import the alpha into the Alpha palette.
  2. Set the Alpha>Transfer>Alpha Depth Factor to a suitable value. (This is trial and error but as a rough guide I used half the Intensity value used when doing the displacement method - in my case 0.025 for the ADF worked well.)
  3. Press Alpha>Transfer>CropAndFill.

The result will tile using the ~ without seams.

HTH,

Bummer I was hoping it was just me. Thank you for try it, I appreciate it greatly.
They are slight but very noticeable in a game engine as a ground texture unfortunately.

Now this is strange. I still get the seams with both of these methods. Granted a little finer when subdividing to 16mil but they’re still there. I’m always checking with a normal map material btw as I can’t see it with my ground texture. Also my depth needs to be deeper than 0.025 more like 0.1 - 0.2 which exaggerates the seam further. Reason being the tools I place need to look buried in an uneven ground but even at a 0.025 I can still see it.

I must be missing something here.

Can you let me try the alpha you are using? I’ll PM you with how to send it. I’m puzzled that you get seams even when simply doing a CropAndFill and then using the ~ key.

What OS and ZBrush version are you using?

Thanks Marcus, PM sent.

I’m using 4R5 on win7 64bit.

Not sure if there are any patches I need to install, I only bought it last week so I imagine it’s up to date.

Thanks, you’re up-to-date.

The displacement psd you sent has very slight lines. These show up (at 500% zoom) if you do a Filter>Other>Offset by 1024 horizontal & vertical, and then adjust the levels. The lines cross the image a little off center. 16 bit is great but you need to remember that there are many more levels of gray than the monitor can display or the human eye can see. You should be able to edit the image if you use an adjustment layer with levels set appropriately, so you can see what you’re doing on the background layer.

I did a quick test by using the clone brush in PS to get rid of the lines. I then imported the result into ZBrush and applied it to a plane divided to 16 million (for reasons mentioned above). This would then tile perfectly.

The image shows the alpha at 500% zoom and an adjustment layer with levels set to show the lines.

Attachments

Grab-levels.jpg

Oh man, I feel like a complete idiot! :o I’ll be using extreme levels on 16bit images like a madman checking for any hidden seams from here on in. I actually had no idea that sort of thing was that hidden in 16bit, so thank you for schooling me in this area Marcus.

I guess this thread is still valid as the plane does need to be subdivided to 16 mil rather that 4 otherwise a seam still shows up due to ZBs displacement. Also using the Alpha crop and fill method seems to be cleaner than the way it’s done in the Eat3d tutorial above.

Thanks again Marcus for all your help and patience, it’s greatly appreciated! :+1:

No problem, I’m glad we got it sorted out and I hadn’t appreciated how the displacement can vary depending on the number of polygons. All useful stuff.

The Crop And Fill method is a good one, though you may need to experiment to make sure that you are getting the depth you require.