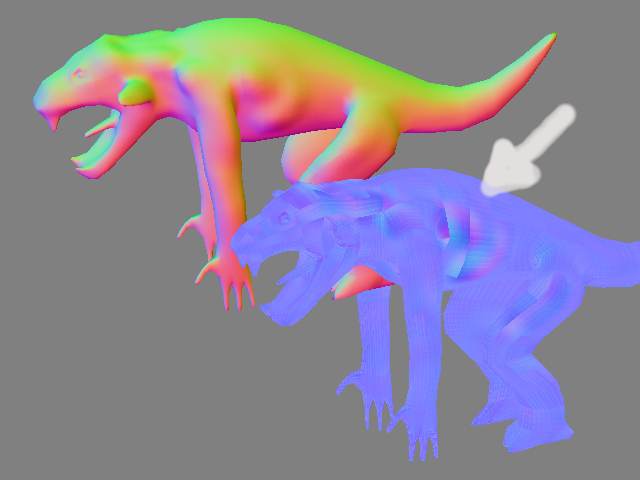
i’m also having problems with generating tangeant normal maps,
you can see from the examples that with flat colour material
the tangeant seems to flip in places, like its lit from
different directions in individual polygons. it doesn’t do this with
worl space normal maps, witch render perfectly with oliviers shader,
unless you try to rotate anything. i’m using js normal shader which
looks good in spots, unlike the killeroo wich looks like rampant cancer.
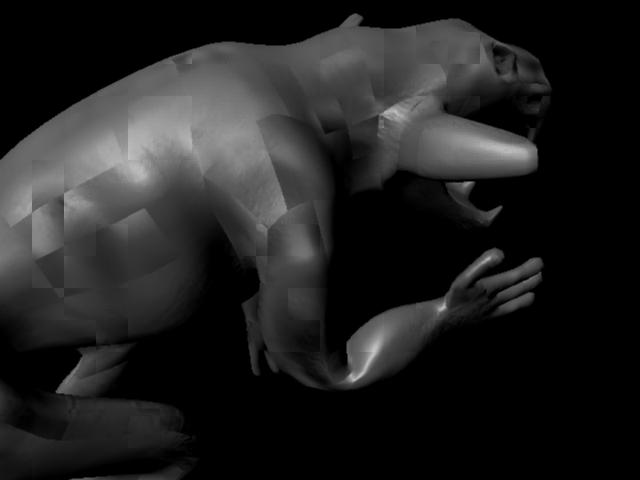
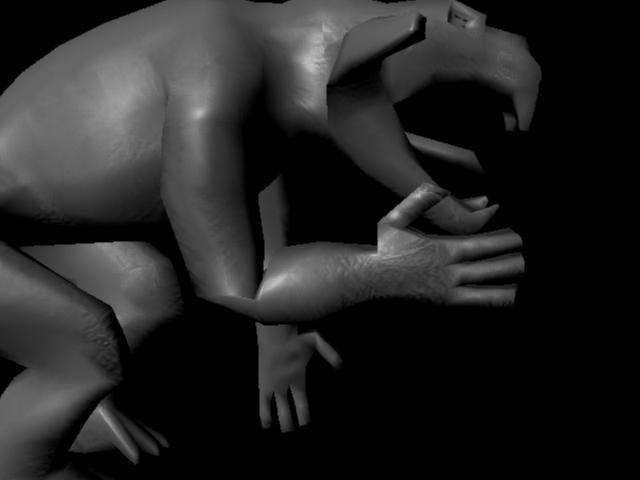
i’ve also tried generating a tangeant normal map with a higher
subdivision, like out of 6 i’ll generate it at 4, which provides smoother
results, but seems spindly.and with js normalizer you cant really adjust the
gain of the normal map past 1 in its filter.
help, scott spencer, for he love of god.
also the points are merged, and the faces are unified on the model.
why does it do this? is there a correction?
any help would be appreciated also, i don’t want to give up on normal mapping, but bump maps don’t look so bad i guess. maybe for the high frquency. i’m also going to try the “allow multiple object” disabled but i think i did that months ago.
i just got a taste for the 24 second renders, but i’ve been
getting pretty silly over it, as some others have too maybe.
this is just a test for bump, which i think looks a million times better than
any of the normal shaders. there’s also a little bit of a displacement on it though.
the horns got a little messed up within the displacement somewhere along the line and i had to switch to an earlier model where it doesnt bloat out.
i’m still working on the model i’m kind of bouncing around.
like every third day i’m " i’m going to figure out these normal maps."
i think i have to add more geometry to the horns, but i already have it rigged with weights painted.
i’m pretty glad i didn’t work out the blend shapes too thouroughly before
i tersted out the displacement
but i guess for the normal mapped objects to look better the models have to be smoothed,and that adds time to the render anyhow.
this new picture took 11 minutes to render, where usualy it takes about three, i’m guessing because of the texture and bump.
and with the other shader it would kick out 50 frames and i sitting there with my hands like a mad scientist saying “yes, yes, more!!! bwaha ha” but the lighting went reverse if i rotated an arm or whatever, so that was a little disheartening.
sio then i was thinking that i have to switch the red and green channels and i tried every combination of that, until i finally rigged up the lady torso that comes with the shaderand twisted it and it was the same thing, reverse lighting, so that was a little disheartening.
also on a side note, i don’t know if anyone will read this, but there is another oliviere shader setup with a sphere, and the material gives it the look of gouraud material…
almost like a smooth proxy, but with no actual change in geometry, a low poly subdivision look…
does anyone know how to accomplish this?
thats probably reaching deep though, because i barely understand what
i wrote in the last two sentences…i don’t want to come off as a nut.
mainly though any insight concerning the random uv polygon lightsource
flipping within zmapper would be greatly appreciated.
quick edit: nevermind texture uv adjustment is helping, thanks aurick and dcman