 Hello I’m having an issue with normal maps seams after exporting from zbrush.
I’m unwrapping the model from 3dmax and taking into zbrush to detail in, the problem is that after detailing and hitting the “fix seams button”, the exporting normal map has artifacts and the seam lines are very clear.(same thing with displacement maps)
[ ]
]
I’ve tried flipping red and green in max and it does not seem to help.
I’ve also tried using Nvidia’s Melody without success.
Please help, Thanks
The problem is that the values are being reversed across UV seams. So where one area might have white as the maximum value, those next to it use black. This indicates that something is getting messed up in the UV or points export from your other software. It would help a lot if you said exactly what program you’re using and what your workflow in ZBrush is.
I’m using 3Dsmax 7 and my workflow is the following:
-model and unwrap model in max
-export as an obj.
-import into zbrush as obj
-click"uvtotextures" to check uvs
-click"fix seams"
-divide mesh and add detail
-create a normal map(tangent on)
-flip map
-export normal map
-load as bump>normalbump>“normalmap.psd”
here are some more examples of this problem
thanks
[ ]
]
These are in max with the normal problem
Attachments
I have the same problem. Where i can find the solution?
Thanks

Hi, I seem to have the same problem exporting to Max. Exporting to tif instead of psd seemed to reduce the warping but you can still see there are more reversing problems. This is just a test and it’s not going to look like that but it’s the same model.
I tried many of the things proposed on the forum but nothing did much.
Does anybody know a solution to this, I have the same issue. 
I have wasted hours trying to figure this problem out. The areas where these artifacts appear are where UV borders are . I am using the latest seetings for Max 8 in Zmapper, have made sure that my texture was flipped on the green channel ect… I honestly don’t know what is causing thid but it is really annoying. The Uvmap was done in Max8.
Okay I decided to take some screens from within Zmapper to see if someon has an answer. Under the display options for Zmapper these are the following results. (topLeft)is Tangeant display. The second image(topRight) is the display I get just after a tangeant space projected normal map with green channel flipped per the max8modified config file for Zmapper. This looks ideal and exactly the way I would like it too look in max and there are no visible seams, however! (image at (bottomleft) shows texture display, in which seams are easily noticeable. In max, the seam near the neck is barely visible but the seams on the arms are. Image (bottomRight) shows what happens when I turn the green channel flip off, hm looks somewhat similar to the way I see it in max. So Why isn’t the normal map in max being show how it is just after projection (topright) [color=DarkSlateGray][color=black]It is very urgent that I find a solution for this as I am on a deadline.
I would like to think this is an issue with slipped rgb channels but I have played around inverting channels in photoshop to no luck.
One thing regardless or whether or not I use the model export straight from max or the one which I export from Zbrush is that the same issue shows up when I apply the normal bump. Why is it that Zmapper will project correctly but my actual normal itself will contain these unsightly seams?
I’m not sure if I’m imprting the model back into max properly so here it how I do it incase its wrong. When I import the zbrush export obj, First of all when I import the model into max I get the import dialogue showing both a “default” and “Zbrushpolymesh” and the “multiple” is selected. Rotate model, texture coordinates, normals and object smoothing groups are also checkmarked. material and center pivot are not checked. I press okay and another diolgue comes up and it lists 12 under “identical vertex index in face”. Not sure if that is supposed to show up or not but I select okay anyways and continue.
So then I throw on a default material, go under the bump channel and apply a normalbump. I load the texture from Zbrush, which is wrong anyways and I usually invert the green channel in photoshop anyways to get it to look mostly right. Regardless I still get those notice seams/flip normals at seams like around arms and side of chest. I also tried flipping channel direction under the paremeters but no option (example:swap red and green work)

Might there be something I’m forgetting to prep with the low poly mesh in Zbrysh before going into Zmapper? Currently all I do is import the model, rotate the preview to line up with the high mesh. Then i go to tool>normal map and make the size 2048 and make Tangeant and adaptive highlighted options. I do not touch the polygroups option, again not sure if its needed. As well I don’t touch anything in the tool>texture panel. Under tool>export I have Qud, Grp,Obj, and Txr selected.
I’m just going to post everything I know and have done up until now and maybe one of you can see where I am making my mistake.
This is just a screenshot showing the basics of my low poly before exporting to Zbrush. I usually would not export withhout collapsing everything but have decided not to just as an example to show my uvmap and export options. This model also has an autosmooth of 89 when exported but I doubt that is an issue.

Just to restate my issue in images again.
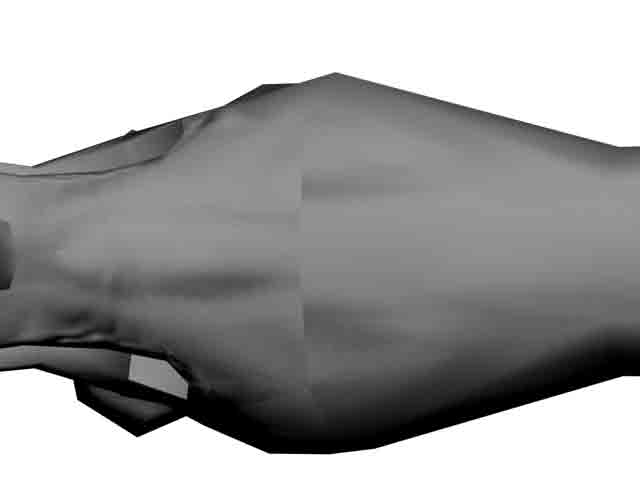
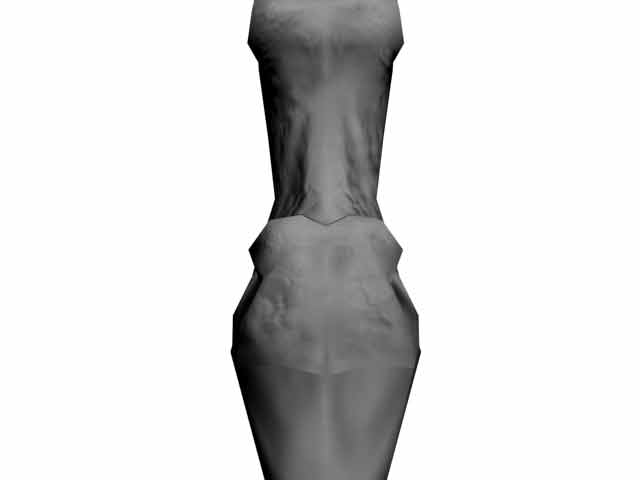
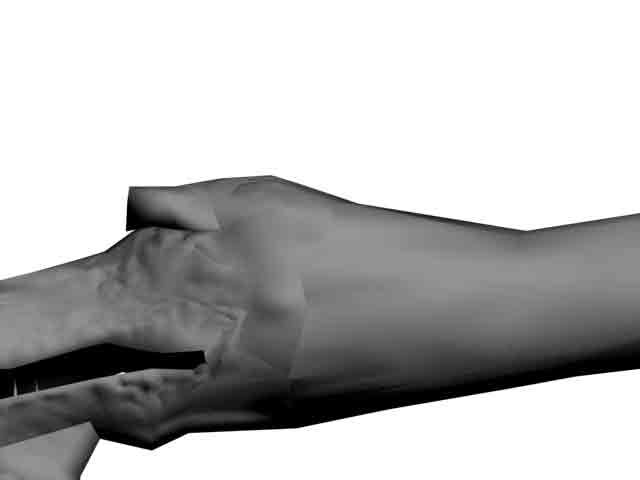
Image 1 below shows what looks to be a properly normal mapped model in max in Directx from the front view. From the side however there is obviously some sort of flip issue as seen in image2… Image 3 shows a part of the model where there is a UV seam but there is fortunately no artifacts like those seen around the arms and chest. The highlighted vertexes show where the UV seam lies on the model. I wish the whole map would behave like image 3!

Alright well your probably going to laugh at me for this but apparently I’ve been using the wrong Zmapper config zmp. I had two different Max8 config files which I downloaded and the one I was using was creating this problem, for reasons that will never be explained since the configurations are nearly the same settings
I did a run through with good old default zmapper config and as well I had no issues with seams in max. So the config file I was using for the past few days, the one which is apparently for Max8 was creating unnecessary stress for me.
The difference was was in two different configs but similiar names which could get one pulling their hair out.
3dsmax8modifiedE.zmp was giving me troubles
3DS Max8_TangentSpace_BestQuality.zmp was the one which worked.
I downloaded both from here I believe so some people might want to find the other one if they are having similiar issues.
Hi Cyborgguineapig,
Where did you find 3DS Max8_TangentSpace_BestQuality.zmp ?
I can’t find it anywhere on the site. Please help as I’m also having some problems with seams.
Thank you
God this is going to sound dissapointing but to be completely honest I have no idea where I aquired it from lol. I thought it was somewhere ont hese forums but I may have found it on a thread on Cgtalk.com. Not sure. Bump, hopefully someone else knows.

Hi,
I have a similar problem, yet almost more so. I have a char in which the upper body is unwrapped cylindrically, but the legs share the same uv space from left to right. In other words, both leg uv’s overlap each other perfectly in the texture space - so one side only needs to be textured.
My problem is, when using zmapper with the 3dsMax 8 tang Space Best Quality plugin, I still have the normals inverting itself on the right leg (left leg was base for normal, uv unwrap and texture). There are seams that show and have an inverted normal and texture …
Here is the image of what is going on (screen captures from 3dsMax9). Perhaps I do not know what are the proper settings to use in Zmapper? I would greatly appreciate a step-by-step instruction, on what settings to use in Zmapper for 3dsMax9/Zbrush2.
Please help :eek: 
Tangent space maps are VERY sensitive to UV seams. This is not a ZBrush issue, but rather something inherent to Tangent maps themselves. Any time you’re going to be using a Tangent map, you need to do everything you can to hide the UV seams.
Also, many renderers show the seams more strongly in the preview than in the actual render. Try doing a final render and see if the seams are still there, or if they’re reduced to an acceptable level.
Thanks for the quick response!
I tested re-building the one half of the ‘legs’, and reattaching them to the body (deleted messed up half, of course, before doing so). So inshort, I recreated a new mesh.
Next I went into Zbrush and loaded the normal map texture and smudged the broken seams to blend better.
I replaced the new blended normal map onto the Max model scene, for both the old mesh and new, and - this is what’s weird - the original mesh worked with the new normal map.
The rebuilt mesh - didn’t, with the new normal map.
Anyway, the result is that the problem is fixed … I guess that’s what matters most, huh?
Thanks!
Anyone who could provide me a link to this confiog file?
Is this the latest and working one?
Hi… I read your thread, and have same problem http://www.zbrushcentral.com/showthread.php?t=81912 but we are in 2010 and I use Max 2008 > Zbrush 3.5r3… did you have same problem with Zbrush 3.5r3? in this ZB version of Zbrush cant have the “Zmapper” modifications…