ZBrushCentral

Normal map seams problem

Hello everybody!
I’m trying to make a descent character and my workflow is this:
1)Low-poly model in Max
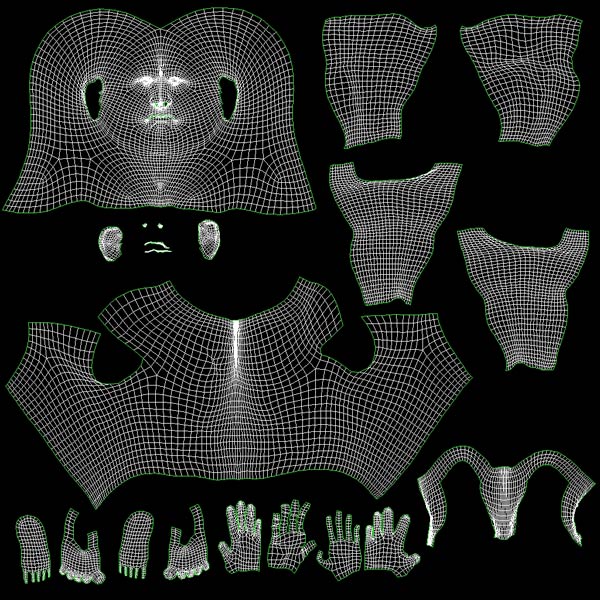
2)Unwrap UV in Max
3)Reset Xform
4)Export obj
5)Import in Zbrush, subdiv and sculpting
6)ZMapper for normal map (in Expert Pass2, all smooth sliders go very high)
7)Export the normal and new low-poly obj in Max
8)Load the normal map in normal bump slot & render with Mental Ray.

I’ve tried this workflow in 3-4 characters, but I had always a problem in applying normal maps…I’ve read a lot of threads here, how to make a good normal map, but nothing is working!!! Why so many people had problem with normal maps? What is wrong?
The only advise seems to work is “Hide the UV seams!” BUT, how so many talented character artists, manage to have models broken to 20 parts, full of UV seams, but when they apply normal map, the model looks perfect???

I tried to use XNormal too, but…the result is just the same as ZMapper…
Your advises would be more than useful to me!!!Thanks a lot!

This is a photo showing the workflow and the ugly seams…
[Normal_Problem.jpg]

  1. what does your UV layout look like?
  2. for Zmapper use “3dsmax8modifiedE” as the config. do a search, you’ll find it.
  3. post up the file you’re working on to see if others have the same problem.

goast666, I’m using this Zmapper configuration already. In the first image is the not-so-low-poly model (13,500 polygons) and next is the applied normal map with lots of problems…Next is the UV’s. I have no overlapping or inverted polygons.

[Low-high.jpg](javascript:zb_insimg(‘141650’,‘UV.jpg’,1,0))

Attachments

UV.jpg

Tangent maps always show the UV seams. It’s the nature of the math behind that map type.

The best is to hide such seams in places where they won’t be seen in the render.

If that’s not possible, this tutorial may help you: http://www.zbrushcentral.com/zbc/showthread.php?t=56882

Thanks aurick, it seems hiding the seams is the only way. I’ve seen this tutorial before, now I’ll make a try.

Have you tried taking the normal map into a program like photoshop and manually painting the seams to be the exact same color?

Yes, I tried something similar. I draw the neutral normals’ blue color (127,127,255) along the seams, but the result in render was just the same…
I’m not so good in drawing-manipulating textures, so trying to find a way to create a descent normal map, without having to edit it in Photoshop.

Also when applying the normal, my problem render areas change radically, depending on the light setup or shaders I use. For example, the SSS shader in Mental Ray, reduces the problem a lot!

You do plan on putting this character into a game right? If you are you should see what the final result looks like in the game engine and come back.

No, its not for a game, just a still image for me. I want to make a Spartan hoplite, and make a render in Max (wip: http://209.132.96.165/zbc/showthread.php?t=67409)

In that case you should use displacement maps instead of normals. Displacement will get you the kind of results that normals can’t. And then you can use a normal for small pores and other details.

A good place for the seam between head and neck is right where the neck meets the head, under the chin and close to the hairline where it will difficult to notice.

But wait a second! You’re making a hoplite- that means you can cover up the seams with armor right?

You’re right, some of the seams will be covered by armor, but not all of them like the seam between palm and arm.
I was looking for a way to get rid of seam problem generally, not only in this model. I thought maybe I was making some serious mistakes, but it looks I did the steps ok.
As aurick said, tangent maps always have this “seam problem”.