ZBrushCentral

Make it look real (With mental ray)

000 - BottomRow.jpg

For the light, I tend to use the Mental Ray’s Area light shape, enabled to have a nice realistic shadow, with enough samples to avoid the grain.
Plugged into the light shader, a Physical light node, to give a realistic decay for the light.

Attachments

Alguien_Print.jpg

001 - Light Setup.jpg

002 - Light parameters.jpg

                    • Camera setup - - - - - - -

        To avoid gamma issues with the displacement textures I use a mia_exposure_photographic for the main camera shader. For the dept of field i like the Bokeh lens, nice and quick.

        [attach=185034]003 - Camera.jpg[/attach]

      Using a 2.2 gamma in the mia_exposure_photographic node, the dark/lit transitions tend to look more natural. It also allows me to adjust the overall look of the lighting and contrast using the node settings.

      [attach=185036]004 - Exposure.jpg[/attach]

    In this pic the gamma is in a 1.00 value, the default is 2.2. and you should use it…

    <table class=“fieldset” width=“100%” border=“0” cellpadding=“0” cellspacing=“1”><tbody><tr><td>[attach=185037]005 - Lens.jpg[/attach]</td><td align=“right”>
    </td></tr></tbody></table>
    For the bokeh node, the plane represents the focused point, the radius the size of this de-focus (in a real camera it is defined by the lens diaphragm).

For the samples a good value for testing is 2 or 4, for the final render more than 32 is overkilling.

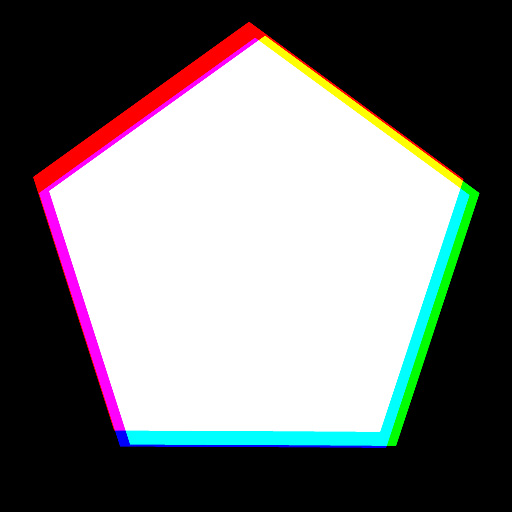
For the bokeh texture I use this image, tends to create pentagonal figures in hotspots (there are none in the final render). The color shifting on this pictures gives a pretty good sense of chromatic aberration.

[attach=185038]BOKEH.jpg[/attach]

Attachments

003 - Camera.jpg

004 - Exposure.jpg

005 - Lens.jpg

BOKEH.jpg

                    • Render setup - - - - - - -

      For the light bouncing I adore Mental Ray’s Final Gathering. The bouncing cards provide a good amount of bouncing light to define the shape of the model.

      The light bounces in 2 gives a realistic lookl without extreme rendering time (I’ve seen some renders with 5 -physical correct- light bounces, but they tend to render for ages)

      [attach=185039]006 - Light bounces.jpg[/attach]

                      • Textures - - - - - -

Generating the normal maps and displacement maps is really quick in 3.5 r3, simply saving a morph target in the highest subd level and presisng the “create disp map” or “create normal map”.

The big deal here is the brand new exporting option: Maya Binary file :smiley:

Some months ago rendering displacement maps was a nightmare, now thanks to pixo is a one-click solution.

By the way, the uv layout was done with uv master.

Thanks pixo!!

Any comments or help needed for this tutorial, I will happily reply

Attachments

006 - Light bounces.jpg

:+1:small_orange_diamond:+1:small_orange_diamond:+1:small_orange_diamond:+1:

very nice tutorial, thanks!!!

Nice work! Thanks so much for this tutorial man!

Thanks Man:+1:

Thank you, that was very quick, concise and helpful!

Good Tutorial, It’s always nice to find someone who knows how to use the mr lenses!

“Some months ago rendering displacement maps was a nightmare, now thanks to pixo is a one-click solution.”

what do you mean: pixo is a one-click solution?

:+1:

IS there anything special your doing with the bounce cards material wise?

Also how would you assign different materials to a single model, with multiple parts. Such as a human with clothes and hair, which are intended to be different materials? What’s difference about the MIA material over your average blinn and phong shaders?

I always thought you had to use a dome and light emitting colors to get that type of look with Final gather. Is GI used at all for this?

@ everyone: Thanks for the quick replys :smiley: It’s always a pleasure helping others…

@ sadicus: Before the zBrush 3.5 releases rendering displacement maps involved messing with the “Aproximation editor” of mental ray, calculating subdivision levels and programming the negative/positive displacment for the mesh taking on account the size… that took a lot of time and the settings were always different on each object/model. Now with the .ma exporting, all those settings are written by zbrush, not to mess with them anymore :smiley:

@ womball: The material of the bounce cards is a white and non-reflective material, just the same material of the curtain.

For different materials on the same object, I strongly recommend AGAINST sculpting different materials in the same mesh (Like sculpting the clothes out from the body mesh) The best thing to do (render+material wise) is to export different objects using subtools.

Mia material is a physical shader, so it will never bounce off more energy than the energy it gets, something that the other shaders usually do, that’s why I love the mia… it also gives fast blurry reflections, refractions and almost any material can be done tweaking it.

And yep, something like GI is used

Very nice render…great stuff

Thank you for the tutorial, very helpful.

Yey!!! hermano, a million thanks for made this tutorial!, im gonna try it!, the model is greaaat!:D:+1:

@ Solid, Skelton - Thanks guys

@ Manzarek - De nada! Espero puedas subir aqui la imagen del modelo que uses :smiley: (Welcome, Hope you can upload the image of the render soon)

What attribute of a blinn shader is the Physical shader should it be applied too? Or is it its own shader?

I’m getting some serious blow out with the area lights. What intensity are you using for the light. What are the physical light attributes your using?

womball - Adjust your blinn’s parameters to make them match this simple rule:

Diffusse + Reflectivity + Transparency = 100%

If you have a 0.8 diffuse (the blinn’s default) there is only room for 0.2 for reflectivity or transparency.

The blown out areas should be less noticeable with the lens shader aplied. Take on account that the area light’s size affects the quantity of light emmited from the light (duh :lol: that sound funny). I use physical light values over 10 thousand. This values change from scene to scene.

Thanks for sharing ISK-86! Great little tutorial. One quick question about the bokeh texture.

For the bokeh texture I see how the edges of the hexagon resemble chromatic aberration, but what exactly does this do? For EX: what if this was a circle instead? What would be the difference? Could you explain this particular attribute? Thanks again for the tutorial! :+1:

If the bokeh texture would be a circle, the bokeh effect would be a circle too…