And Here it Is!
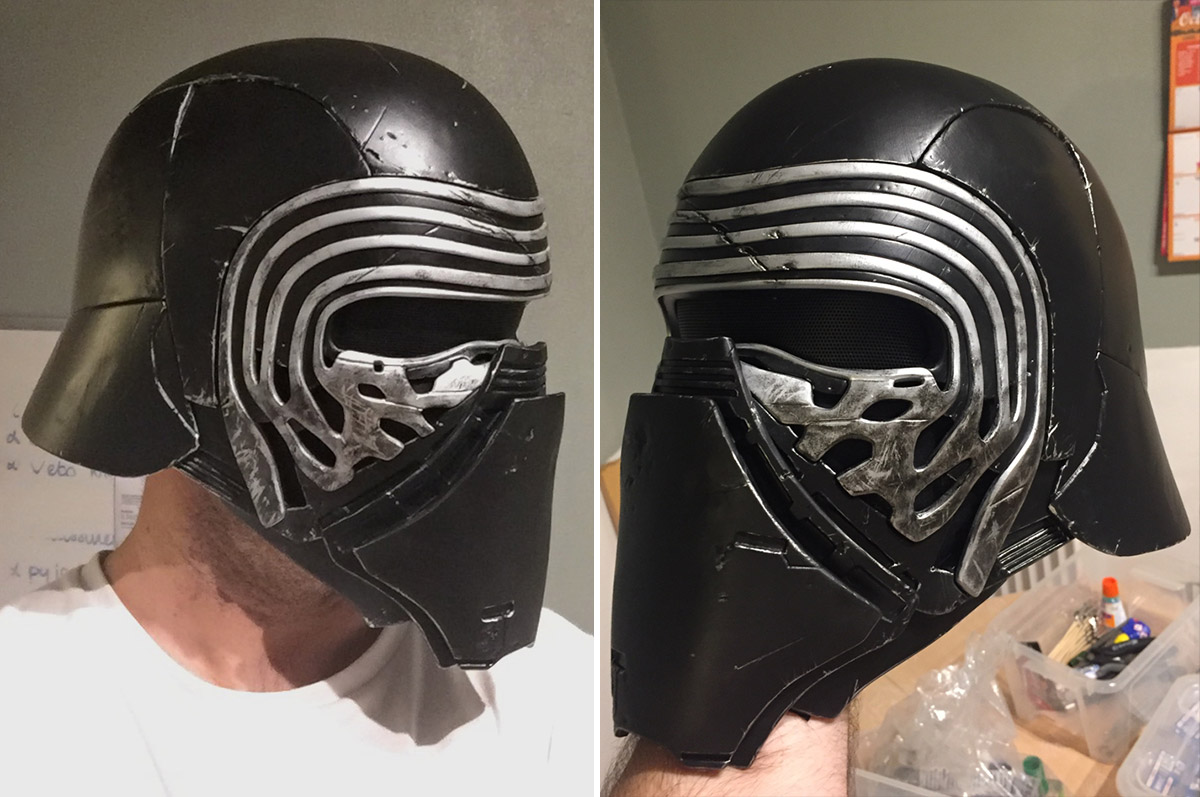
The final stress! It was at this stage that I was worried that despite all my efforts, both parts wouldn’t fit my head, wouldn’t snap together, or even might not fit in my luggage! Luckily, everything was fine and in fact was close to being perfect. I was able to wear the helmet; the size was good and stayed in place around my head without problems. To be honest, I have to admit that I was laughing in jubilation in front of the mirror the first time I wore it.
There was only one place where there was a slight offset of ~2-3mm due to a lack of support which then caused the part to deform just a little bit during the 3D printing process.
Once the helmet was assembled, I started the long process of painting. This is not where my skills are the best. I used only Tamiya paint cans in two colors: a half shiny black and a silver grey. I wanted a real chrome but nothing was in stock at my usual supplier and my plane was taking off only 12 hours later.
I did some weathering effects and scratches using a dry brush technique with the black color. I used a chrome paint with a small brush for the inside of the scratches and on some shapes’ corners.
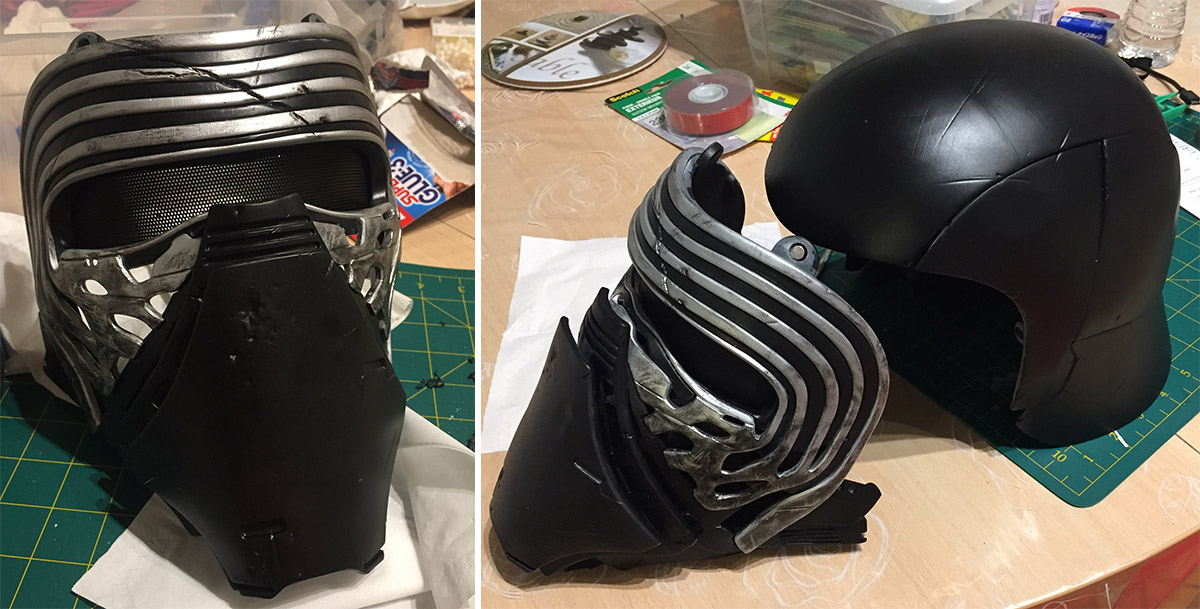
This is the final helmet on my head. In the photo on the right, you can see that the assembly is not perfect on the right side of the front grid. Magnets were missing, creating this gap.
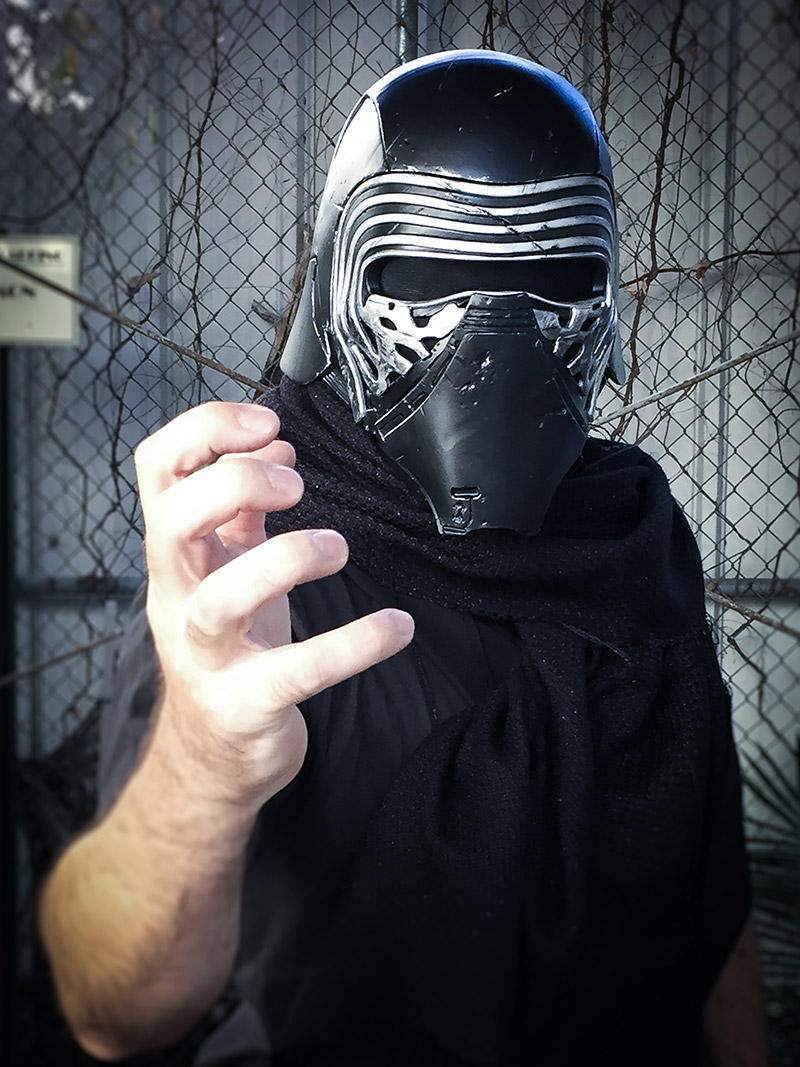
Me and my helmet below. Well, it’s quite hot with that on your head in the heat of a Los Angeles summer, especially with the scarf and the neck lock. Despite the recent assembly, the smell of the paint and glue was not that strong but was certainly present! The use of magnets was a good idea, but only as a temporary solution. They are too strong for the Super Glue to hold them!
Let’s Travel!
And here is the helmet at our ZBrush Summit, resting on part of a Kylo Ren costume I bought on Amazon.

Me and my helmet below. Well, it’s quite hot with that on your head in the heat of a Los Angeles summer, especially with the scarf and the neck lock. Despite the recent assembly, the smell of the paint and glue was not that strong but was certainly present! The use of magnets was a good idea, but only as a temporary solution. They are too strong for the Super Glue to hold them!
Cost
Is it worth doing your own helmet? Yes and no. It really depends on your 3D skills and 3D printing knowledge. It’s dozens and dozens of hours of work, including experiments. It is not really a project for a beginner in this field, but definitely a fantastic project to do.
As for the the cost it added up fast. (Note that prices have been converted from EUR to USD and include French taxes.)
- 1.4L of resin Grey V3: 266 USD
- 1 resin tank: 77 USD
- 10L of IPA Alcohol: 40 USD
- Sanding tools (Japanese): 7 USD
- Paint: 40 USD
- Glue / double sided tape: 29 USD
- Misc (paper, masking paint, paintbrush, etc.): 15 USD
- Total cost of the materials: 474 USD
This cost doesn’t include the price of the printer itself (3500 USD + taxes) or electricity to run it. Of course, I didn’t include some of the tools I already had like the sanding sponges, papers, etc. I could have saved on resin by reducing the global thickness a little bit… but too late! This means that we could evaluate the final price to be 500 USD without considering human labor.
The project took a total of 4 days, 11 hours and 30 min to print everything.
Now if we look at the commercial Kylo Ren helmet, you have a choice of crappy and cheap ones or very good but very expensive ones. The only one I found in the latter category is this Anovos one at 699 USD. In that case, yes – if you are a huge fan with the skills and technical tools/knowledge, it’s worth doing. Otherwise it’s actually more cost effective to buy a the Anovos helmet. And if I will say that if I had to sell mine the price would be at least twice my material cost for a minimum of around 900-1000 USD.
Conclusions About the Helmet
It has been a fantastic project for me and I have to admit that I love mixing both the virtual and real worlds to achieve an end product that I can have in my hands. (Well, on my head.) I learned quite a lot along the way, which is for me what I love. Of course, I learned from my mistakes as well. I hope to one day do a Darth Vader helmet and I’m sure that with my experiences on the Kylo Ren project it will be easier.
I’m also certain that with a couple of extra days to work on this project, I could have improved it – especially with a better finish due to more sanding and better painting. What made me the most proud is that during the ZBrush Summit some people thought that we had purchased this helmet. They were pleasantly surprised when we told them it had been built in ZBrush and 3D printed.
Now it’s time to build the lightsaber!
Attachments