Yes, you can do that. A good rough working method would be:
- Import the height map into the Alpha palette, and the color textuire map into the Texture palette.
- Make sure there’s nothing in Edit mode and the canvas is clear. With the texture map selected in the Texture palette press the Texture>Image Plane>Load Image button. Using the Image Plane plugin just makes this bit simpler as it creates a plane of the right proportions and applies the texture map.
- You should now see the texture map on the canvas with the Gyro showing. Turn on Edit mode.
- Turn off Tool>Geometry>Smt and the divide the plane until the polygons are approximately the same number as the height map pixels.
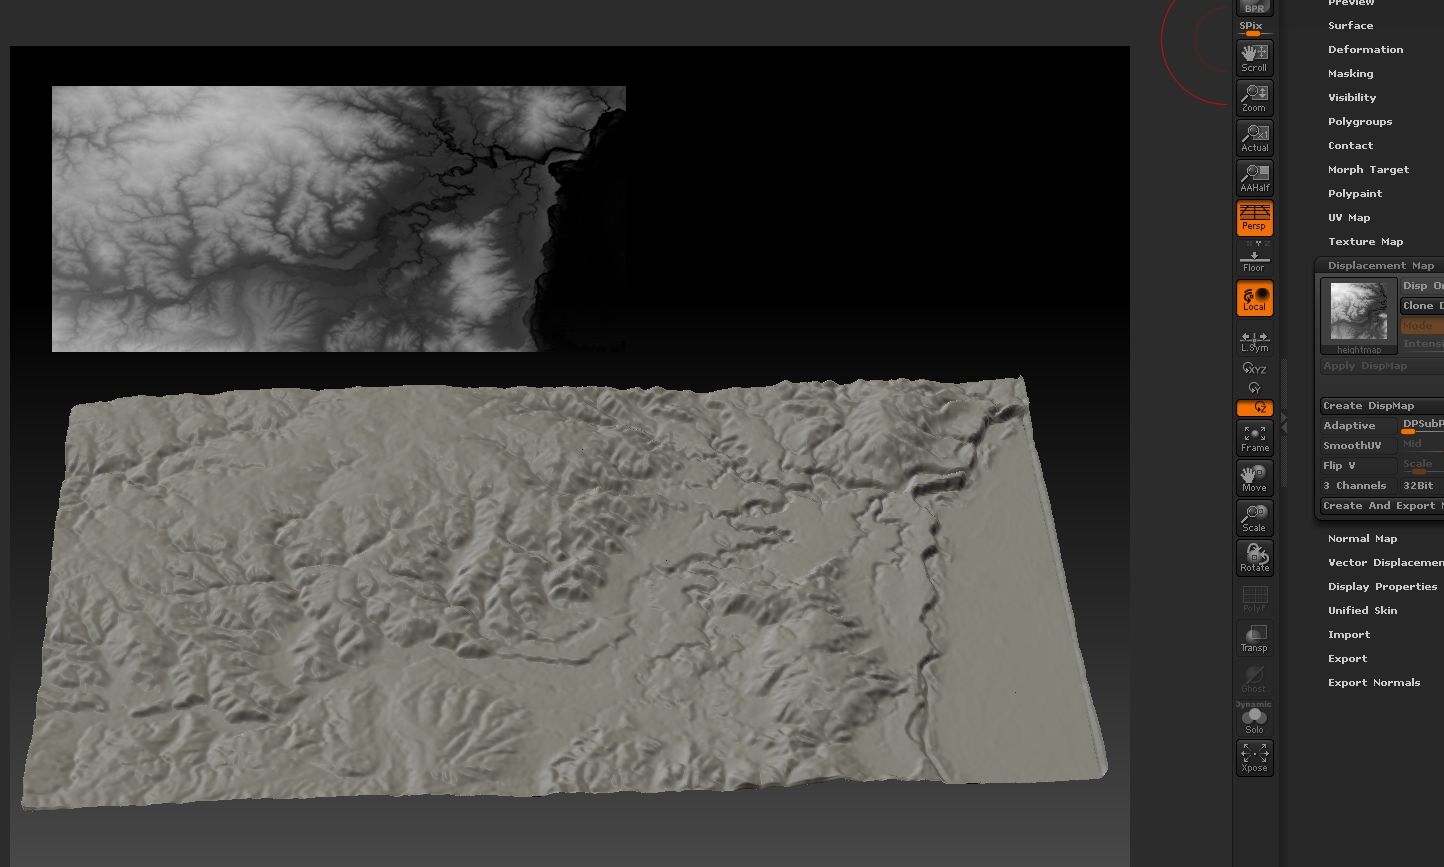
- In the Tool>Displacement Map sub-palette click on the thumbnail and select the height map from the pop-up.
- Turn on Tool>Displacement Map>Mode and then adjust the Tool>Displacement Map>Intensity until you see the amount of displacement you want. (This is trial and error.) You may want to click and drag outside the canvas to rotate the plane so you can see the displacement.
- When you’re happy, click Tool>Displacement Map>Apply DispMap. This coverts the displacement into actual geometry which you can then sculpt further.
Notes:
*For the displacement to work you need a texture map displayed in the Tool>Texture Map sub-palette. Just create a white map if you aren’t importing one.
*If you want to change the color as well as sculpt then you will probably want to convert to polypaint using Tool>Polypaint>Polypaint From Texture.
HTH,