In your original thread, you had a pic showing your subject was a gorilla, so you’re looking for a sort of facial specular map. I’ll tell you in general terms how I might go about doing it, but depending on how new you are to Zbrush, you may have to learn about some of the concepts I reference.
It just depends on how much work you want to do. These days I get the impression that most people, if working only for static image output do layered texturing by means of composited render passes (they render out the same scene but with different materials applied to emphasize certain characteristics like diffuse, shadow, specular, etc, then composite and edit them in photoshop).
If you want to create a dedicated specular map for layering in a third party program, first of all, you’ll need to create UVs for your model, either in Zbrush or elsewhere. This is a broad subject in itself, so Ill leave it to you to research the ins and outs of Zbrush’s various UV creation methods.
I would choose to handpaint my specular map in Zbrush, though there are quicker and dirtier ways to create one. You could simply convert the model’s color texture to greyscale, and photoshop it for brightness and contrast, and do some lightening on areas like lips that are supposed to be shinier.
First, with the model at polypaint levels of mesh resolution, I would filll the model with about a 50% grey color.
Then I would start with either an Ambient Occlusion or Cavity masking, with a light noise applied to the intensity curve, until I found a setting that looked good and darkened the recessed areas I didn’t want to all a lot of attention to with specular (eye/ear cavities, nostrils, etc). Note : At higher levels of subdivision generating AO masking becomes CPU intensive, so I would experiment at lower levels until I was ready to generate the higher res masking.
Once you’ve got some nice shading on the mask, invert it and fill it with about an 80-90% black.
For there I would probably run it though noisemaker for a fine grain noise to diffuse the shading and add skin texture.
From there I would start handpainting with some airbrushy sprays in 0-30% white, there areas I most wanted to call attention to…cheekbones, nose area, ear ridges and especially lips. How much work you do here depends on how well you want to try and render the complex reflectivity of skin.
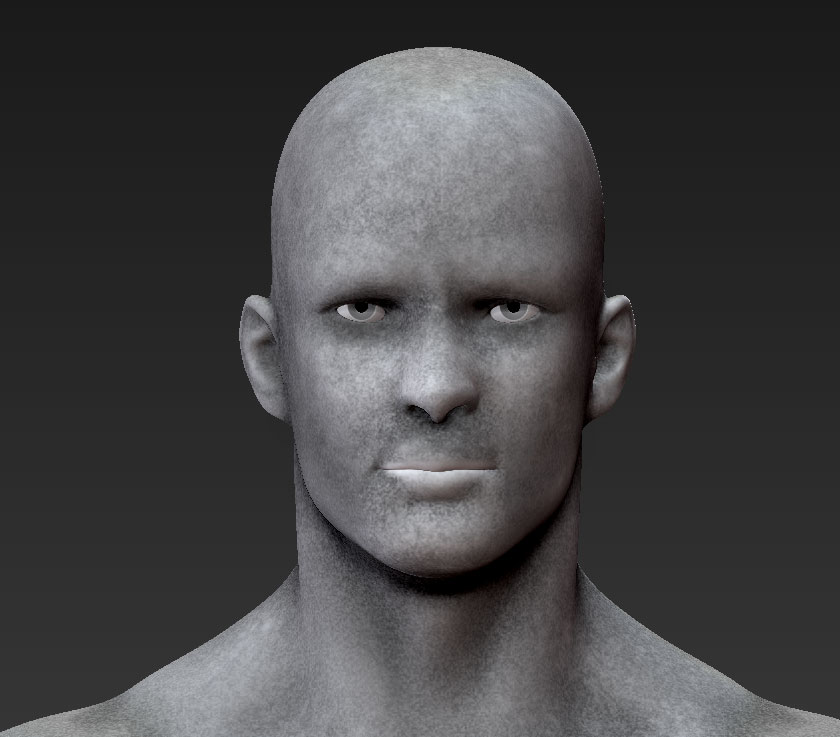
You should end up with something like this I knocked out quickly using Nick Z’s humanoid model. It could probably stand to be darkened up in photoshop a bit:
Save that texture out of zbrush as an image map. You can further edit it in photoshop for things like noise, brightness, contrast, etc. You external renderer should have controls for that as well. As long as your model has UVs, you should then be able to apply it in the external render in the specular channel, and adjust its settings until you find something you’re happy with. You can always reapply the texture map in Zbrush to continue to paint on it and change things you dont like, then re-export.


