AACK! I’m importing a model that’s already UV mapped & wrapping it with a provided texture map… works beautifully. Problem is this… is there any way to polypaint onto this model & export or otherwise bake the new texture using the same map & layout? I do not want anything to change regarding UV’s, map layout, aspect ratios, etc. Everything needs to stay exactly the same except design. PLEASE HELP!
yeah, paint the model and export the texture. Flip it vertically before export.
appreciated but I’m not experiencing it to be that easy. How do I grab or bake the texture to the imported map layout? I’ve only been able to grab the texture from Tool:Texture Map:Create:New From Polypaint. Problem with this is it creates a new UV map & layout. Also does not allow for me to choose desired aspect ratio/resolution. Only allows for square aspect ratios. Am I missing something easy?
i don’t understand the issue.
you have a model with UVs and a texture. you import it into zbrush. you apply the texture. so far so good.
you want to do further painting, then make a texture from that new paint using the original UVs layed out the way they were when imported.
if that is correct. then all you have to do is apply the texture. from polypaint palette, click “polypaint from texture”, that will convert the texture to paint, you can then paint on model. when done click “new from poly paint” in the texture map palette. the same UVs, layed out the same way will be used. if you want to adjust the resolution of the texture, go to the UV palette and select the size of the texture you want, then do “new from polypaint”.
that’s it.
it’s not possible for zbrush to assign new UVs when “new from polypaint” is clicked. that option is only active when the model already has UVs.
Ah, you didn’t mention things like that, you just said to paint on it and not effect your UVs…which they aren’t…so 
My guess is 2 things are happening.
1 Your UVs appear flipped vertically in Zbrush…and they are, but only in Zbrush. They will export the same. Zbrush uses a -y coordinate system for some reason. Your model is probably upside down as well if you turn on your floor…but non of it matters really.
- Zbrush only supports the creation of 1x1 textures. To overcome this simply build at your highest resolution and scale down in 1 axis by .5.
I.E. if your texture needs to be 4k x 2k then work on a 4k x 4k and adjust your image size once you’re done with your changes. It’s basically the same thing.
If that doesn’t answer your questions feel free to add pics, vids, etc.
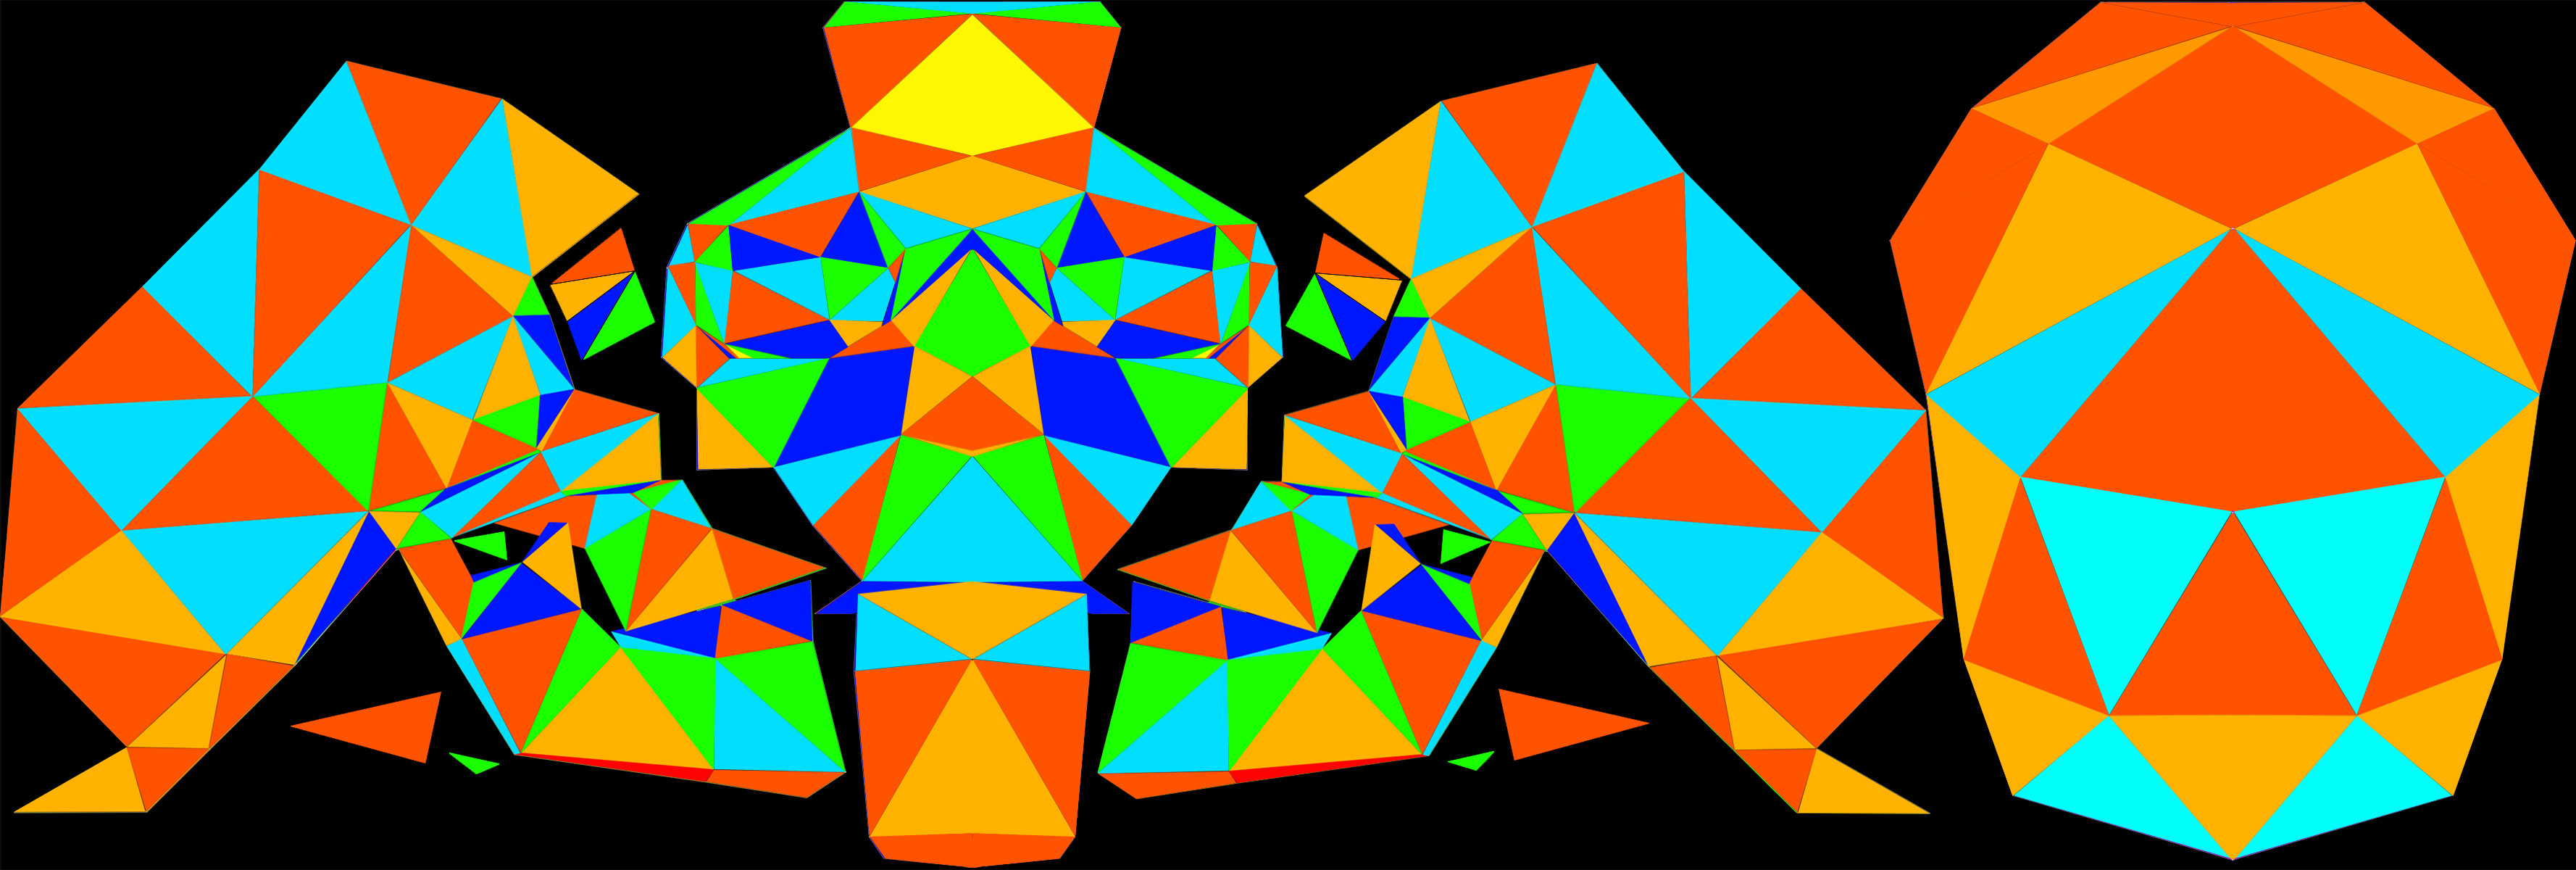
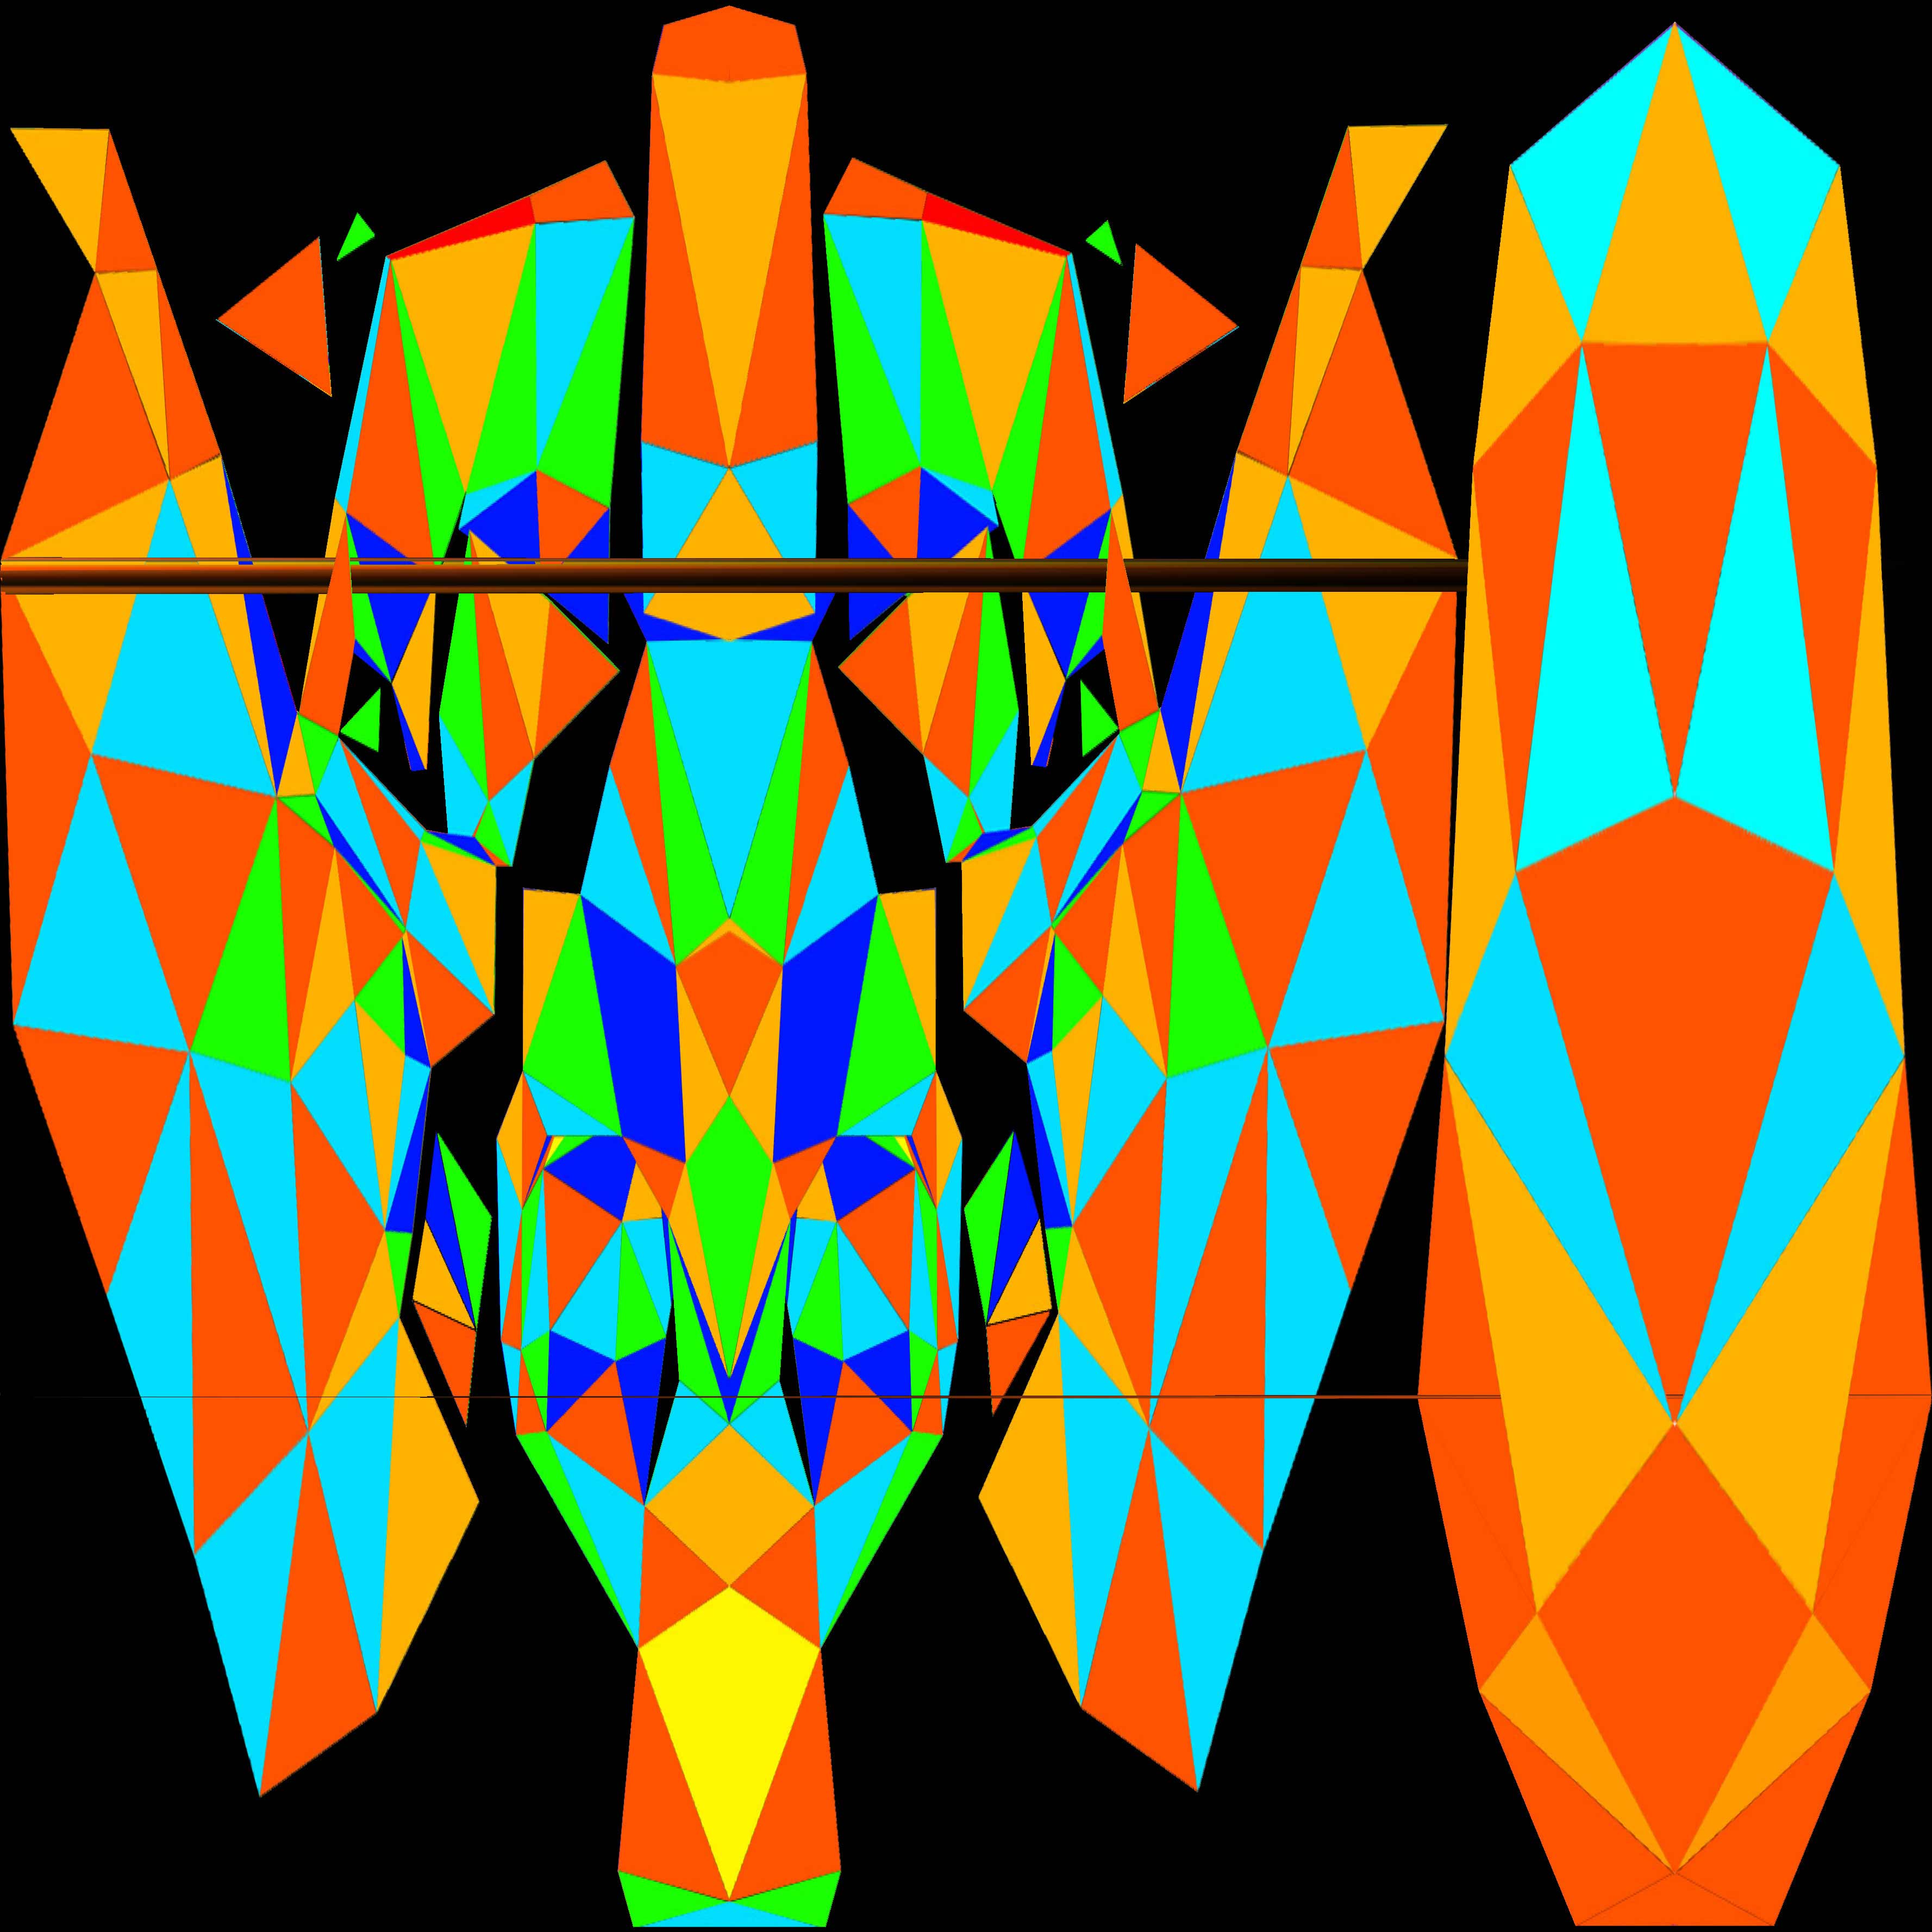
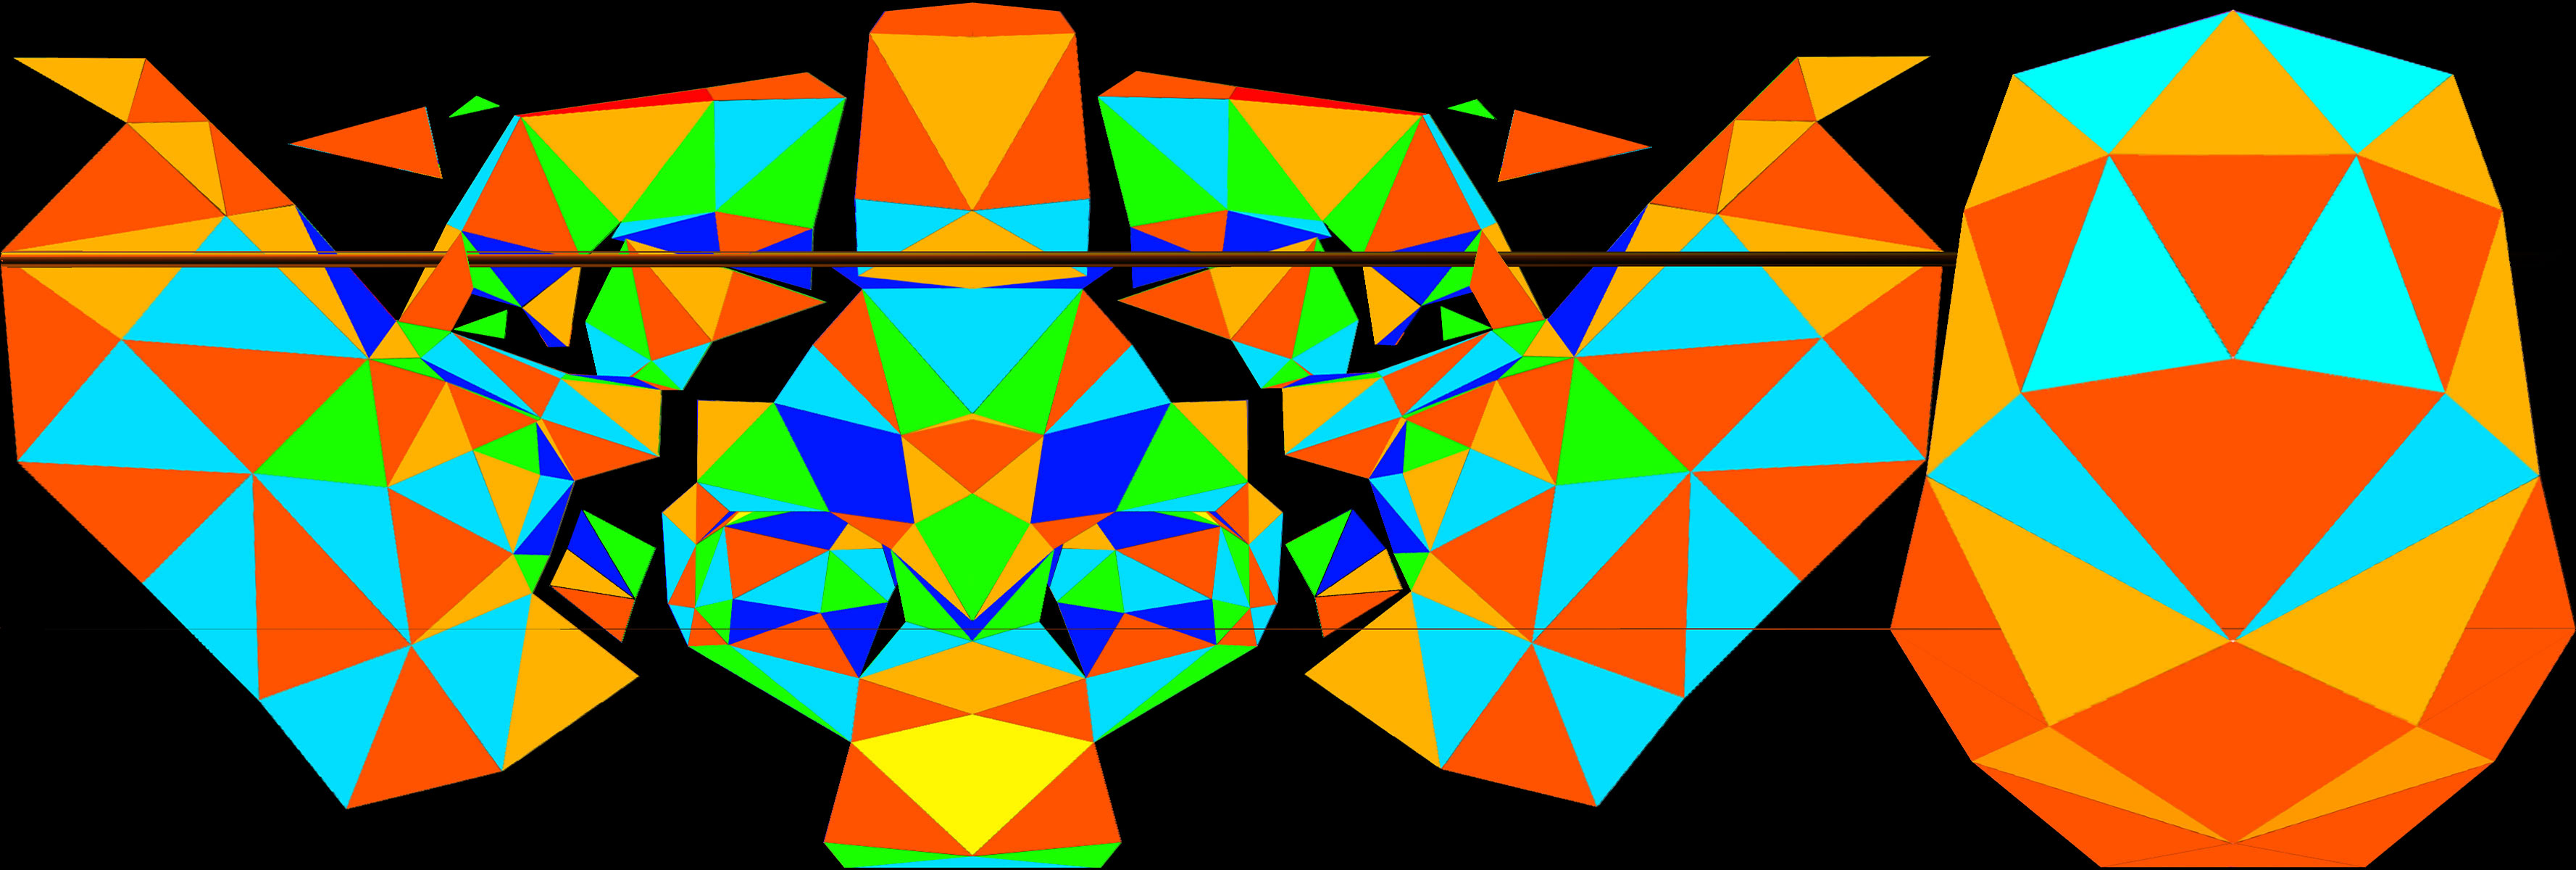
wish it was that easy. For some reason when I “create:new from polypaint” I magically get some wonky lines through the map. See attached images for before & after. Also the map only exports in square aspect ratio (example is in lo-res so I could upload it here). I can manually resize in PS but the extra step is not helpful given that I need to make hundreds of versions of these for a projection animation sequence
Attachments
does the model have more than one UV map assigned to it? i’m wondering if those lines are what is supposed to be a separate texture, like a sword or something. in other words, overlapping UVs.
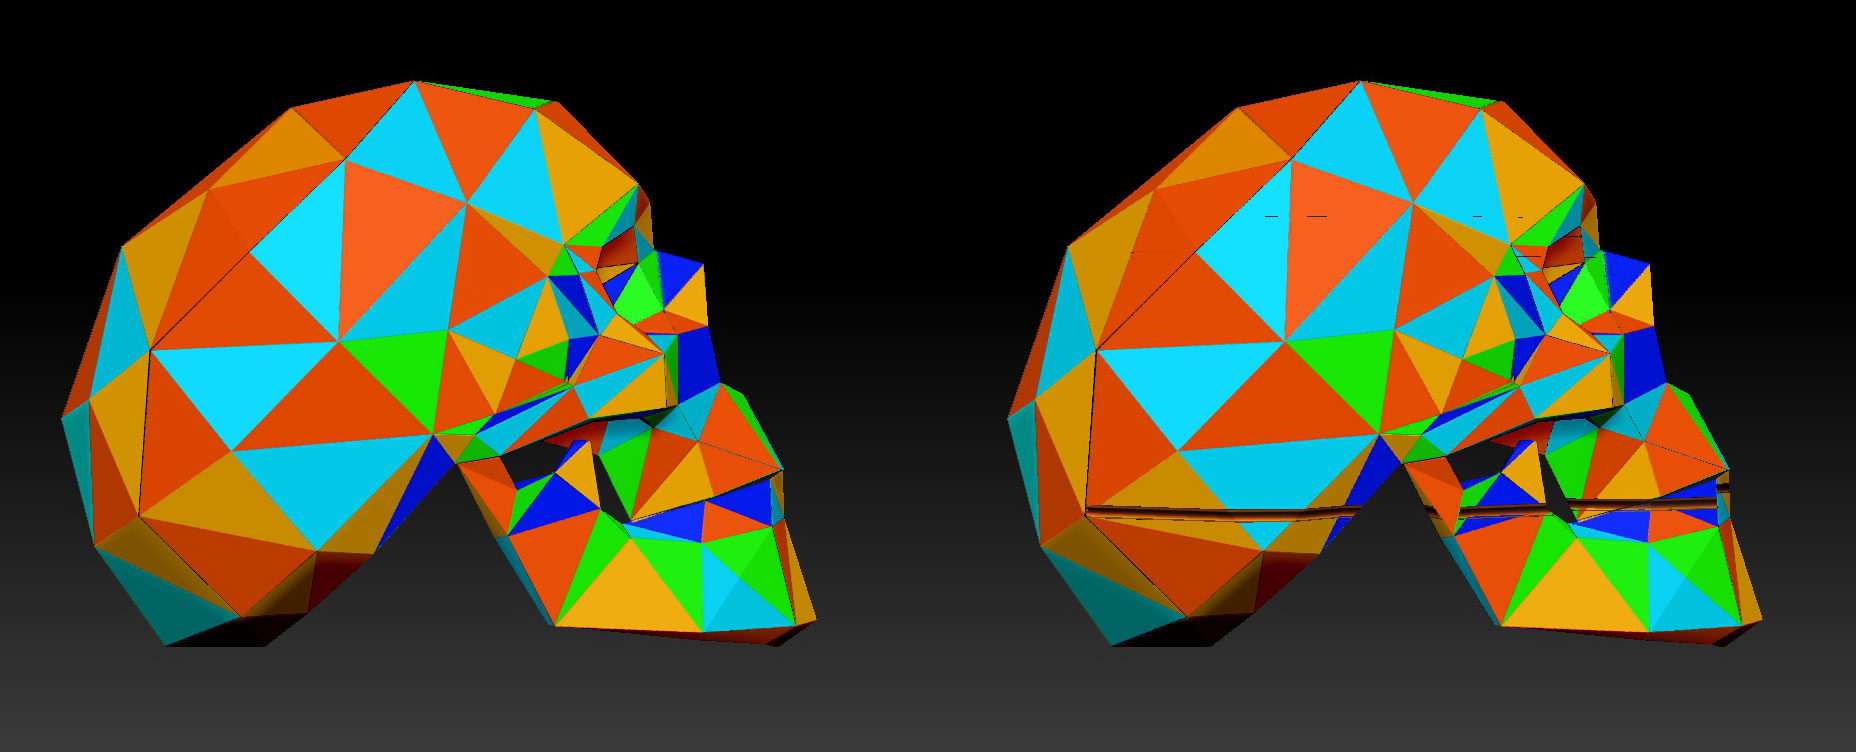
I’d guess it to be a skull.
how would I be able to tell if it has more than 1 UV map assigned?
make one part visible at a time while you click “new from polypaint”.
ok did that… each polygroup 4 (total) maps correctly when shown by themselves & “new from polypaint is applied”. Does this mean each polygroup has it’s own UV map? If it does, what does that mean? Can I combine them somehow without changing the map layout?
if you get a different texture for each part, then they each have their own UVs. you have to generate maps for each one separately. there is no way i know of to combine them without changing the UVs.
ok just to confirm… each polygroup maps correctly off it’s portion of the single texture map. Does that mean each group has it’s own UV map? If the entire model had only a single UV map would each poly group try to map the entire texture map onto itself? just trying to confim what you mean by “different texture for each part”
the image you posted above shows a texture made with all parts visible.
when you make a texture from just one part, does it have the same layout as the image you posted above or does it look different?
if it has one UV map the layout will look the same for all groups done separately. if they are different for each group then they will look it.
if you like, post an image of a texture done for one group and a texture done will all groups visible.
The line through your texture is because your UVs are not actually within 0-1 UV space. You’re either right on the edge, or going over. You need to leave room for your overpaint in your texture so you’ll want to adjust your UVs to support this.
Zeddie: here’s pics of each polygroup mapped when all the others are not visible. Each polygroup was 1st selected then mapped. These were not mapped as a whole then made individually visible afterwards. the 2nd pic is the entire model fully visible then mapped. Everything looks the same both ways. It’s after I paint on it & “create:new from polypaint” that I get the lines.
beta-channel: I’m sorry but I’m not completely sure what 0-1 UV space means but I think I get your gist. What I don’t get is that it maps perfectly with the map & UVs as they are. It’s when l I try to grab a new texture from the model that things happen. I can paint on it & it looks fine but I can’t get that texture copied into a map without it getting messed up.


those don’t like shots of unwrapped textures but in any case from the looks of the skull i doubt it has more than one UV tile anyway, so that’s not it. i’d go with what beta is saying.
not sure what you need to see I guess. here’s the pic of the single texture map I’m using whether I’m mapping the entire model or just one part of it. The texture maps correctly on all of it either way. I flip the map before applying it.
Attachments
Like I said before, you have UVs outside of 0-1 space.
You need to leave room for padding in Zbrush.
The streaks across your texture map is due to your UV islands/elements touching the edge of x0 and x1. You can scale your UVs in another program by a percent…say 1% toward the center of the map in X, you can also scale your texture 1% by the center in photoshop and you’ll get the same result, but wont receive an error in Zbrush when you try to bake.
Your UVs and textures worked before, probably because you’re not using any overpaint…but you should be…well, assuming you’re going to use this asset in real-time or with any smoothing applied to the texture.
This appears to be for your burning man stuff, which looks purty sweet as well. If you’re running into technical issues shoot me a pm and I walk you through the things you’ll need to get this to go.
thanks beta. will check into this. Yes, this is for the burning man project & thanks much for the offer for tech support. I may very well take you up on that.
Cheers