ZBrushCentral

Grainy Alpha Brush

Hi,

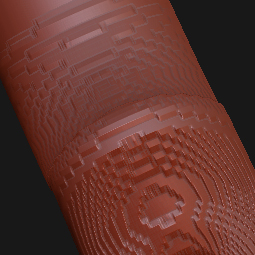
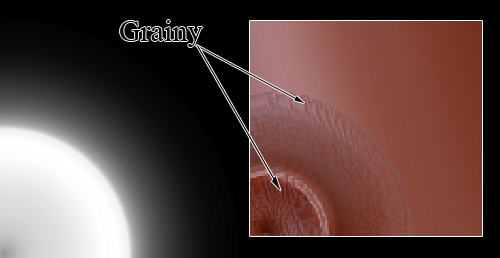
I created an alpha map in Photoshop at 4096^2. The original alpha is generated by a displacement rendering in Maya but the same issue occurs when I use a gradiant brush from Photoshop. If you look at the attched image, you can see that there is an awful grain. When I compare my brush to the brushes included in ZBrush, my brush looks higher quality in photoshop but when I paint with my brush it creates the weird grain.

I’ve divided my mesh as high as it will go and it still doesn’t help. Is there a trick to getting the alpha brushes to look right?

BTW, I am using -100 focal shift to get the sharpest stroke possible. I am happy with the general shape but the grain is killing me.

The original displacement map was more of a grayish tone and I ran an autocontrast in photoshop to get it to be the right tones, which I assume is the same as shifting the gamma to 1.1 or 2.0, whichever is the target gamma.

Anyone have any ideas?

Thanks,
Thomas Goddard

Attachments
Grainy.jpg

I may be wrong here, but I think ZBrush may actually resample alphas when they’re imported. It may be that it’s averaging some areas out and thats why you’re getting a grain. Maybe try a lower resolution version of the alpha? 1024x1024 maybe?

I tried both 1024x1024 and 256x256 and it looks exactly the same. Any other ideas? You can see the issue in detail if you make the brush stroke very large.

Here is a post that looks to be along the same lines:
http://zbrushcentral.com/zbc/showthread.php?t=45953

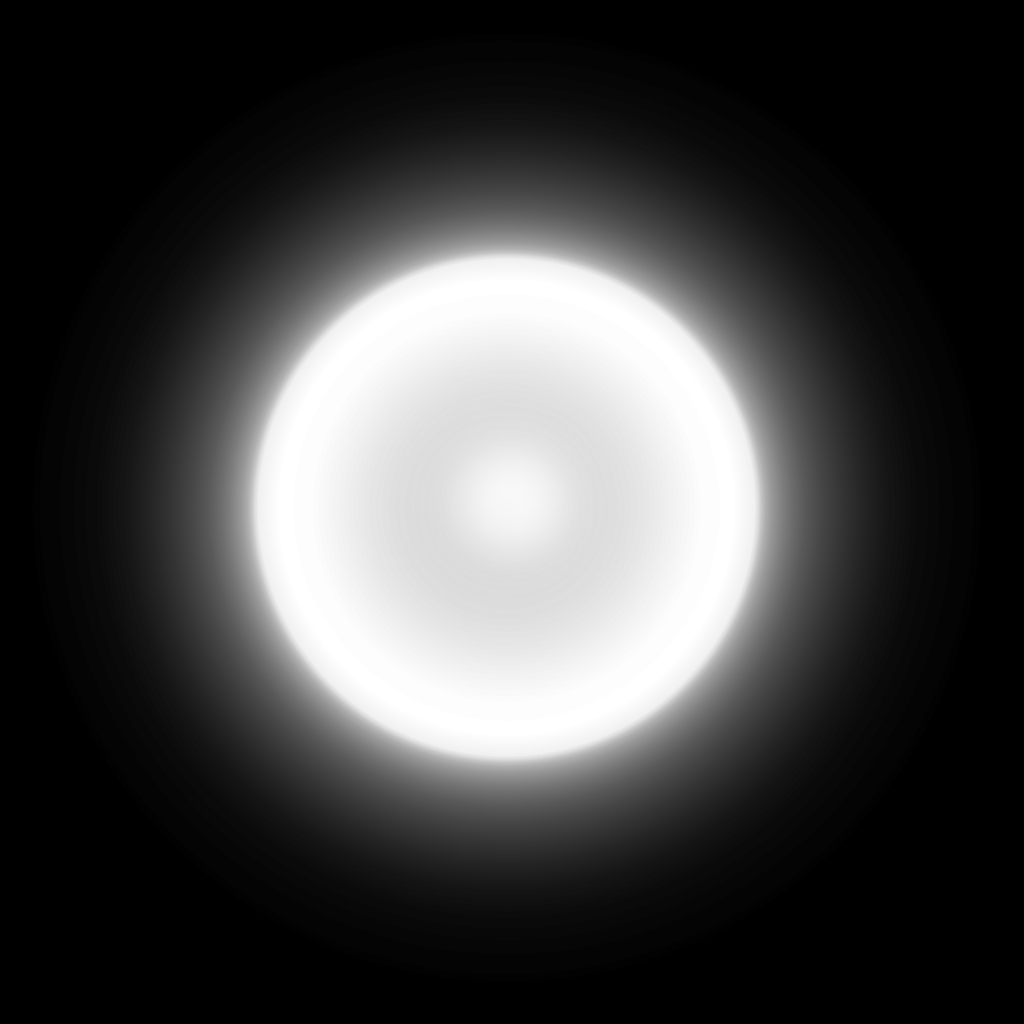
Go ahead and try out the attached Alpha “TestAlpha.jpg”. Use the rectangle stroke, Draw Size 47, and Z Intensity 100 (the rest is default).

Thanks!

Attachments

Grainy2.jpg

TestAlpha.jpg

What are the bit depths of your alphas? Are you sure it’s grayscale and not RGB?

I can’t test the alpha you attached at the moment, I’ve got a render cooking with an ETA of 22 hours :slight_smile:

use 16 bit grayscale alphas (psd), that will fix.

I’ve tried using 16, 32, 8, and both RGB and grayscale. If anyone else can give it a shot, I’d appreciate it.

Thanks!

I tried importing as 16bit grayscale and I got a bunch of lines. See attached;

Attachments

Alpha.jpg

As others have said, change your 16-bit alpha from RGB to GREYSCALE. ZB3 doesn’t like RGB alphas. Plus, greyscale will significantly reduce the file size. :slight_smile:
In photoshop, I believe it’s Image > Mode > Greyscale… something like that.

Sounds like you may know your way around photoshop, but just in case, this is not the same thing as simply desaturating an image so that it appears to be greyscale. You have to actually change the image mode.

Also, your grainyness may or may not be caused or accentuated by the material it’s applied to. Have you tried a seeing how it looks with a different material?

And lastly, this may (or may not) be somewhat related to whatever it is that ZBrush is doing to make alphas radial faded, even at -100…as discussed here:

http://www.zbrushcentral.com/zbc/showthread.php?t=45953

Image from that thread (notice the stepping):

http://www.zbrushcentral.com/zbc/attachment.php?attachmentid=58789

It is actually a grayscale image and I’ve tried the different color depths. This version is set to 16 bit.

Thanks for your response!

Testing now… back in a few with my findings. :slight_smile:

Yes the stepping is exactly what I am seeing. As I draw the brush larger, the steps get larger and tend to grow in a pattern.

Your greyscale image had an alpha channel… delete it. Resave. Should show up in ZB3 without looking all wacked (but it doesn’t get rid of the stepping problem…currently looking at that).

Ah! That fixed the whack import but I still get the “banding/stepping”. I generated this from a displacement map in Maya, using the “Transfer Maps” tool. I think it might be generating an 8bit image, which has the “banding” effect. This is all just a theory… I converted it to 16 bit after opening the PSD that is generated by Maya, which probably doesn’t add anymore depth information to the image and that’s why it’s ‘stepping’.

I remember reading something about Maya using up to 32 bit maps but I am not sure. I will have to dig more.

Thanks for helping me with that alpha weirdness and please let me know if you find anything else.

Thanks!

The stepping is likely due to your alpha and how it was created. And I suspect it may be caused by taking an 8bit alpha and converting it to 16bit.

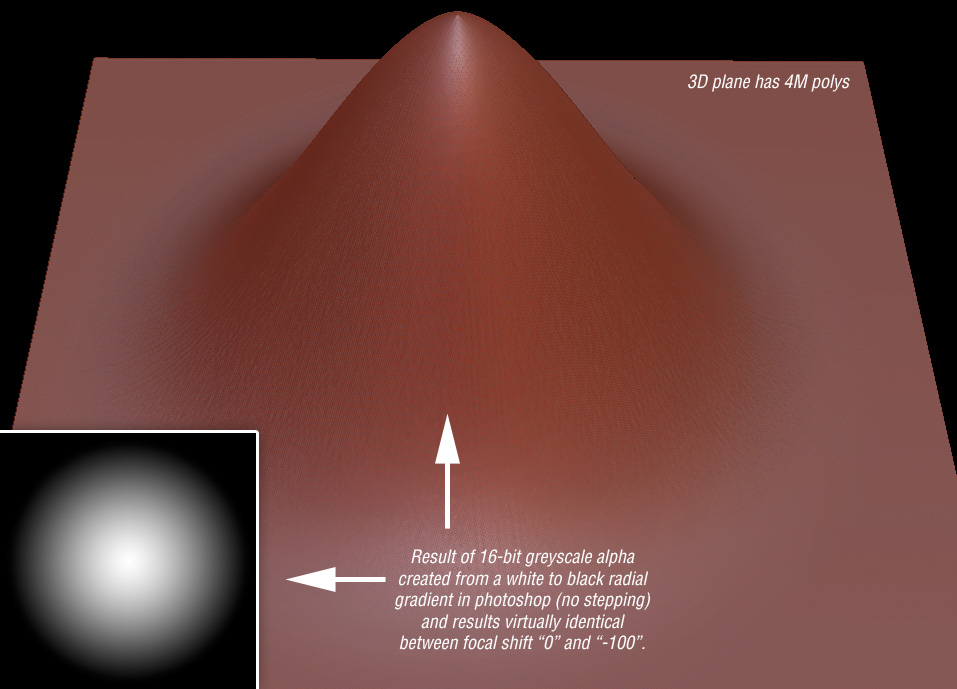
Here is the result of a test I did, showing no stepping from a 16bit alpha created in photoshop…

Everything is shown 1:1 (actual size).

Note, while there is no stepping, there is a small amount of “grain”, and more so from the alpha applied with “-100” focalshift. This is where a healthy application of the smooth brush will help.

[attach=61139]no-stepping.jpg[/attach]

Attachments

no-stepping.jpg

Hi Zero Dean,

I was able to save as a 32 bit exr displacement map from Maya and then convert to a 16bit with adjusted gamma from Photoshop. After I import the Alpha into ZBrush, it looks ok but not quite full quality like other brushes. I am still able to see the “grain”.

The problem with applying the smooth brush is that it’s not very practical for a large amount of the alha strokes applied to the surface.

I am trying to find out a way to export the displacement map of my mesh from ZBrush as a 32bit image. Do you know any good resources for doing it this way?

Thanks again for all of your help!

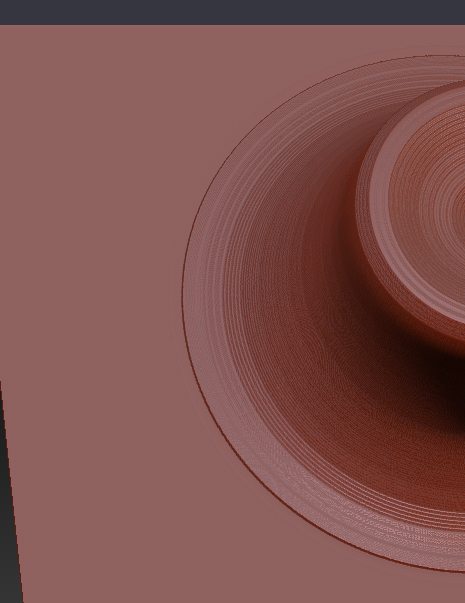
From this latest snap, you can see there is some serious stepping going on. This was a 32 bit exr from Maya takend down to 16bit in Photoshop.

Attachments

Steps.jpg