ZBrushCentral

Goldie Pheasant (Don Bluth Toon)

Started this on the 11th, so about 13 days of on an off work and most work on weekends to complete.
This is Goldie Pheasant from Don Bluth’s Rock A Doodle. The outfit and even sitting on a pillow is from a scene in the film:

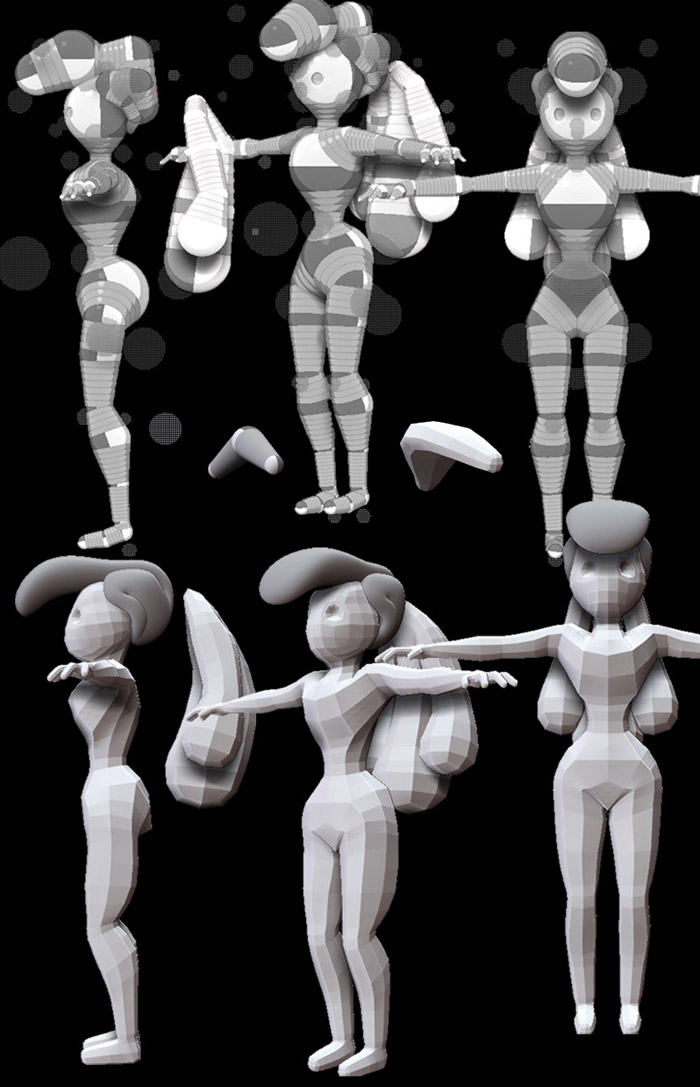
I’m pleased with the result of being able to do a decent sculpt of a toon. What I had hoped to be able to do in Zbrush. I used that MatCapToon material, modified a bit, and blended it with another render in photoshop. The shadows didn’t turn out the way I want, but I didn’t have time to spend with the lighting and shadow system at the moment. I should have done another render with no shadows to fix the shading on the eyelids, but Zbrush cashed on me.

Here’s a turntable before posing: http://youtube.com/watch?v=ZxTBNBIrdWI

A Turntable of the finished pose: http://youtube.com/watch?v=o_Jf0p-Mays

Here’s my other stuff in my newb WIP thread, with some zsphere tests, a face, work on a Brisby model from Secret of NIMH: http://www.zbrushcentral.com/zbc/showthread.php?t=50523

I random toon face I did one night before starting Goldie: http://www.zbrushcentral.com/zbc/showthread.php?t=55064

Below is just the thumbnail for the recent images:
step_4a.jpg

The body and hair were made up of 3 zsphere tools. And the one floating in the middle was for the mouth.

[attach=82740]step_1.jpg[/attach]

Finished angles:

[attach=82741]step_2.jpg[/attach]

Attachments

step_1.jpg

step_2.jpg

Posing with Transpose Master was not as easy as I had hoped. I wanted to
leave the body some what low poly, but the other parts like the extracted out
fit are high poly, so getting similar masking to bend at the same time for skin
tight stuff was hard.

Below, I had a few errors. One error, I don’t know why, I actually extracted
the entire glove, and deflated the arm to fit. I should have just painted the
skin the glove color, and used the torus to cover up the transition. I gave up
bending the real arm, planning to hide it, but the glove for some reason bent
while leaving the inside polygons behind, which you kind of see.

Then some how along the way, the shows got horribly distorted. It would be
more work to redo the whole pose than to fix the shoes after. So I just used the move brush and smoothing to fix them. Not as perfect as they once
were, but so small it wouldn’t matter:

[attach=82742]step_3.jpg[/attach]

How the original shoes looked:
[attach=82743]shoes_1.jpg[/attach]

Oh, and because it was so difficult to transpose the figure, I had to
do a sketch ahead of time to plan the pose:
[attach=82744]Goldie_Render_WIPa.jpg[/attach]

The main part of the bows on the shoes was made using an imported flat cube with just the right amount of polygons. Same cube was used for
eathers, pillow and eye lids (which I used zproject to fit to the eyes). Only
ther thing I imported was the frilly cloth around the hip. It was too thin to for
any real extraction.

Other items. The hair piece was a an extration from a cylinder. The tassles on
the pillow started as cylinders.

A time lapse:
http://other.toonguru.com/3D/zbrush/timelapse.gif

Attachments

step_3.jpg

shoes_1.jpg

Goldie_Render_WIPa.jpg

wow thats beautifull ,and very descriptive ,yep zbrush has its quirks ,have you tried transpose master? Any way i like it:+1:

COOL!!!

I like it ALOT and I’m a cartoonist for 15 years professionally.

(2yrs at MTV. 6yrs at WARNER BROS 4 as AD. 4yrs at Disney. Currently at a AD AGENCY as a Illustrator, Modeler & animator.)

If you can share that TOON SHADER or direct me to it. It would be appreciated.

Keep up the good work friend.

CAS NYC

Thanks. The third post shows the low polygon transpose master work (got the latest version), and what I had to fix.

I got 18 minutes to get to work. But tonight I’ll post the original toon shader and my modified one with comparison image. I forget what I even changed.

Beautifully done! :+1:

Wow that is just a beautiful sculpt. top row from me!!! nice description too. that really helps to see how others approach and finish their work. keep it up!!!

this is lovely!very nice !!! 5*

Seeing your toon just makes me happy :smiley: Thanks for sharing your “behind the scenes” stuff! Sure is refreshing to see some colorful cartoon characters instead of all the scary monsters inhabiting ZB Central.

:+1: Great work :+1:

Wow this is lovely!!! Very beautiful! :+1: :+1:

dude, that is awesome! I love your translation. :+1:

Here’s the main toon shader I used. It’s the MatCap Toon shader, modified a little (mod version linked at bottom). The original can be found here:
http://www.zbrushcentral.com/zbc/showthread.php?t=47524

I liked it the best since it only attempted one shading level. Others toon materials often have two or 3 sahding levels and look too posterized and distracting.

Still, I wanted a little more in this shader. After randomly messing with it, I got edge lines, more shading to define details, and light in the shadow, which almost looks like reflected light (may be lost with Best Render).

Though, to get the lines and shading, cavity settings had to be turned up, and if a model is low poly, it will make them stand out. So when I do a final render, I go to Transform top menu, then I turn off “Quick” so it does a live smoothing in seconds without needing to divide your model like crazy. You still may need to go to the tool’s, or subtool, options in display properties on the right to make it smooth even more.

With best render settings, the shadows are so soft and blurred it adds a bit of depth to the toon without being as harsh as the preview shadows.

The following is just preview quality:

So here’s the modified version: Download ZIP File

Clever modifications ,unfortunatly the mat link does not work

Sorry about that, link has been fixed.