ZBrushCentral

Getting a Normal Map Material with flipped channels? [Answered]

Hey there, is there a special technique for getting flipped normal map channels when using the Normal Map Material on a 2.5D image? Is there an easy way to create a new material with a flipped red or green channel?

We’re using the 2.5D sculpting/painting to create tile-able ground textures, but unfortunately the Normal Map Material creates normals that are flipped the wrong way (for us). The 3D modeling has all sorts of flip normal options, but there’s only one Normal Map material in the 2.5D and I can’t see how to change the light orientation to make it work for us.

I could go the hard way and create a 3D model using a displacement map from the 2.5D mesh, but then I’ll run into breaking the tile-able-ness of the original.

Can we get a material with flipped channels or is there a way to create materials so we can do it on our own?

Thanks!
I’d find it easier to just load the resulting map in photoshop and flip the green channel there. You could also try doing this to the image that is used to drive the matcap.

You could try changing the normal’s settings under your preferences->Importexport section. There are some normal flipping options. Not sure if they work for 2.5 or not. You might want to write down the default settings in case you need to switch them back.

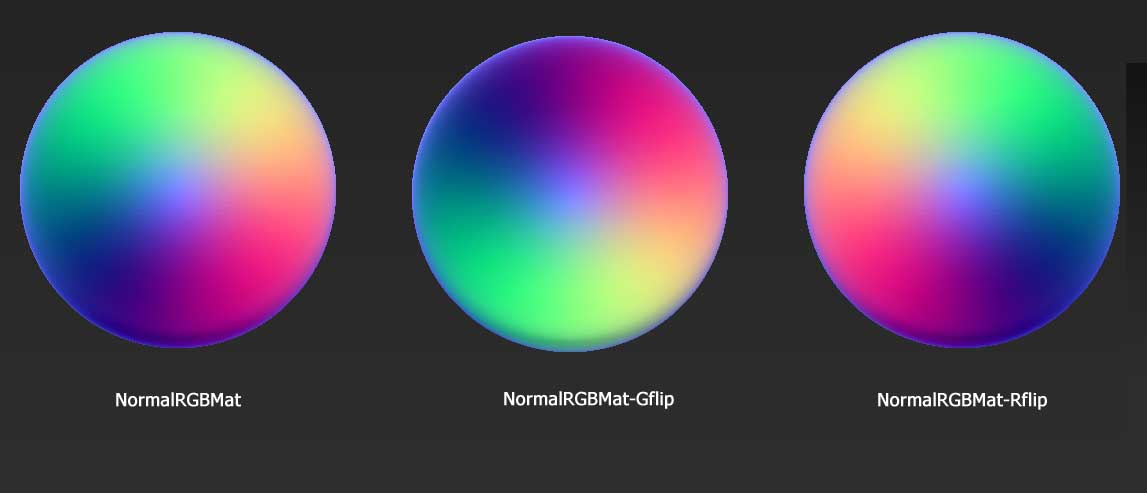
Here are two new materials. If you add them to your ZBrush 4R3/ZStartup/Materials folder they will be available each time you start ZBrush. One has the Green channel flipped, the other has the Red channel flipped (see image).

There’s also a zip of a PSD Normal RGB LightMap so you can adjust in Photoshop and make your own material if you wish. To make your own ZBrush material:

  1. Import the image into the Texture palette by pressing Texture>Load and selecting the file.
  2. Select the NormalRGBMat material in the Material palette.
  3. In the Material>Modifiers menu, make sure the S 1 shader channel is selected (press the S 1 button).
  4. At the bottom of the shader menu you’ll see the NormalLightMap texture icon. Click on this, then select the texture you imported at (1) from the pop-up.
  5. Save the material with a new name by pressing Material>Save.

HTH,

Attachments

NormalMats.jpg

Thanks Marcus! :slight_smile:

Awesome. Thank you Marcus.