ZBrushCentral

Evangelion Mark. X - Physical

Hi, it’s been a while since the last time I posted. This is what I’m doing lately.

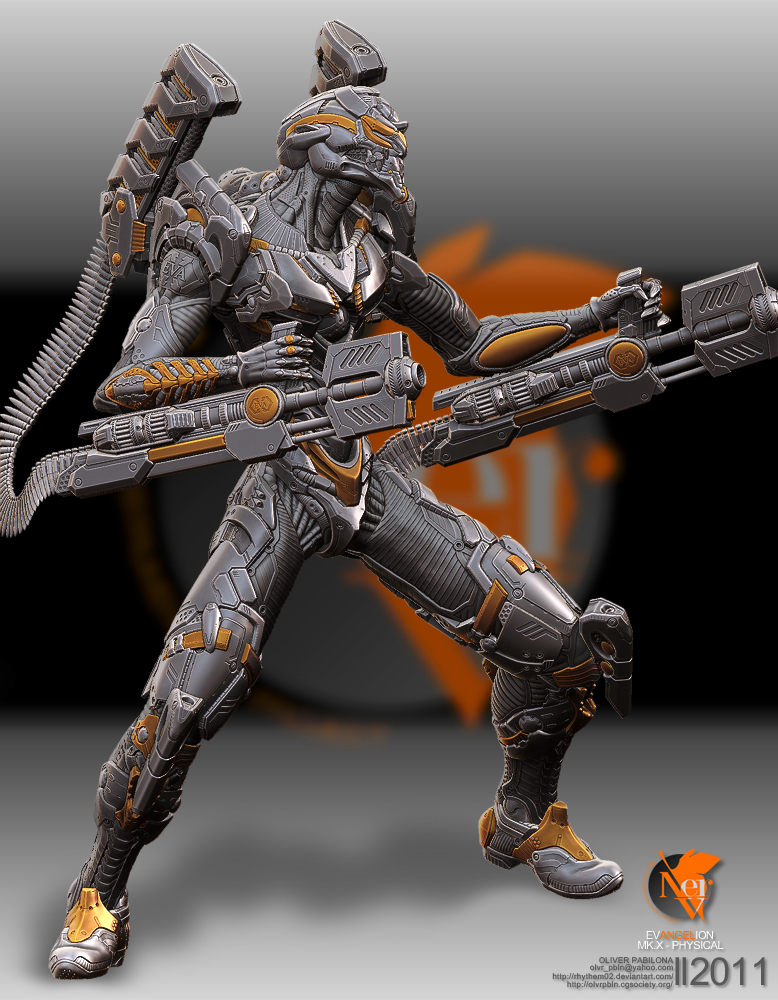
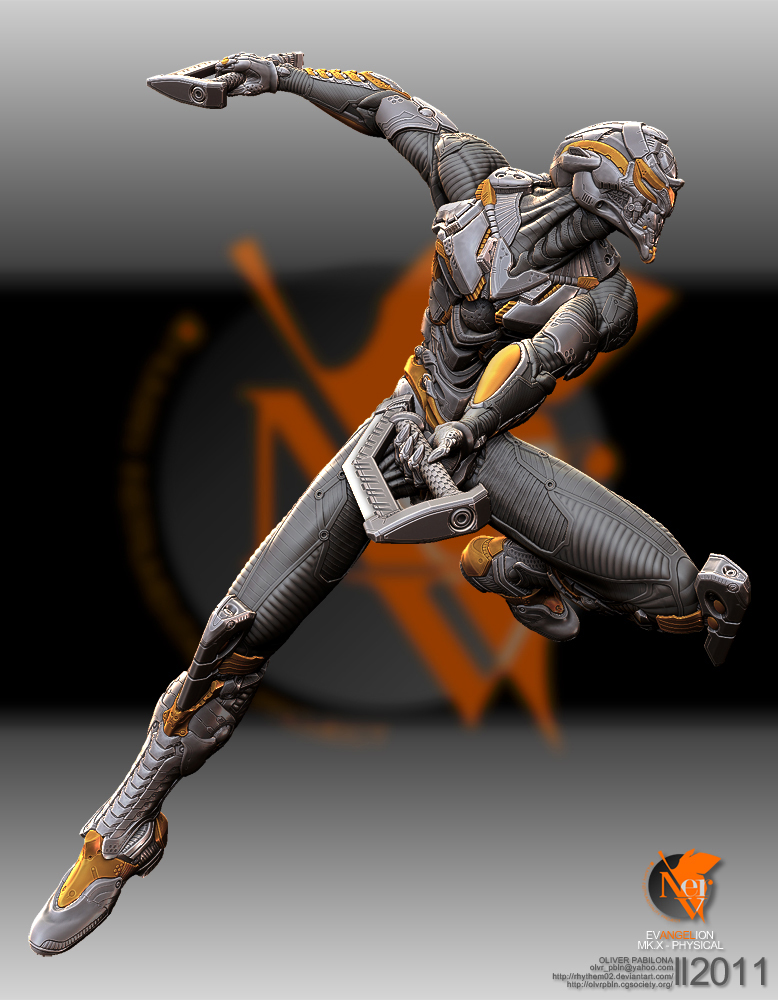
This is my own version of Mecha from the Evangelion Series. What inspired me to do this project is the E-book wrote by Mike Jensen, The Zen of ZBrush. Also I haven’t done anything completely just ZBrush, and never done anything completely hardedge in it. also I wanted to try compositing using the zbrush material, so i guess this is the right time to learn something new.

Ok, the first thing that I have to do is “what’s inside the armor”, I’m always curious about this. Because it’s organic inside and yet it was never really directly shown in the series. So I did the human like monster first based on the size of the armor and the realeased form of eva 02 which is shown on the revamped theatrical version of the series. So basically its’ just a very thin body with ridiculously thin leg and arm.

Then I created the armor around the human like monster. On the concept area I did not really followed the original design, I just thought that it’s too simple if it’s done in 3D Space. So instead I played around it, I make the forearm, the torso. the neck, and the back to still be recognizable to the original design.

The only big problem that I encounter is transposing. At first I used the transpose master since there are more that one tool specially on the head area, but after a while ZBrush just became non-responsive. I think it’s because I’m only working with 2GB of RAM. So I end up tranposing each subtool one by one. hehe

I did the compositing in Photoshop, so this project is 98% ZBrush and 2%Photoshop.

It was a fun experience to do everything inside ZBrush, though there are moments that it’s really tempting to open max specially on the early stage, I thought some area of the process would be easy if it’s done in max. But I was able to resist.

In the end it was fun and rewarding experience, I learned another area of Zbrush that I did not used before, now I’m more addicted to it.

So here is what I did. Until next time.

Attachments

11---Pose02---Run-Stance.jpg

10---Pose01---Standing.jpg

09---TurnTable---Body.jpg

08---TurnTable---Head.jpg

01---Tittle.jpg

05---Pose01---Descend.jpg

04---TurnTable---Body.jpg

03---TurnTable---Head.jpg

02---Tittle.jpg

07---Tittle.jpg

Here are the remaining 2 shots

12---Pose03---Gun-Stance.jpg13---Pose04---Axe-Stance.jpg

DONK!! Thats the sound of my jaw hitting the floor lol. WOW that really is some amazing work right there. The level of detail is awesome and you can see that alot of time and love has gone into this. Truely inspireing stuff and also TOP ROW material. Well done sir :+1:small_orange_diamond:+1:
PS I love the image where he has his guns drawn. How did you go about making the bullet chains?

I would have to agree to this! Stunning work, the metallic renders could use some work to really show of the level of detail you have. But the sculpting is quite amazing!!!

incredible! it is the only word that comes in my head…
really great stuf!

5 stars here, excellent design!!!

wow, that is a great design an sculpt!

Eva never gets old , just love this one, lots of litle details and the designs flow into each other very well. If you dont midn the crit, I do think you should work on the organic part more. Seems you rushed it. Great work! 5 star fish!

Nice! I had issues with transpose and multiple subtools as well. I found a nice work around though that might help you in the future if you didn’t already discover it on your own. I did a Jango fett sculpt that had many subtools (not as many as this monster!) and so I broke it down into steps and it cut down nice on the time. the first thing I did was pose the body and another major subtools using transpose master. So I also included the shirt, hair and eyes, pants and shoes. Just make those the only visible subs and head into Transpose master. When I was done that set up a great frame work to move the other tools. Now came the fun part, all of those other pieces. in this case, merge is your friend. Doing this gives you the advantage of moving large groups while still retaining the polygroups of the individual subtools. Still takes some time, but I think it is faster and makes posing a little more smoother.

Only draw backs… you might loose subdivision history, but if you merge things right then all you are doing is creating a new subtool for posing and the originals will remain. Just hide them. Hope this helps :smiley:

Fantastic hard surface stuff. Love it

thanks for the all the LOVE!

@LeoAMD - Its’ difficult to imagine at first how to align every single bullet. But it’s actually easy, you just have to adopt the Loft system in max or in any other software packages.

My jaw just hit my desk. Great work. Great documentation!

Thanks