Paul- Thank you so much for the awesome and very helpful videos. I especially like that you have included download links so I was able to watch many of them while away from any internet connection. 
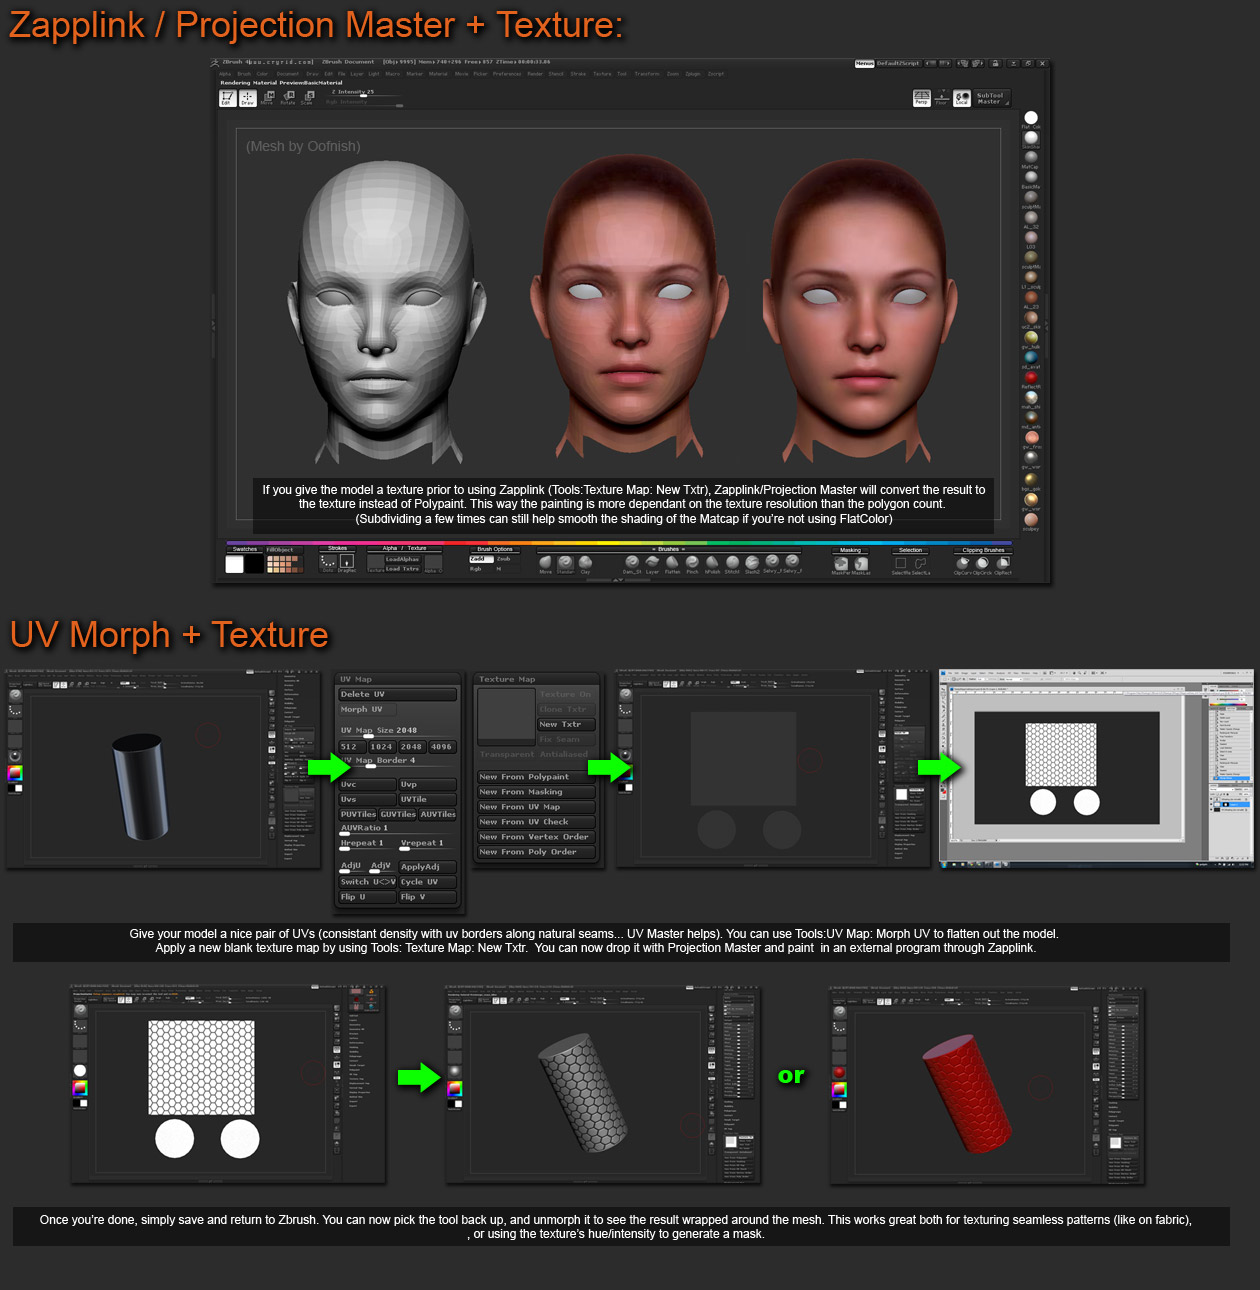
I don’t think this has been mentioned here (and I don’t know if it is limited to ZB4 or not), but I’ve seen this to be new knowledge to a few people so it might be worth sharing. Zbrush isn’t always limited to polypaint/vertex colors when texturing, and having a texture can also make UV Morph more handy.
Attachments
Cryrid: Yeah ive known about using PM with Zapplink since the beginning. I think thats how it was initially used before polypaint became so prevalent.
Ive asked this question in the Questions forum but sill no answer.
Say i have a character with a blank 4k or even 8k map. What is the recommended size of the document when working with zapplink in projection master.
Because im sure the document size comes into play since when in PS if its way to small then when you are scaling down your projections the detail will be lost if the size of the document (in PS) doesn’t have enough pixels.
Is there a concrete rule? If not is there some sort of guideline i could follow?
phrenzy, I wonder if the tutorial on precision texturing that Aurick posted would resolve your question:
http://www.zbrushcentral.com/showthread.php?t=27680&highlight=aurick+document+resolution
Wow thanks mate. Although its not geared towards Zapplink, its pretty much the same principles so it will probably help me out.
I spent so much time trying to figure out how to make custom UI’s in ZB4. Your video made my day. Thank your!
Thanks so much for taking the time to do these Paul - much appreciated!
HI,gabo1991, very useful, you are nice.
But sorry, I can’t watch the videos because of the internet.
Could you give links to the rest of the videos?
Thanks
Hello
All videos but the 3DSMAX GoZ video can be downloaded. There are links right below each video. All videos are found in this thread or on the Pixologic Blog under the Did You Know That tab here: http://www.pixologic.com/blog/
Hope this helps.
Paul
Thanks, Paul, for your hard work!
I can’t seem to find a way to make the mesh insert brushes work.
I remember an option being there(in Zbrush R3) in the brush palette that allowed one to choose a polymesh and use these brushes, but it’s not there in Zbrush 4.
Does anyone know how to use these brushes??
Thanks.
Khurram
i learned a lot just by reading the posts here in this thread! Thanks!
ok i got two brush for all and i request one trick for picker color like old school
my favorite first brush 2D5:
CTRL+F for get backround
DECO BRUSH on conic mode with low intensity like 1 2 3 
second is Tsuper make by here
http://www.zbrushcentral.com/showthread.php?t=138913&page=2&pp=15
in brush in 3D:
alpha 39 ajust curve or not
free hand on mouse average max with lazy mouse to 0.01
in brush windows >modifier > brush modifier set ~42
low Zadd intensity
result one brush where you can PolySculpt easy
What you are looking for is in Brush>Modifiers in ZBrush 4. There is a little window that will allow you to pick an tool for the insert brush.
Paul
i learned a lot just by reading the posts here in this thread! Thanks!
Great videotutorials and very helpful!
Warning: the next things to come, come from a newb who’s completley new to everything considering 3d modelling:
I decided to mess around some for the first time with Zbrush and decided on trying to get some sculpted fish exported to cinema4d. However I encountered some problems and now I’m fairly to extremely stuck…
I sculpted a fish (and maybe quite recklesslessly I subdivided and subdivided the mesh). Then I textured it using Spotlight and Polypaint.
Here comes the rub: I only really know how to export the OBJ and haven’t really found how to export the textures. I figured I might have to use the UV master to make a UV map with the texture embedded in there (correct me if I’m completely wrong!)…
The problem there is I don’t really know if I’m just getting the lighting and 3d information to create some template without the texture. Other than that when creating a cloned object it doesn’t return to it’s most basic polygon level but the fish remains having the ridiculous amount of polygons; when unwrapping my programme crashes. I tried to reduce the number of polygons thorugh geometry, however there’s nothing that’s selectable in that section… I can’t subdivide or undivide, not increase and not decrease polygons. (My fish is in editing mode though).
Only if I make a polymesh3d (again? I don’t understand) I can reduce the polygons…but then my texture gets lost.
What bothers me aswell is even though I have a ZTL of my fish and an OBJ; in Zbrush it’s textured. I can’t seem to find any reference to some kind of texture in my tool palette…
If the above just seems like odd non understandable rambling without an end my issue is this: I don’t know how to export both my fish and my texture to cinema4d. Everything I tried didn’t work and I encountered a lot of problems.
Last but not least: the difference between texturing, polypainting and UV mapping fairly confuses me and I think that’s the origin of my complete journey of flaws and failure towards creating my fish of doom. :lol: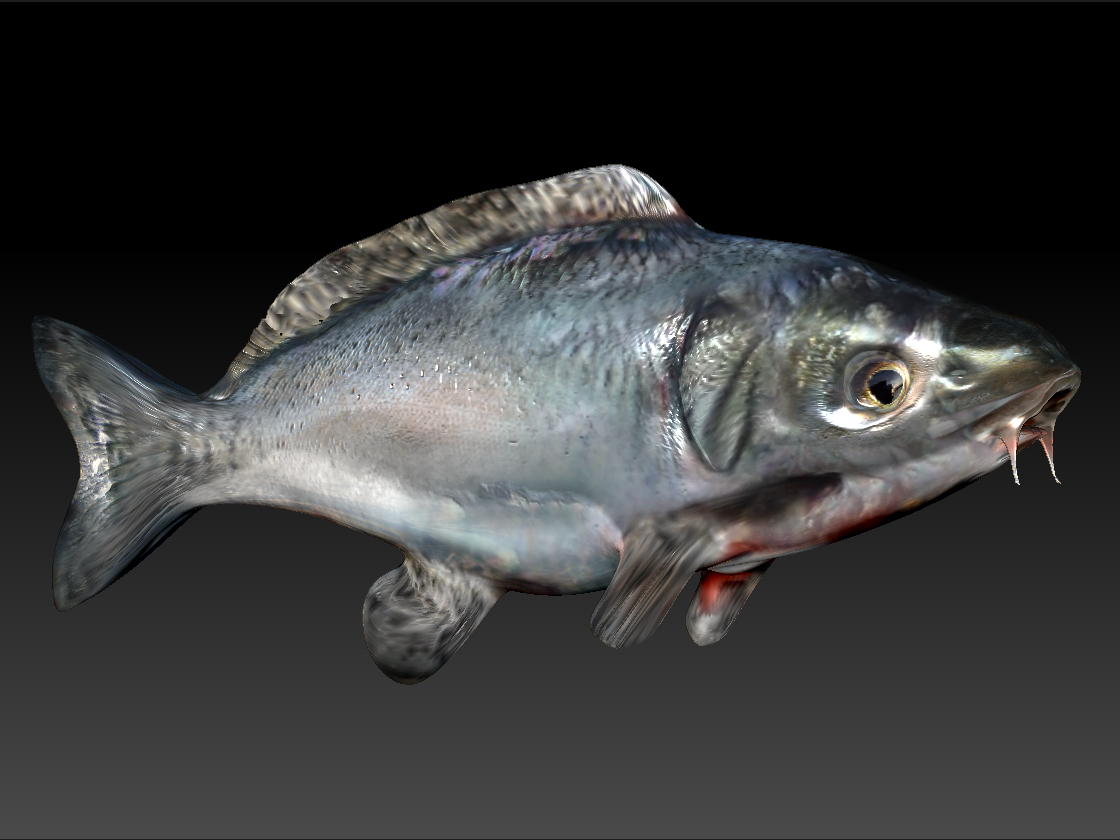
Attachments
There’s a setting under “Preferences/Misc” called “Use ZFolder” that is on by default. This is why Zbrush does not remember the last folder you have been in. One click and no more random folder browsing 
This is a brilliant thread for beginners like me. Thanks everyone, theres lots to learn here.
i am just starting with zbrush and have two quick questions:
-
When appending subtools lets say a sphere for an eyeball, is there a way to get that appended
sphere mirrored so I only have to place one eyball and the other one moves in the exact place on the other side? -
I remember having seen screenshots or videos where the artist had a selection of their favourite brushes in a custom palette at the bottom of the UI for quick access. I’d like that too and i managed to create a menu containing my most used brushes, but I dont know how to dock this at the bottom. I can only move it in the tray to the left or right.
The subtool master plugin does a lot of things like mirror an eyeball to the other side of the mesh. Definitely something to look into.