Hey,
I wanted to use ZBrush to create displacement maps to add some higher level detail to my models once I’m done with them in max. Like for example sculpting detailed lips would probably be a lot easier then trying to model it by hand in max and would probably also look better than just eyeballing bump maps using Photoshop.
I’ve run into a problem tho, which might be me misunderstanding the purpose and function of ZBrush and the way it creates (displacement) maps.
I’m not sure about the exact workflow I am supposed to use to yield good and exact results.
So far I’ve tried the following:

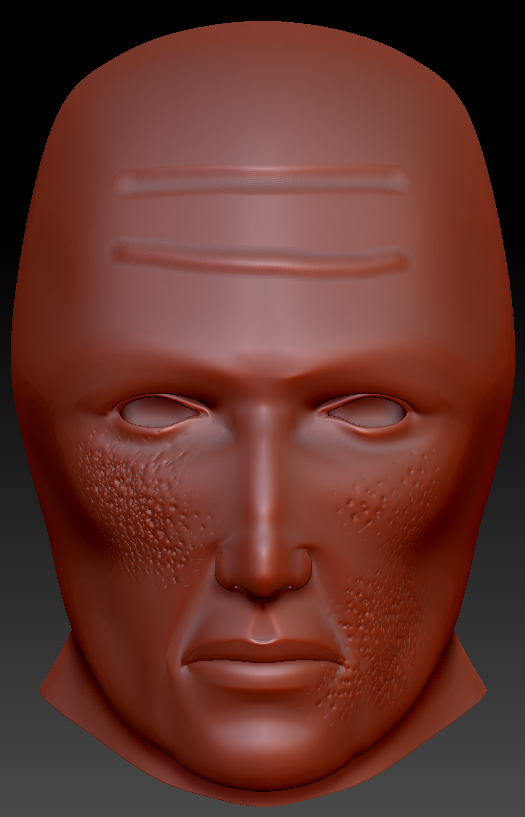
(using this old head mesh of mine I found for testing)
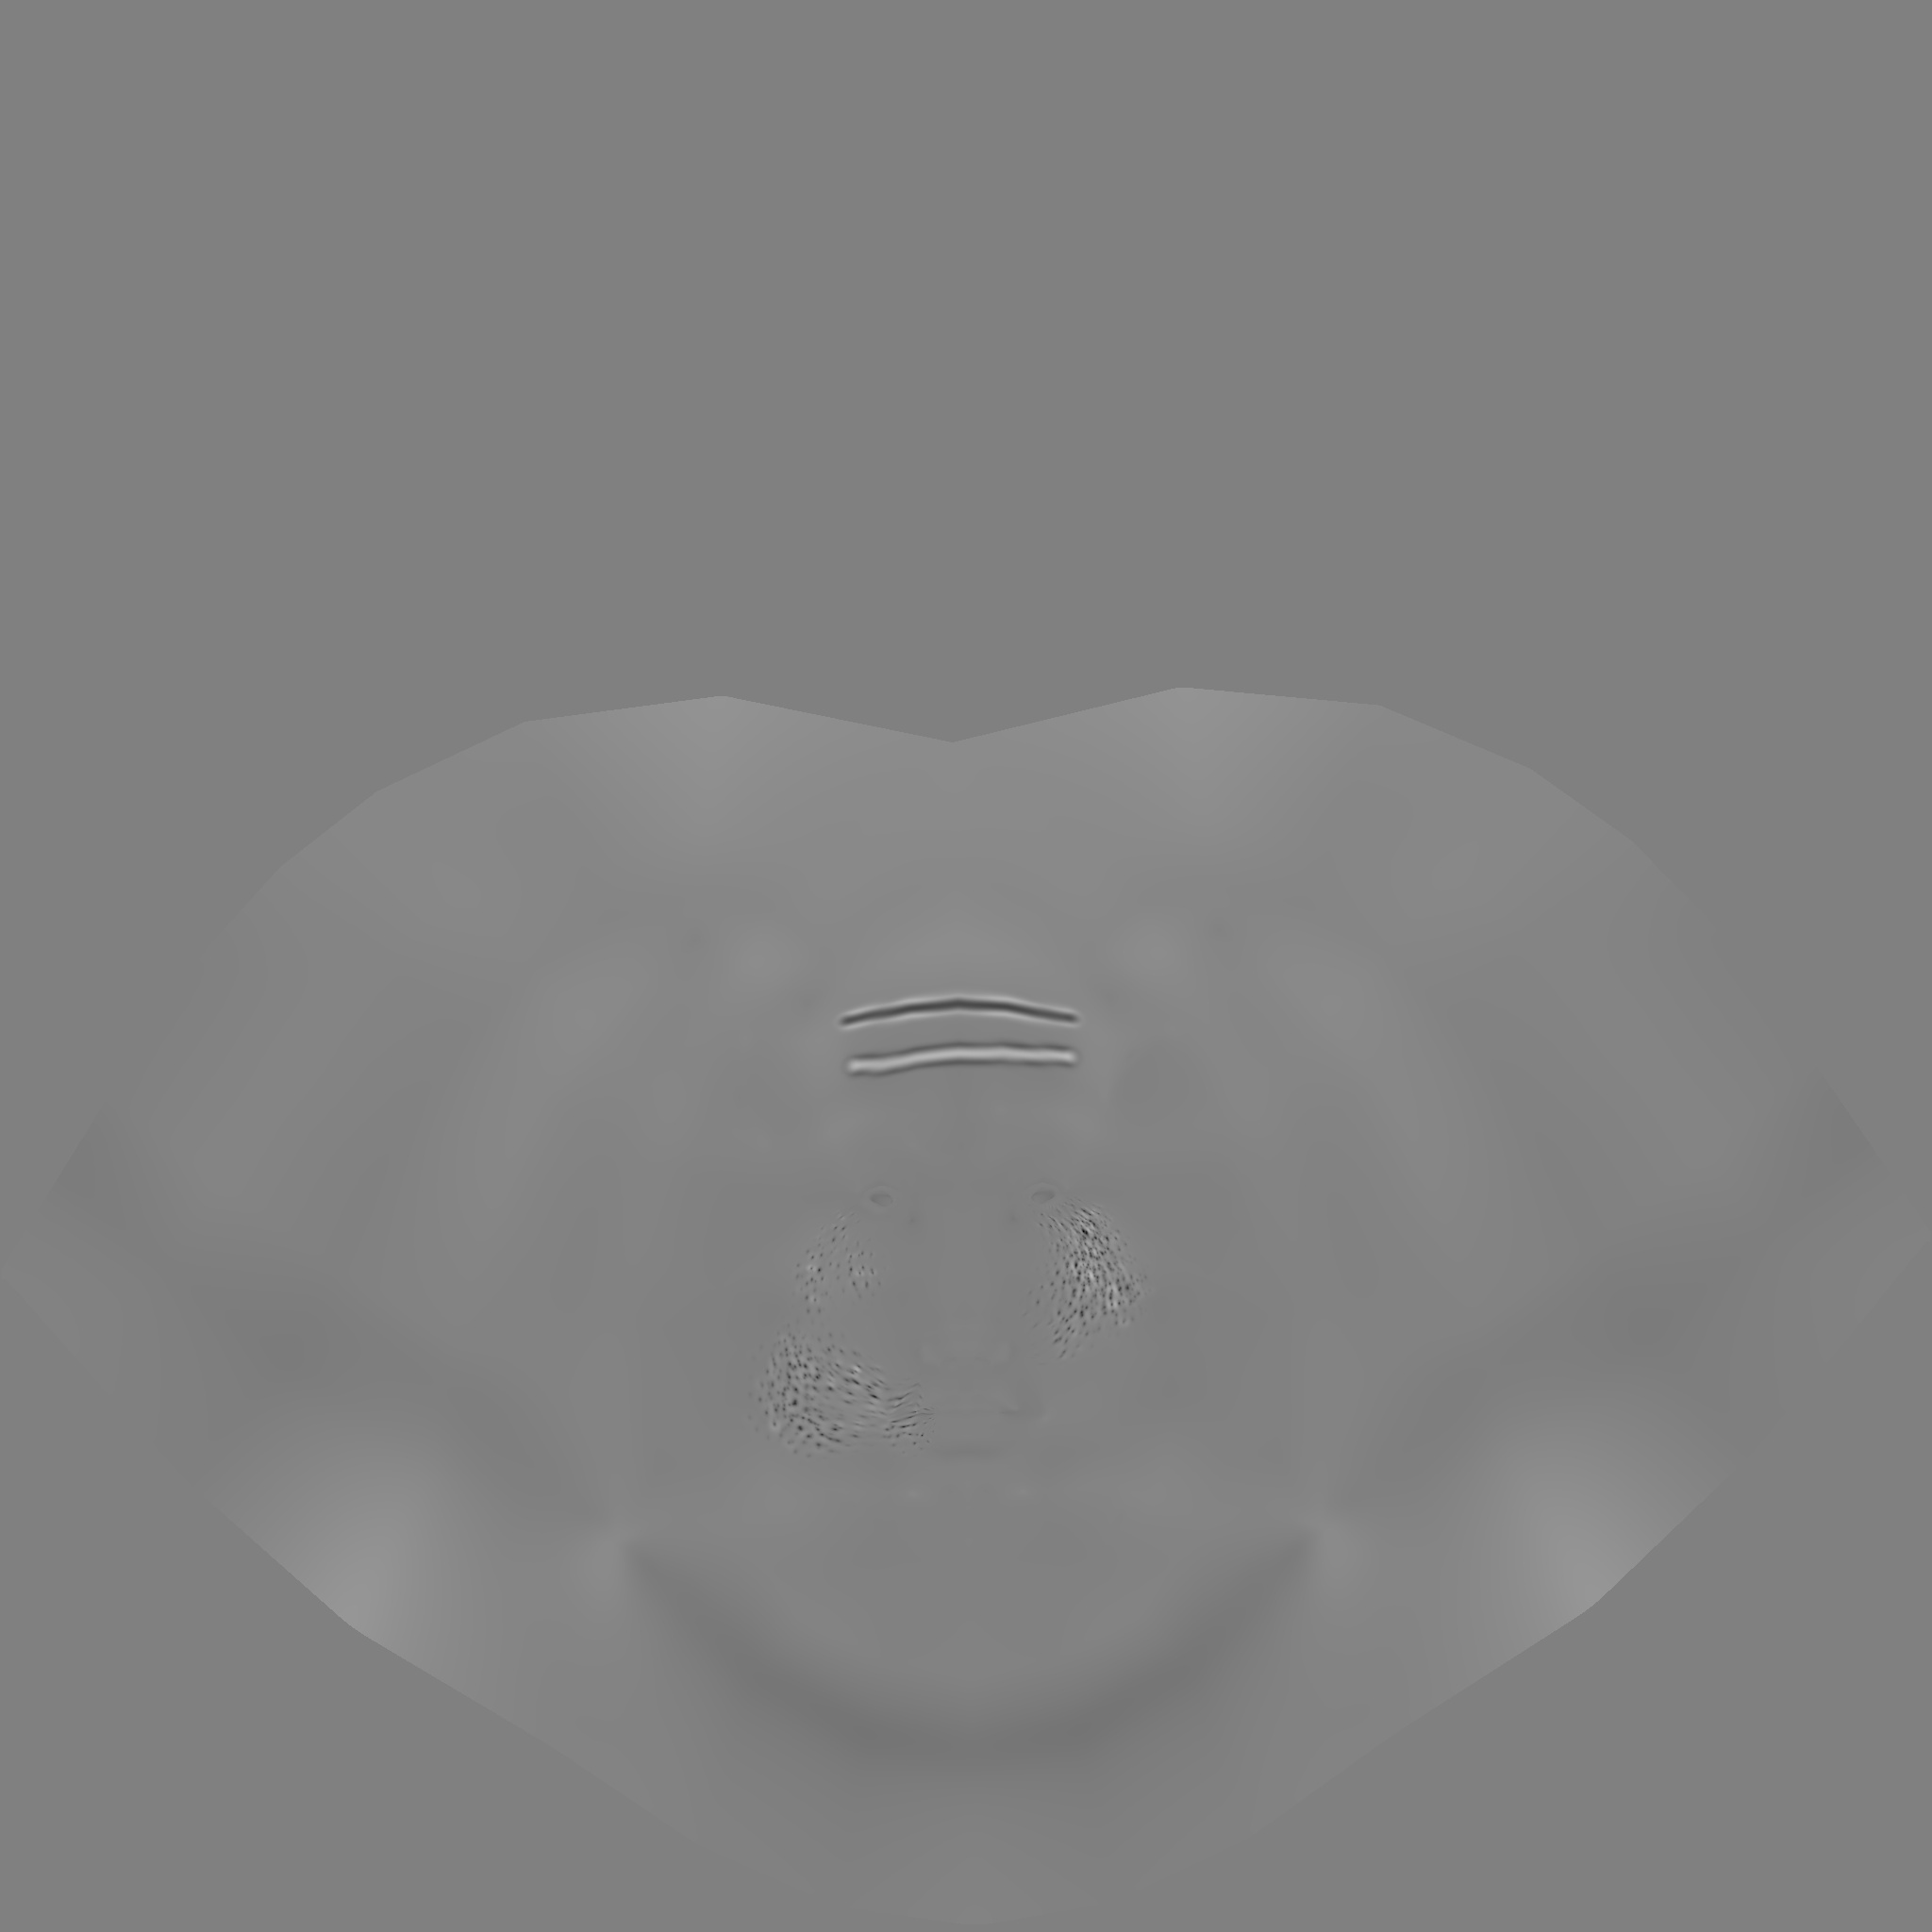
First, I used the unwrapped basemesh before Turbosmooth and exported it as OBJ, imported it into ZBrush, subdivided it up to a level that allows some fine details (for testing only went up to about 2million points), added two basic zAdd and zSub strokes and a few finer pores to see how the maps will turn out:
Turned the subdivison down to 1 ie. my basemesh, went to displacement map and create&export the displacement map with the following settings:

The result was not what I expected. I thought it would only add the strokes I made to the displacement map depending on the middle value (0.5), so zAdd strokes would be brighter, zSub strokes would be darker. That was the case, but it also added a lot of displacement in areas that were completely untouched as well as having extremely low details in the finer pores for a 2K map. If I now use the map in 3ds max it will of course displace the strokes correctly, but also deform the rest of the mesh.
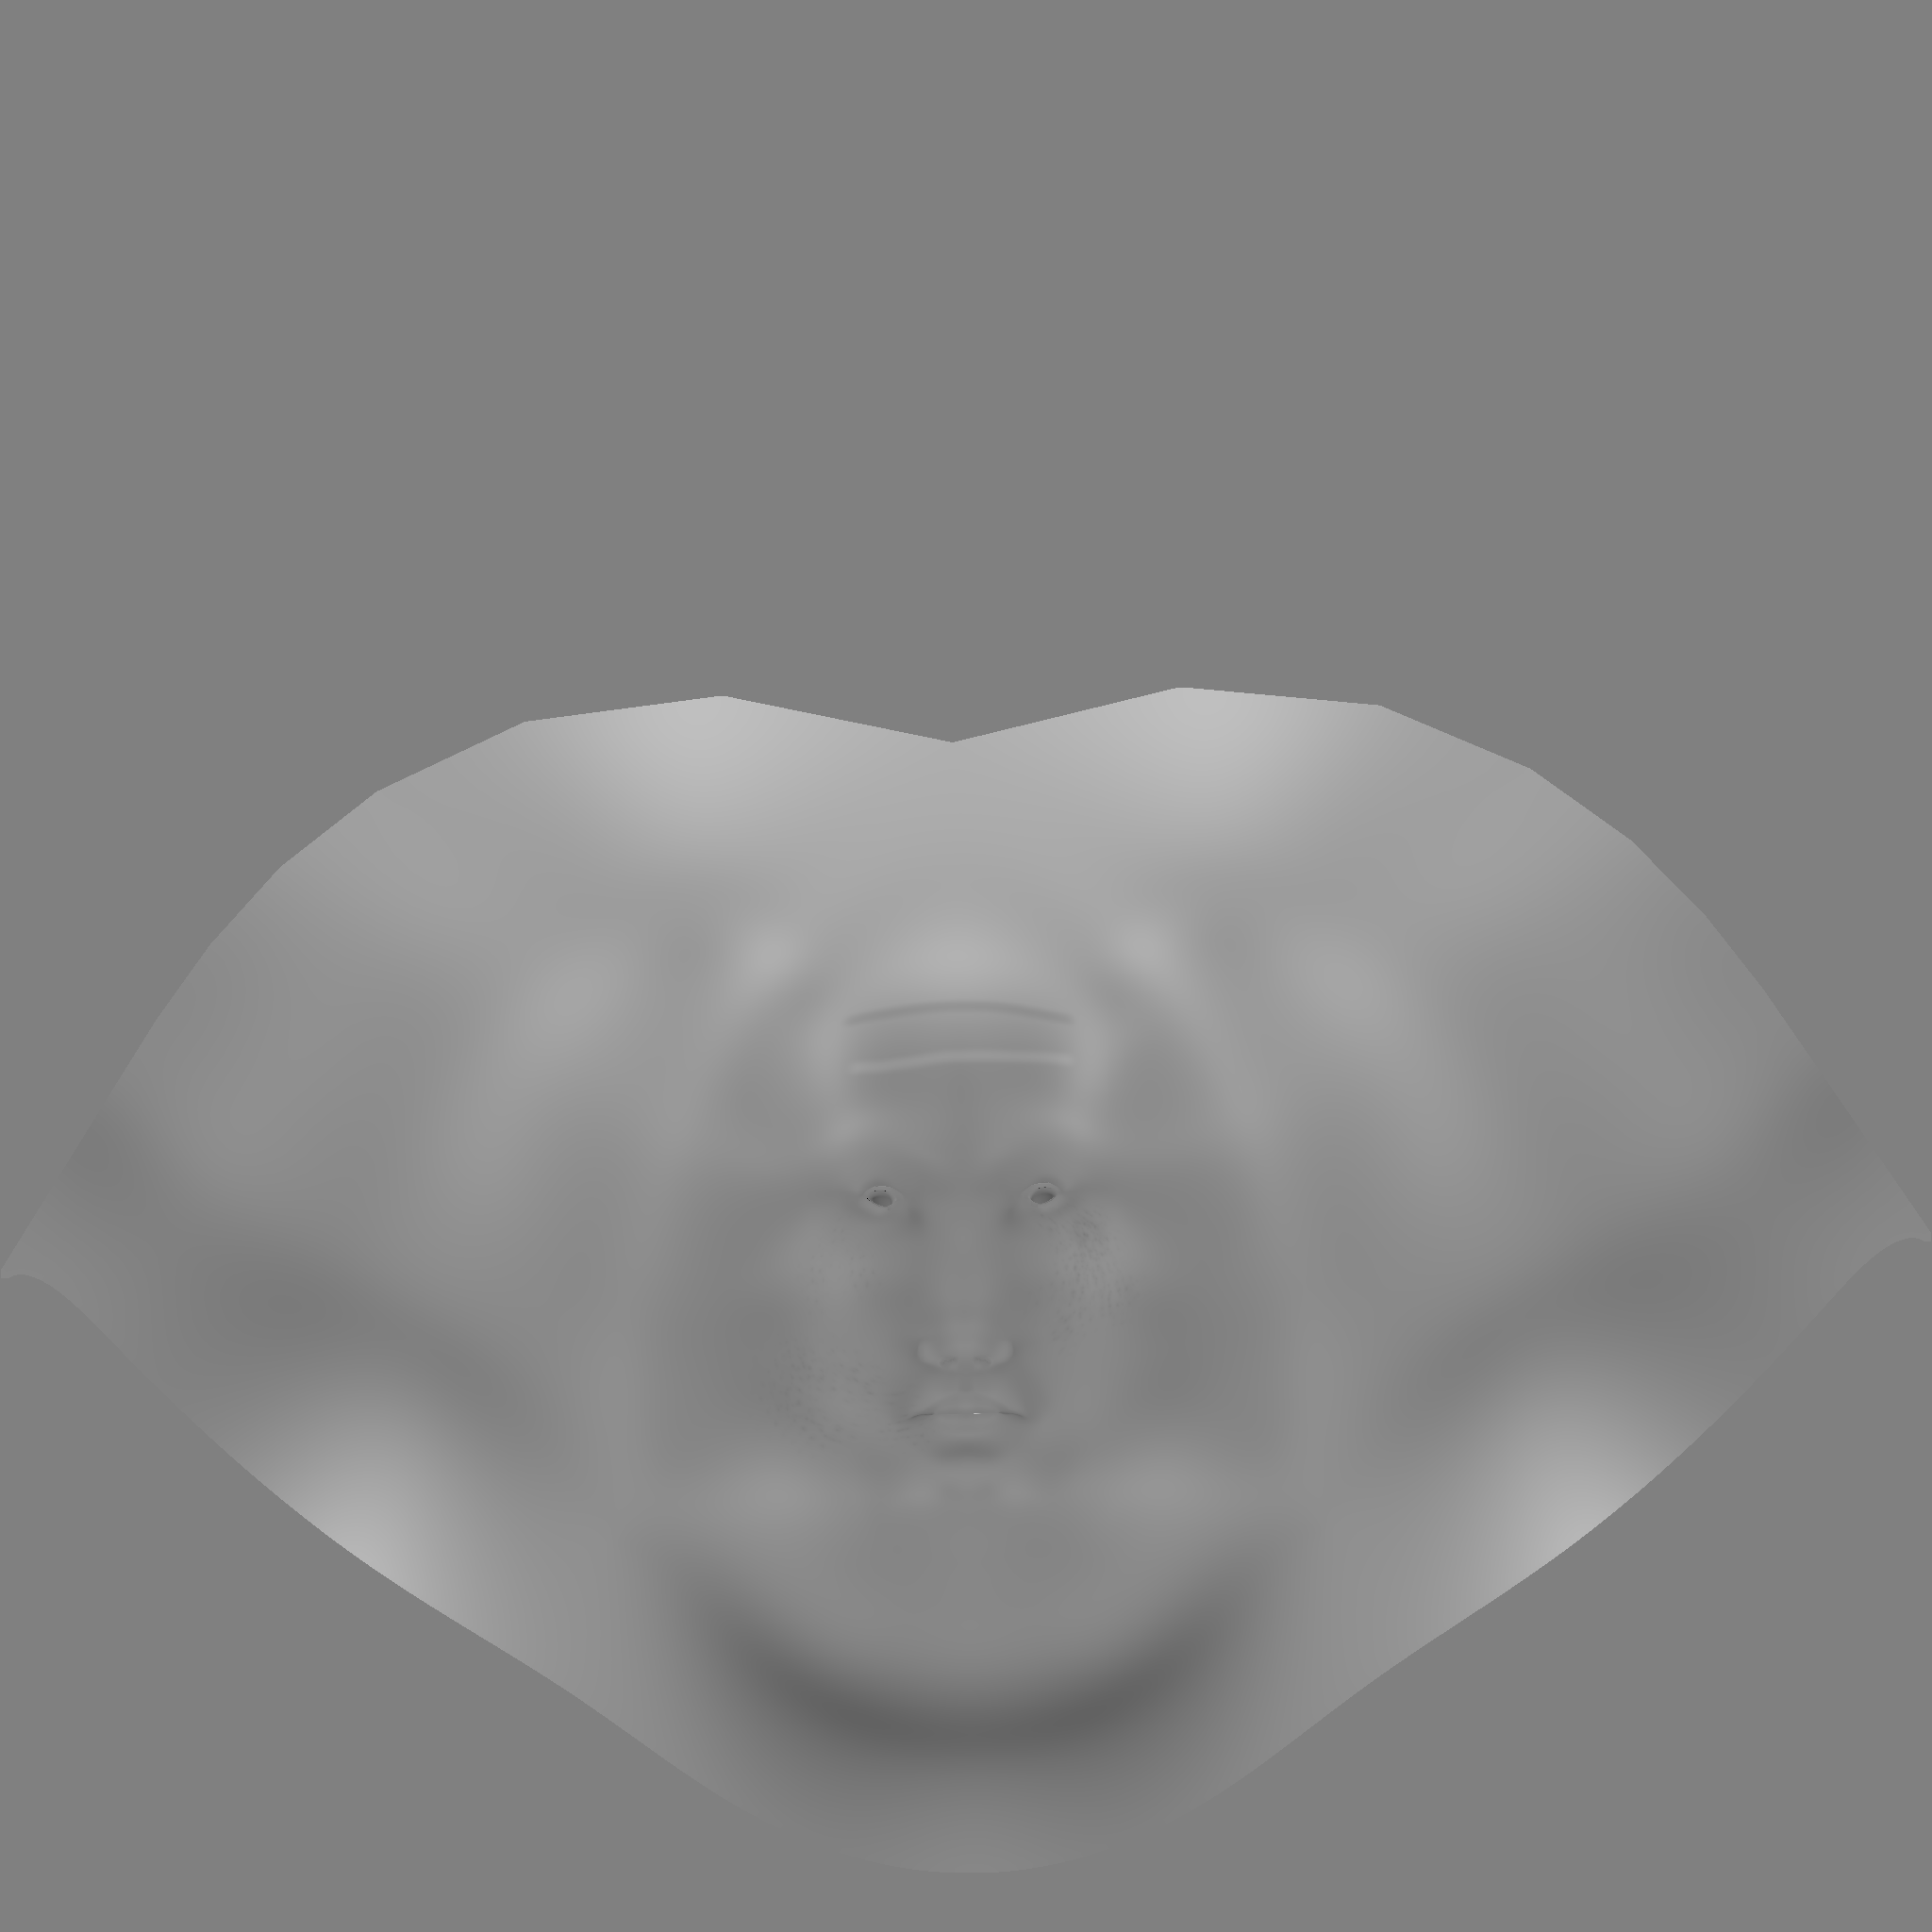
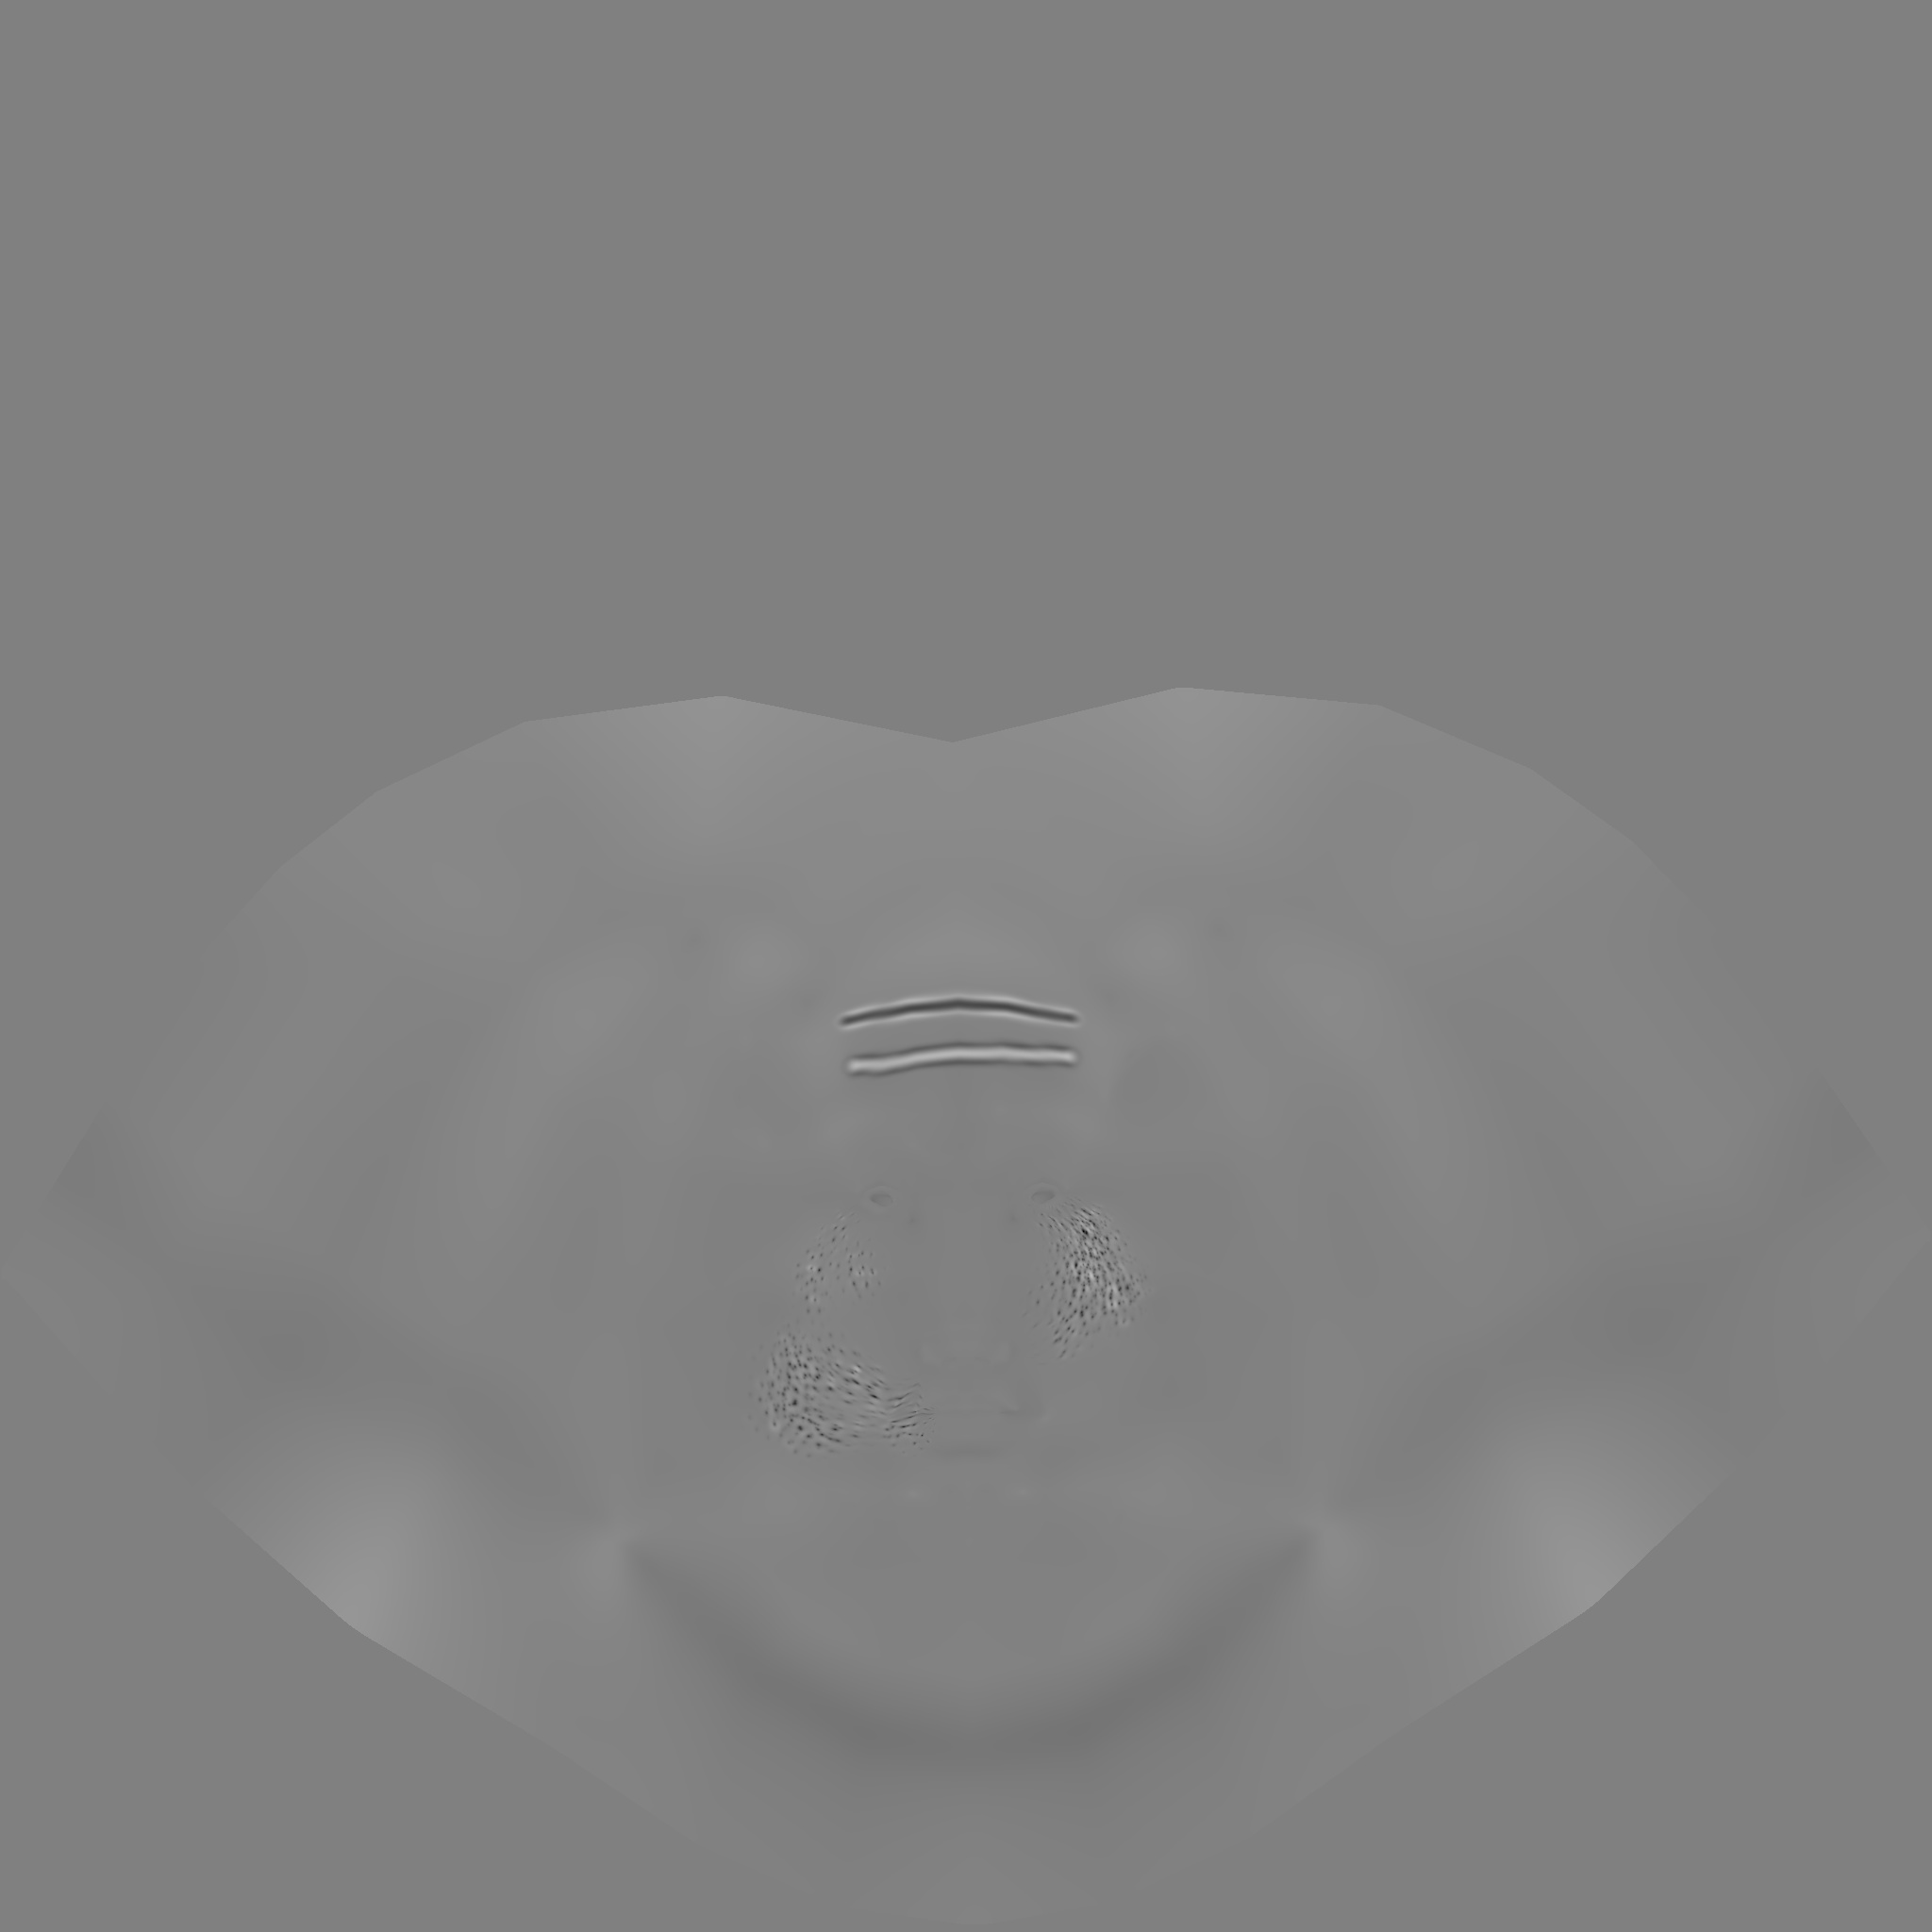
Then I tried exporting the basemesh turbosmoothed to my target iterations during rendertime, imported that into ZBrush, subd’d to about 2 million points, zAdd and zSub a few strokes here and there and created the displacement map at subd level 1 (ie. my 48k points turbosmoothed mesh).
The result slightly improved on the unnecessary displacement in areas that i didn’t touch in ZBrush (although still clearly present) and on the level of detail of the map, but gave every stroke I made a sort of “negative shadow”. You can see what I mean in the map below. Instead of just going from the mid value to a brighter value in case of the zAdd stroke, it would first go down way lower than mid level and then go into the brighter levels. Vice versa for the zSub stroke.
Where do I go wrong or what (steps?) am I missing?
If I have to take the map into Photoshop to clean up the unnecessary displacement and the "negative shadows"and add more detail, then I might as well just create the map in Photoshop in the first place and skip ZBrush entirely.
Thanks in advance.
PS: I would have just posted smaller pictures and linked to bigger ones, but that isn’t allowed, so, I hope you like scrolling or have a 1440p+ monitor.
Attachments