Hi there!
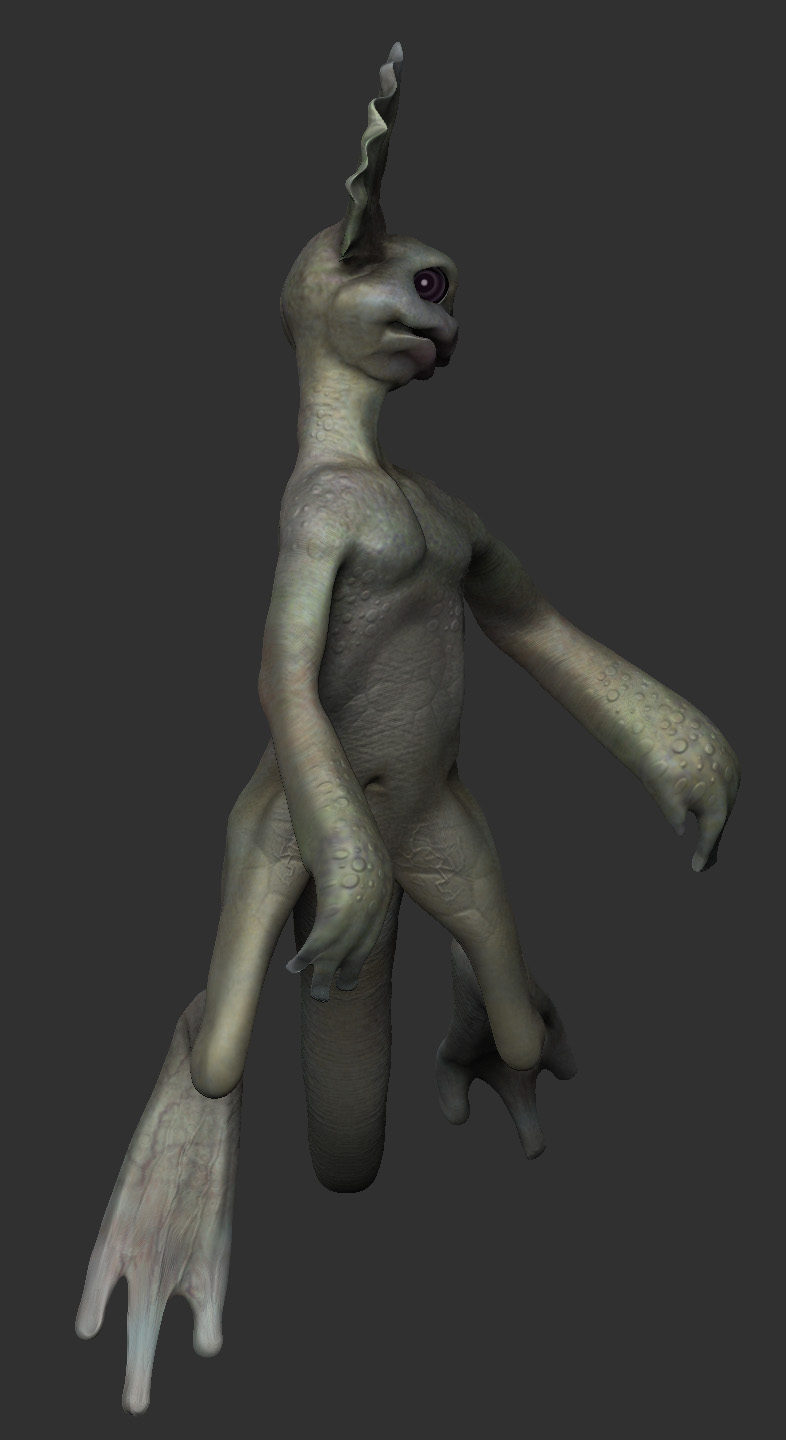
I wanted to go further than just modeling a head and tried to sculpt a whole body, but during the process I’ve found some issues I would like to ask, your help will be very appreciated! The fact is, if my model is set of many subtools, can they be “transposed” all togheter to get the final character pose? If so, how is that done? On the other hand, in order to get a render, the subtools whic are not the current active one appear like shadowed even in the “best” render preset, Is it possible to fix that to get a whole render without the subtools other than selected appearing ‘masked’? Thanks a lot for the help! To see what I men here I post a WIP image of the character, notice the shaded subtools of the head and hands shaded…

First, congrats on the sculpt. It’s very nicely done. I like the guy alot.
To address the posing issue: There are a couple of ways at least. The first, which is my preferred method, is to make sure all subtools have the same number of subdivision levels by either deleting or adding levels. Then, clone each subtool with the clone button at the top of the tool palette. Once cloned, they can be “inserted” with InsertMesh in the geometry subpalette to make one complete mesh. For example, clone the hands, the head, the feet (if any), the shirt (assuming it’s a seperate tool). Then insert them into the pants mesh. You will then be able to delete all the subtools from the subtool palette.
Another method has been proposed where you would either rotate or move a part in one subtool (say the arm) while recording the stroke, then replay it in the hand subtool. This would require you to only move or rotate at each step, not both. Each of these methods are described in the ZBrush Wiki.
As for the other problem with the shaded subtools, simply create a null object (I usually make a sphere) and append it as another subtool, then make it very small and hide it inside the body. Then, when this sphere is selected, all the other subtools will have the same shading. Just make sure your null is a polymesh.
Hi Slosh, glad you liked it!
Thanks a lot for your tips on transposing multiple subtools and rendering without the shaded not selected objects! It was tricky but simple and clever and I was a bit silly not thinking about that solution…:o I’m quite new with Zbrush and I still must get used to it, even if in general I find it extremely intuitive and comfortable. By the way, I’ve been testing transpose while tweaking the hands, just to rotate and bend the fingers and I miss having more fast control on the whole body, maybe because the lack of experience. I’ll probably end taking the character to max and doing a fast rig to pose him and later bring him back to Zbrush for the final retouch. I’ll keep updating this post as I make some progress, thanks!
Almost finished with the hands, next moving to the shoes.

Hi I’m back!
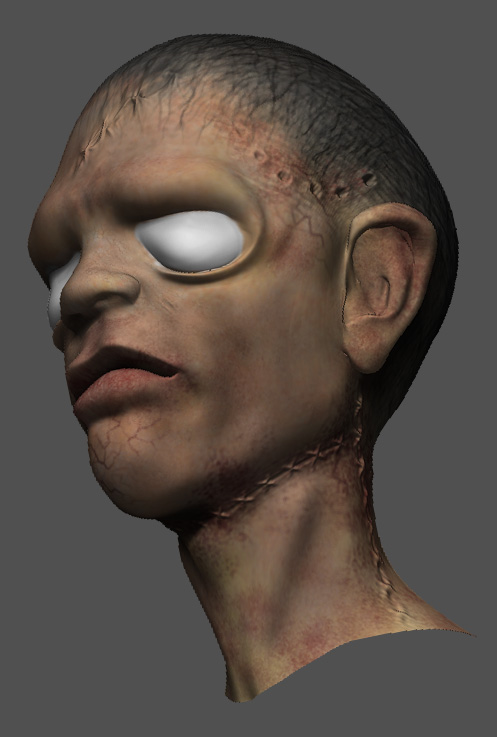
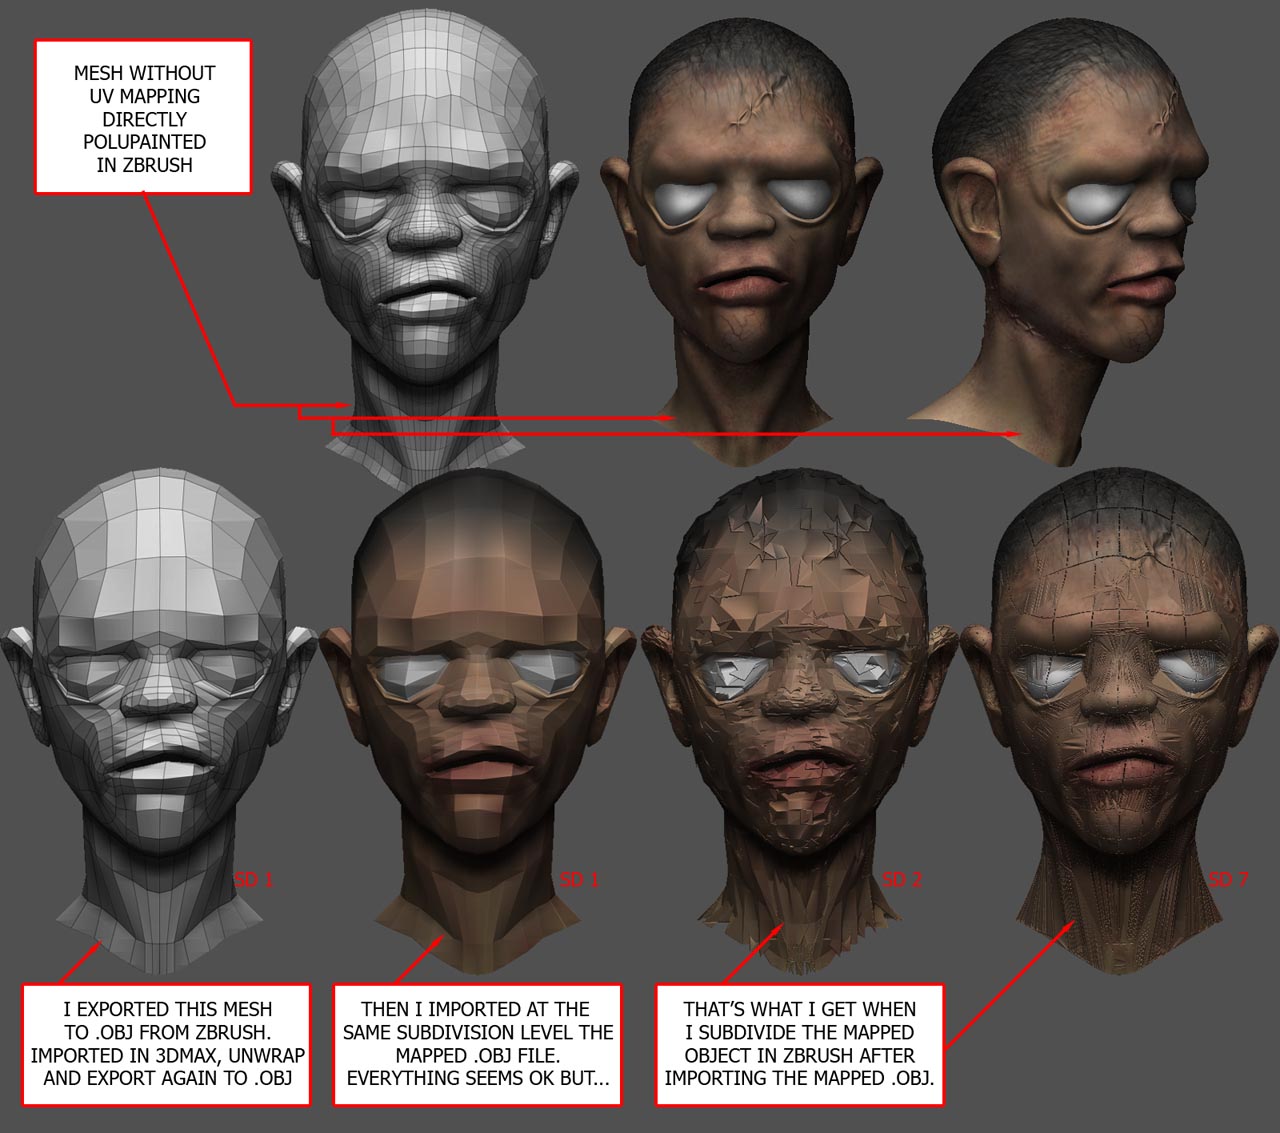
I broke my plans on doing the last character shoes cause I started messing with polypainting and found it really cool. The fact is that I started tweaking a head and then painted it directly in Zbrush, without taking care of its UV’s. Later I thought it could be nice to have the texture unwraped so I could do a normal map. I went to the lower sd level and export it to .obj, then import it in MAX, unwrap and did the step back to import it on the same sd level over my zbrush tool but wuth the mapping coordinates. What I found is that at the exact same sd level the mesh looks ok, but when I go up in the next sd the mesh starts to crack. Does anybody know why? Is there an alternative way of doing that? Your help will be very appreciated! Here I post an image, cause it’s better than 1000 words… Thanks!
Attachments
Can it be that you flip the normals when you import/export the object?
I also thought about that at first but checked it and the normals where always pointing out during all the steps. Thanks for the tip and fast answer anyway!
The object must export with the lowest div. And import as the lowest div. when you have there a lower div then you must delet this first.
But can be a lot of solutions.
From time to time I have the same problem. But until now, I have always found the solution.
Hm. Without files i can not realy help you.
Thanks Jakyll but I aready tried exporting the lowest sd, level 1. In fact I just tried something that makes me guess that should be some import/export options. I export the lowest sd mes with default Zbrush export options in obj. just import in max with the options shown in the screenshot and without moving anything export it again to .obj with the settings below. Then import back at the corresponding sd in Zbrush with its default import settings… and yet the mess  So even without modifiting anything, just export/import/export/import between Zbrush and Max makes that broken polymesh…

you might want to check if your model has multiple polygroups when you export, that can change the point order on re-import
Patton
Cool! Thanks Patton, and how do I check that?:rolleyes:
Do you mean when I export to obj from Zbrush or from Max?
Sorry for the harsh of questions, I’m very new to Zbrush… :o
try making your model edit poly in max, than export as obj.
Or try the plugin Riptide. I only import/export with this plugin. But it must go without it. Can not say what the problem with Max. I work with Cinema 4D. Can it be that your Import/Export options scale the mesh?
i see that you export on quads, i would set that to polygons, i never set it to quads, and this works for me.
Hi guys!
I finally got it working thanks to your tips! You both gave me good ideas and put me in the track of what was going on, I really appreciate your help, I’m loving this community!  To get it right I had to convert the imported mesh once in max into editable poly instead of editable mesh (as it is imported by default). Later on the export options, following ivo d advice I exported the mesh as polygons and not quads, and guess that made the difference. You guys are great, I’m ashamed I didn’t thought about it by myself…:o So thanks again! Btw, love your galleries, I’m pretty new here but definitely going to track your work Cheers!
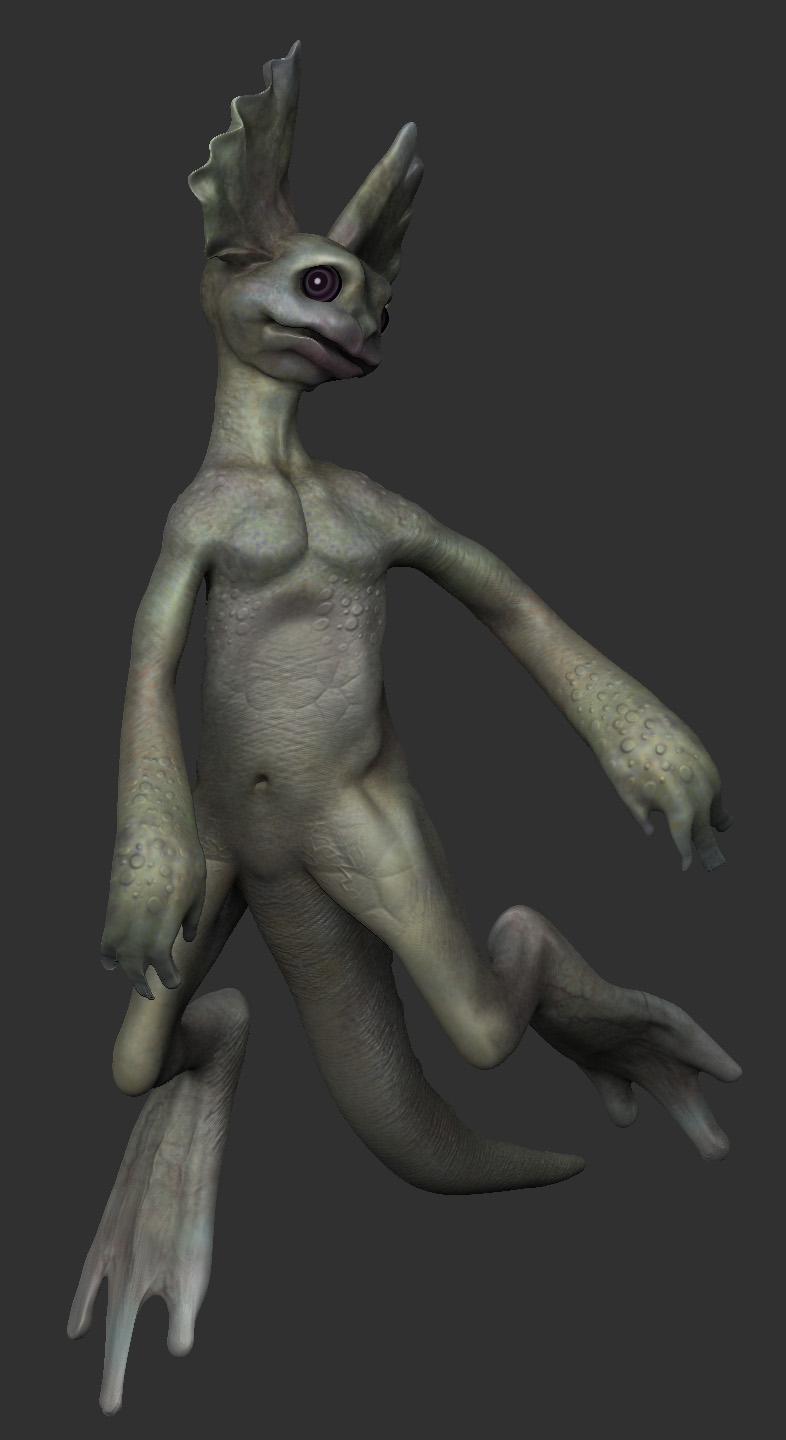
Ok, i use to do that, I forgot about the cartoon young man and started messing with a kind of water creature…:o Sorry… Rather than starting a new thread I decided to keep posting on this one. Not sure if that makes sense but anyway :rolleyes:
Attachments