ZBrushCentral

BattleStar Galactica Viper helmet

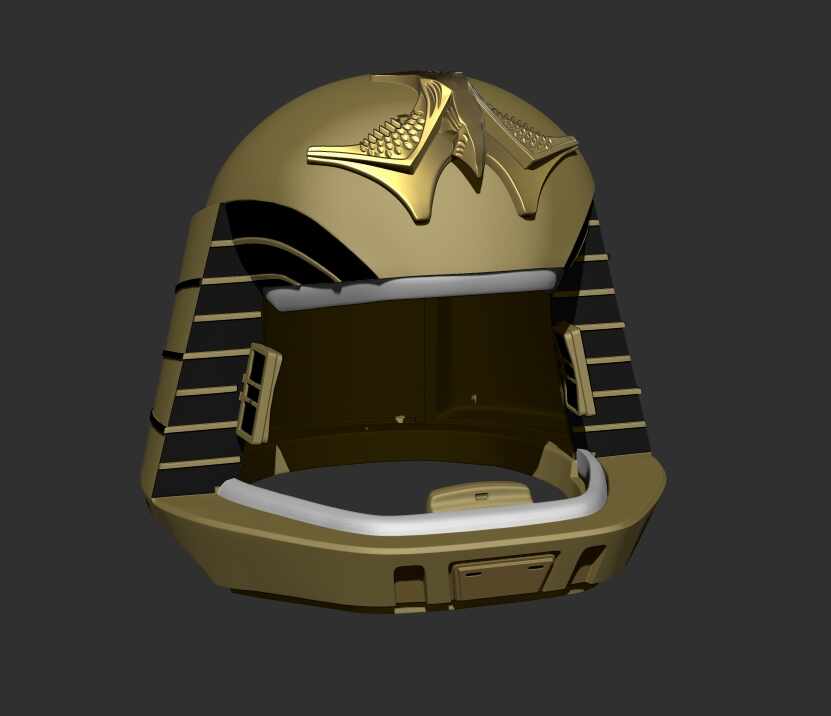
Getting back to my adolescences. After Star Wars there was just nothing in SciFi in the late 70’s. Then Battlestar came along. I brute force sculpted a helmet back in July 2021. Began learning Zmodoler brush working on the ESB Walker. I re did the entire sculpt in low poly using the dynamic subdivsion. The game changer was bevel pro. Initially, I fought with the bevel in the front. In about 15 minutes I got exactly what I needed. This is my first attempt at polypaint.

ViperHelmet1 ViperHelmet2 ViperHelmet3 ViperHelmet4

Thanks for looking.

12 Likes

This reads nostalgia from when I was a kid!!! So Frakking Cool!!!

1 Like

Nice work! I immediately recognized the Battlestar Galactica helmet in the main forum page thumbnail. Sweet childhood nostalgia. :+1:

@remcv8
@MetinSeven

Thanks. I appreciate it.

1 Like

I printed the helmet on my FDM printer for fun.
It was really easy to break up the model with live booleans.

3 Likes

That looks amazing!!! Came out great. If you paint it, please post updated pics :slightly_smiling_face: :+1:

1 Like

Very cool and a fun project. Thank you for sharing.

1 Like

@Spyndel
@PixoPaul

I’m knocking off projects, since finishing the ATAT.
I scaled the Viper helmet incorrectly. The print above is too small.
This wasn’t just a rescale. I did the sculpt over from one of the earlier revisions. The first print showed me where problems were in the assembly. The topology also needed further refinement. I wanted to keep it to the minimum to hold the shape and give me smooth surfaces.
image
image
The lower chin guard was also done as low poly. I used the boolean feature to create the hard surfaces.
image


I completed the helmet and printed the larger version.
image
Here’s a comparison of the difference in size.
image
image
The light bars were now too large for my resin printer to do successfully. I printed them on the FDM printer. Cleaned and smoothed the parts then molded them and cast them.


image
image

With the light bars complete. I did the test assembly.
image
image

Up next…Sanding…priming and paint.

Thanks for looking.

3 Likes

Looking good.

1 Like

Primed, waited, sanded, filled, waited, sanded and repeat.
image
image
image
Made some pins for the alignment holes. I like doing this for larger assemblies.
image
image
image
image
image
Some minor fit issues but overall it’s good.

Thanks for following along.

3 Likes

Glued the hemet together with 2 part Methylacrylic adhesive. The bond is stronger than the print.
image
Then more filling and sanding.
image image
image
Last coats of primer. No more filling but there is still sanding.
image
image
image
I’m now on the hunt for the correct color.
Thanks for following along.

2 Likes

I tried to search the Internet for the paint color. It was pretty much a waste of time. Colors aren’t accurate.
I finally got over to the paint store. I was able see actual paint chips. There was a pure acrylic base which is important. Latex will peel.
image
Since I couldn’t find the color I wanted in a rattle can, I broke out the detail gun.
image
image
image
image

Thanks for following along.

1 Like

So cool!! Great work!

1 Like

Labor of love, looks good! :wink:
Jaime

1 Like

Very cool - Commander Adama would be proud. I especially like the 3D printing you are doing… Prints look great! :sunglasses: Nice Work!

1 Like

@PixoPaul @Jaime @Spyndel @MetinSeven @remcv8 @Ian_R @EricMCS @remcv8

FRAK!

Finally finished. Hope you like it.
image
image
image
image
image
image

Thanks for following along

3 Likes

looks awesome. Thank you for sharing so much.

1 Like

Looks great and very authentic! :ok_hand:

1 Like