Is it possible to set a fixed angle when using the Planar Cut brush? For example, I might want to cut exactly parallel to the X-Y plane.
are you trying to do something you might be able to use the clip brushes for? that would make it easy, just snap your view to a side perpendicular to the desired plane, and use the rectangular clip brush.
just an idea I could be way off :lol:
That works for me! Thanks.
Just to add that - for the Clip or selection brushes - you can use the grid, or a Spotlight image, to line up the stroke and then press the Spacebar to move to the exact position.
I understand that a clip brush makes sense here. But is there a way to control the angle when using the planar line brush? Is there a way to “fix” the angle so it remains perpendicular? So far using it seems to result in a hit or miss result? It would be great if I could fix the angle and then type in a number somewhere. The examples of planar brushes on YouTube are informative but the results also seem very loosey-goosey using planar cuts
Thanks.
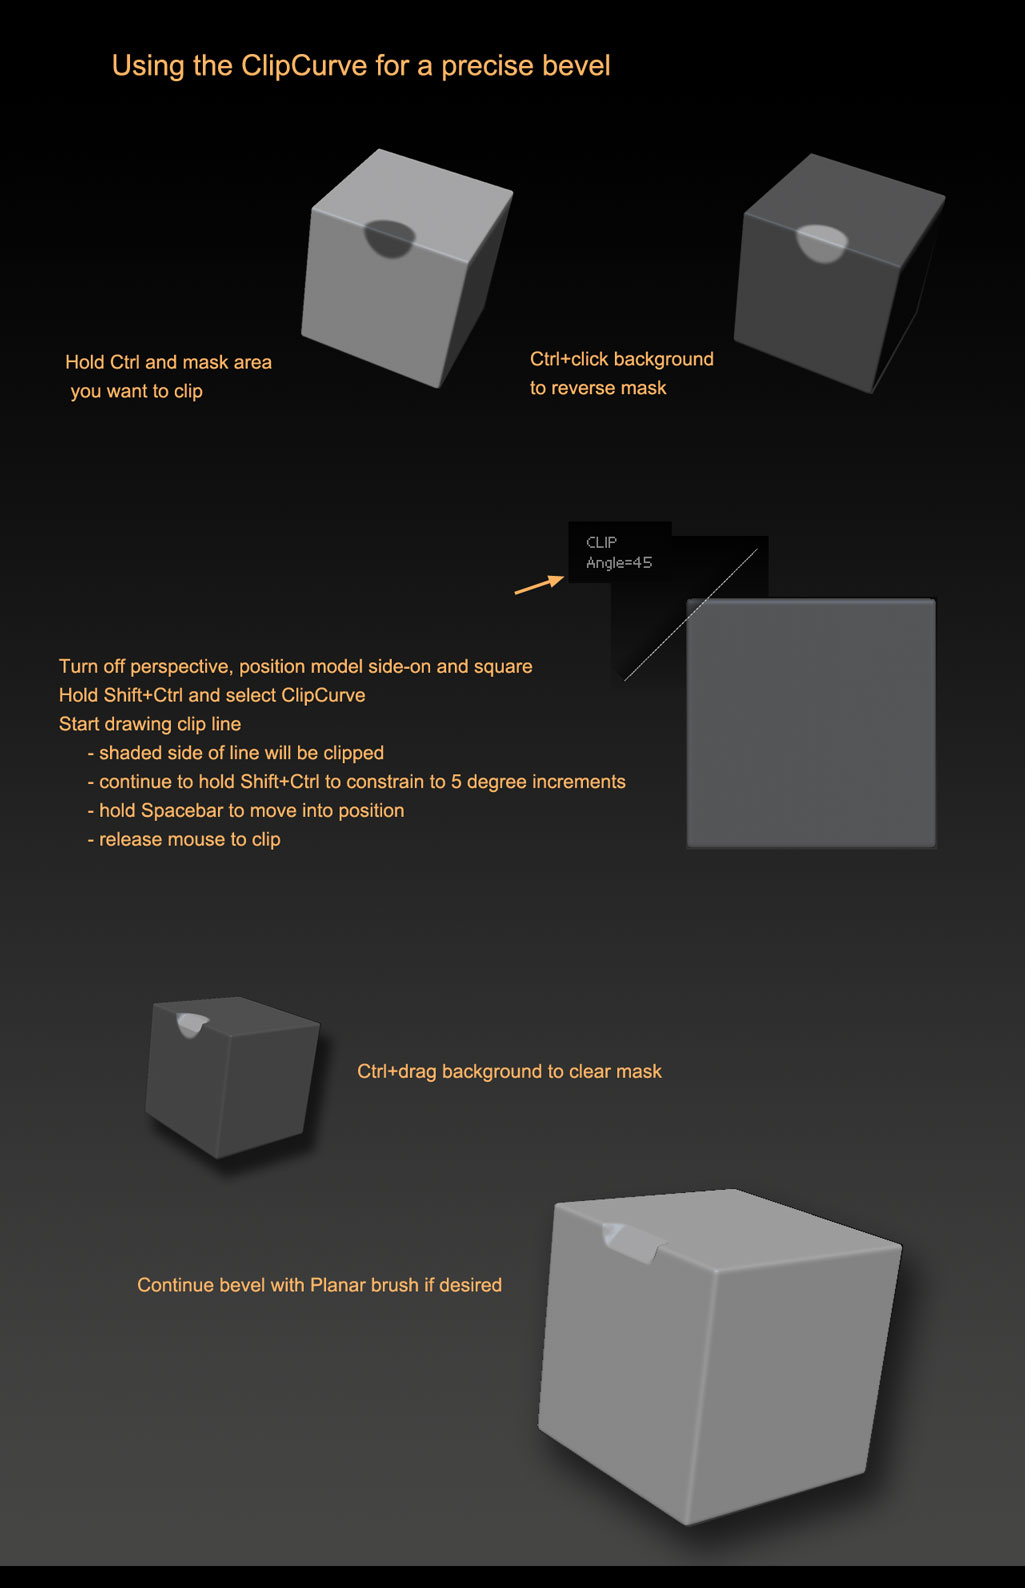
With the Clip Curve the angle shows at the top of the clip line. If you hold Ctrl+Shift then the angle snaps to 5 degree increments. Release Ctrl+Shift after you’ve drawn the line and you can change the angle by single degrees. You can draw the line off the model then press the spacebar to move into position. Release the mouse when you’re ready to clip.
The clipping tools are no doubt your best option, but for brushes “Trim Front” always clips relative to the view of the model (just like matchmaker always works relative to the view), so you can turn on the grid floor and exactly move and position your mesh and not your brush to effect your preferred axis and go to town with that brush. Its one of my favorites.
I’ve been fooling around with the modifier axis buttons in the Transform palette. These seem to turn on/off axis in any combination for the brushes, but not deformation modifications I don’t think. (I wonder if these are legacy brush manipulators that never made it into the current brush palette- I’m not sure about that, though.) Working with these buttons might solve your problem depending on your choice of brush, but I can’t find alot of information on their purpose, so again, I’m not certain this is a solution.
I am actually following the tutorial that Scott Spencer made in the latest issue of 3D World (July 2011) called “Create a weapon model in ZBrush”.
The whole tutorial is very detailed and I am learning a lot. Scott has a very patient instructive approach which I appreciate. So in video 12 of the tutorial he talks about creating bevels, the idea is to start with the planarline brush to create an angle for the bevel and then switch to the planar brush to use that bevel’s set depth and extend the bevel out in both directions. The problem is in getting the correct/accurate initial-angle. It is very hard to do and appears to be more miss than hit. Hopefully there is a way to use the planarline brush in a controlled, numerical way. Just angling the object and pulling the brush apart to set the angle is not working well at all. I have done a search on the web and cannot find a way to control the planarline brush.
It is not possible to set accurate angles when using the PlanarLine brush as the start and end points determine the angle based on your model. You can snap the line to 45 degree increments (and so get the cut square) by holding Shift after you start drawing (and it is probably best to turn off perspective when you want accuracy). Additionally, for regular models you may find turning on polyframes useful as a guide:
[attach=258848]PlanarLine.jpg[/attach]
If you want accurate cuts then you need to use the ClipCurve:
[attach=258849]ClipCurve.jpg[/attach]
Attachments

Marcus, thanks for these tips. I played around for hours with the planer brushes last night after reading coffeeham’s post and got nowhere! The solution is so simple.
Thanks Nancyan
For (fairly) accurate placing of your model this little plugin may help:
Axis Rotate.
Thank you Marcus.
The information you have detailed is great. Much appreciated. I am in awe of ZBrush (to say the least), and I don’t expect it to do things that a regular modeling program can do, like bevel edges. But since I am learning more every time I ask a question, I now have to ask if there is a way to trim the edge of a circular shape? In Scott Spencer’s’s tutorial, the sci-fi weapon he is teaching us to make has a straight shape that curves around before becoming another straight shape. I now have an understanding of the clip brush, and your explanation for using the clip curve is invaluable. So now I can cut the straight parts of the shape. If I can just solve the curve part, I will then be able to carve circular and curved shapes with controlled the results.
:b2:
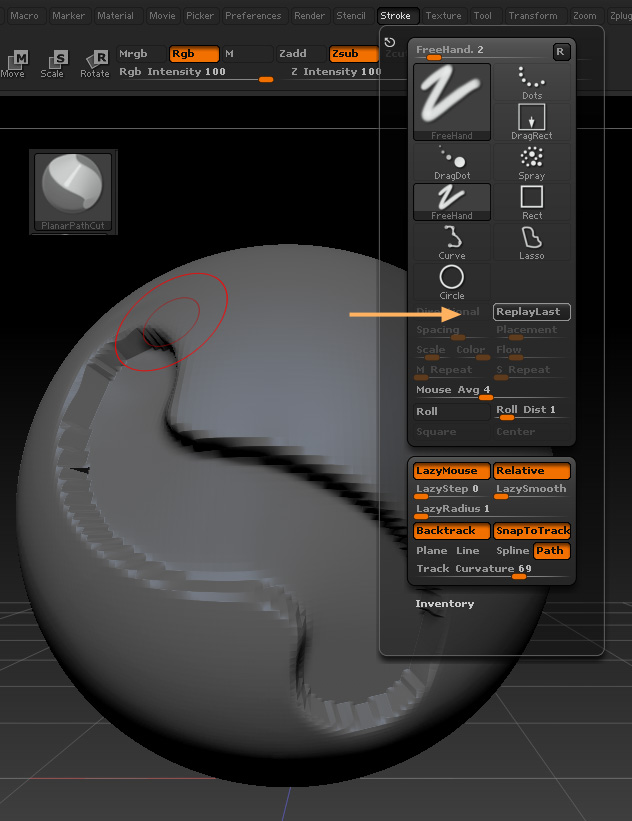
I’m presuming that you’ll want to use the PlanarPathCut brush, though you might also mask the curve (then invert) before using a number of different methods. One tip, in the Stroke palette there’s a button called ReplayLast. This will replay the last ‘canvas stroke’ and is very useful if you want to deepen the cut made by the PlanarPathCut brush. A word of warning: you must press the button immediately after you’ve done the first cut and not move the model at all. Moving the model to see how it looks counts as a canvas stroke and ReplayLast will repeat that instead!
Attachments
That’s a great button which I did not know about. Thank you.
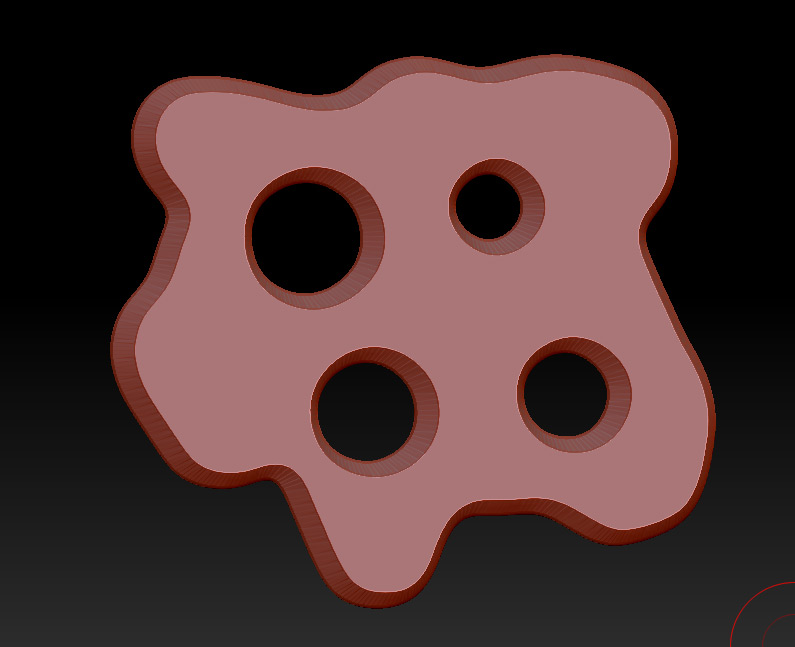
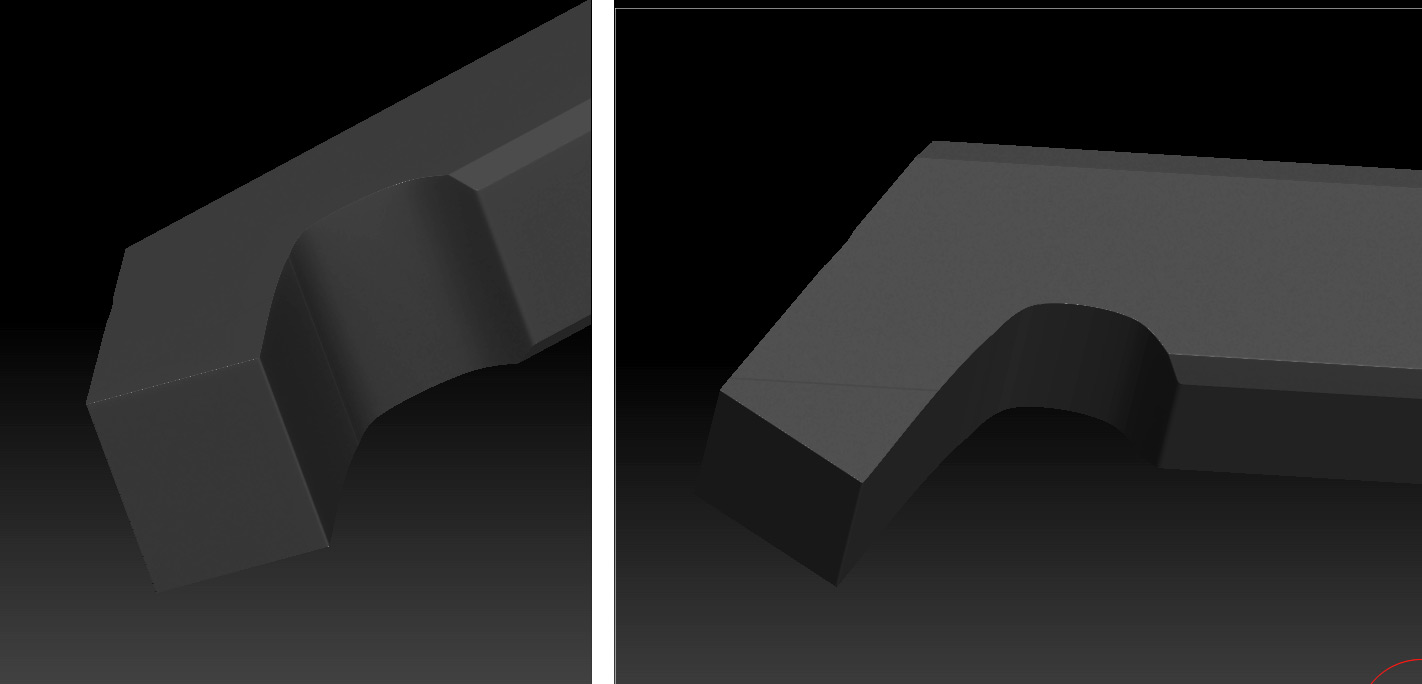
I do want to explore the planar tools and learn its capabilities, but for this project I care more about using the tool that works best. Also I want to create the smoothest, most logical looking bevel so what I need help on is creating the bevel-curve that comes off of the straight shape. Here is the shape:
Attachments

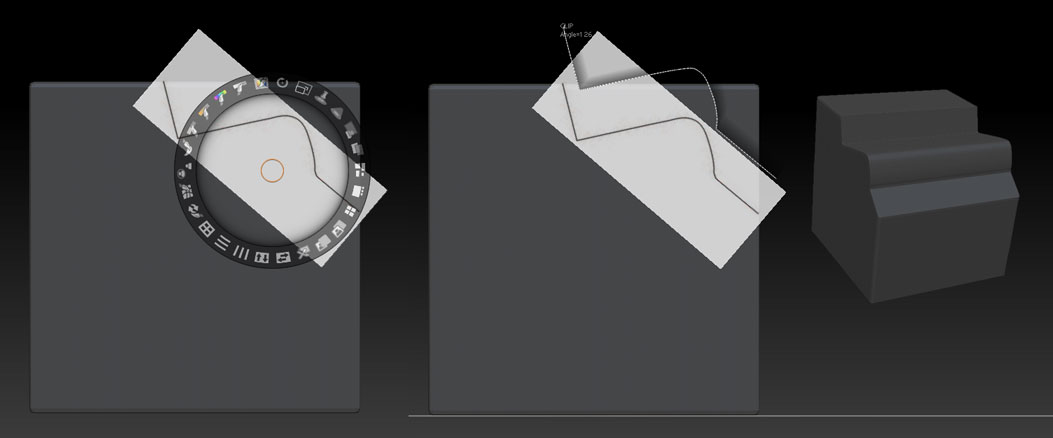
I’m not sure whether that is the profile you want or the path. With a profile you can use the ClipCurve - remember that you can create a curved clip by tapping Alt, and a sharp angle by tapping Alt twice. You could use Spotlight to position your image as a guide (see my image).
If that is the path you want then that is more difficult. Again you could use Spotlight for a guide. But I think I would probably use masking to set up the exact curve I wanted.
Attachments
Sorry, I now see why my detail wasn’t informative enough. It is great to see how detailed one can get using Spotlight and clip brush though. Here are two different angles of the shape that will better show what I want to bevel. (I don’t have a problem with doing the bottom).
What I need to figure out is the straight part going smoothly into the curve. I intend to use the X key to do top and bottom at the same time. No matter how I try I can’t get an even and smooth bevel coming out and onto the length of the curve.
Attachments
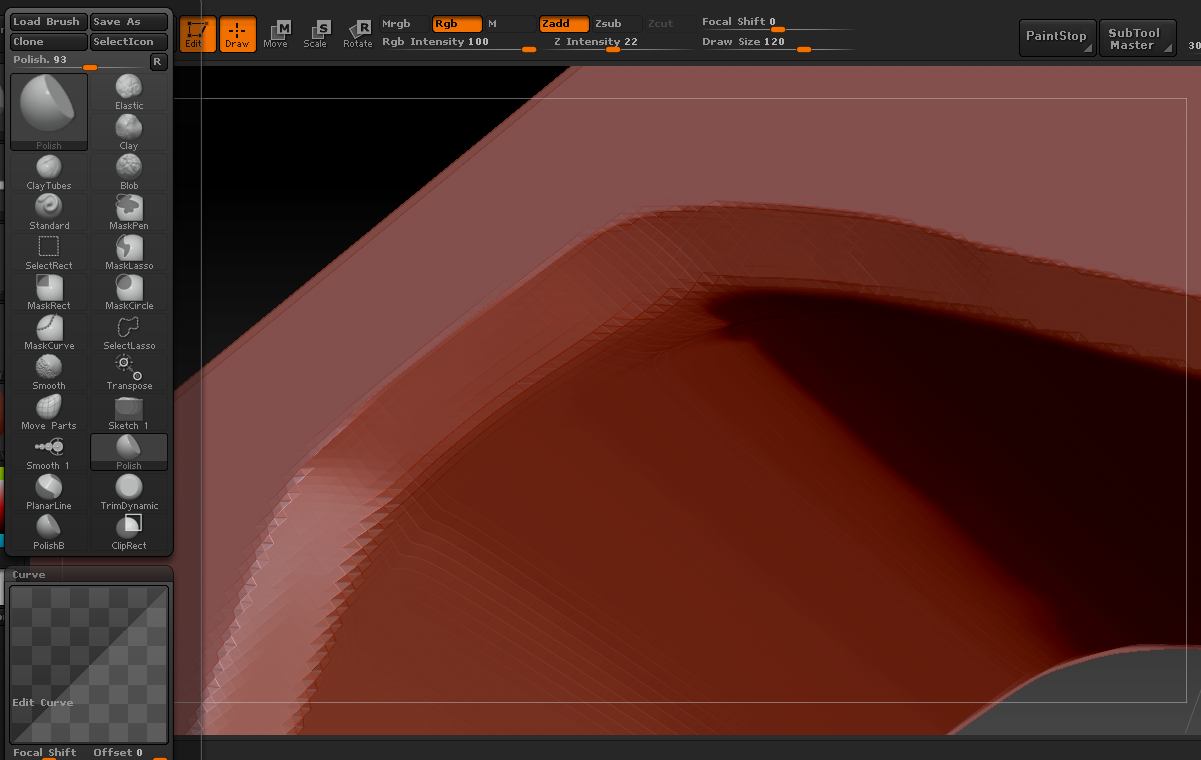
I think the way I’d do that is to use the Polish brush, perhaps setting the brush curve so that it is straight, then gently shaping the bevel round the curve. Don’t use a too large brush size or too high Z Intensity. If you find the Polish brush too slow you could try the TrimDynamic brush.
Your results will depend on the topology, so you may find it a good idea to use the Remesh and Project All functions.
Steve Warner has a good way with bevels for hard-surface modelling. See here: Creating Hard Surface Bevels in ZBrush
Attachments
This is great. I reviewed the Steve Warner method and that looks great I now have to test the application to my “real world” object. I will also try the Polish tool next and see how that works. I then need to “brush up” on what it means to Remesh an object and Project all functions. I am taking on the issues of learning Zbrush as if I was learning to play a musical instrument. So this is a great help.
Attached is my S.Warner test. The bevels are what I’m trying to achieve. Now I’ll see if I can get my object (straight into a curve) to turn out as well.
Attachments