ZBrushCentral

Cutting shapes out of an obj file???

Thanks everyone for the help so far. I am LOVING Zbrush, despite the frustrations of generally not having a clue what I’m doing most of the time, regular crashes and things sometimes working and then randomly not even though I’m repeating the same processes as much as I can see.

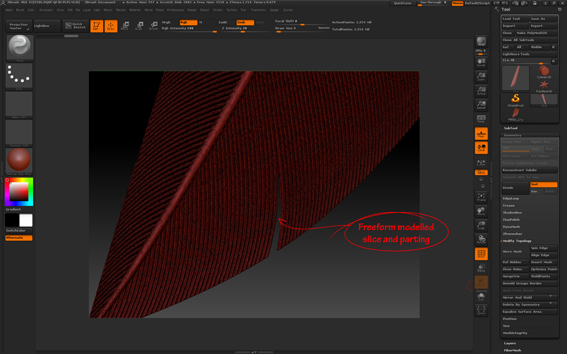
Anyway…new question and pretty darned urgent. I have an obj file imported from Freeform. I need to cut into and manipulate this object to create a more detailed version in Zbrush. The details are all 3d physical ones, we’re not interested in colour or light at this moment in time. So imagine I’ve imported an image of a lump of cheese and I want to cut a wedge shape out of it. I keep trying different things like the clip and trim buttons but they keep behaving in ways I can’t seem to understand or master. The tutorials I’ve been following haven’t really explained them properly. Can anyone recommend a really good tutorial for mastering those in the first instance?

Then someone recommended creating a wedge shaped object and doing a Boolian cut of that object into the first object. Which worked fine when I practised cutting an orb out of a bigger orb but when I try it on my .obj file nothing happens!! It’s in edit mode. So what am I doing wrong?

I don’t mind which way I do it, I just need to master how to do this, preferably by the end of the day as I’m on such a tight deadline. It’s made more complex by the fact my wedge shape isn’t a standard polygon shape but has a slight curve in it which really needs to be traced exactly off the first object, so cutting into the first object to remove pixels would be more intuitive than the Boolian method, I think, if I could just get the program to do what I want it to. But when I’m using the clip and trim buttons it either does a) nothing at all, b) takes a random cut of a random size and shape near where I was trying to cut, or cuts but not very deep (I need to cut my wedge all the way through). There doesn’t seem to be any precision…so what am I doing wrong, and how can I found out how to do it right?

After I’ve cut my wedge shape out and closed up the sides (keeping it ‘watertight for 3d printing’) I need to then push the gap I’ve created on either side to open up that gap a little, tweak it. Am imagining a whole other day of frustration doing that, but hopefully not as much as the cutting out has been. Where is there a ‘knife’ like tool I can simply draw onto my shape to indicate where the cuts should be and then remove that area? That seems such an obvious thing to have. What am I missing.

I’m working in 4r6 by the way, if that makes any difference.

Thanks to anyone who can help. Hugely grateful for your patience as always x

Slice curve. http://docs.pixologic.com/user-guide/3d-modeling/hard-surface/clip-brushes/slice/

I don’t understand it. No matter which tutorial I try to follow my version either doesn’t do what people say it will, or the buttons aren’t where people are saying they are. I’m not a total thicky, so please someone put me right. Doug? Any ideas?

Basically when I use slicecurve, I have managed to get the brush working, and make the shape I want it to cut out, but unlike on the tutorials I have watched, it doesn’t cut it out/delete it, it just shades it a different colour from the rest of the model.

I’ve read another tutorial that said I just need to ‘delete hidden’ except when I try that it then tells me no area is hidden. I can’t find ANYWHERE on Zr46 that allows me to hide the areas (which I presume are just ‘masked’…is this a form of masking when it shades it a different colour?).

I accidentally at one point in my struggle must have clicked a short cut key and the bits I wanted to go were suddenly gone, and I could see the grid of the floor through them, but I haven’t found a way to repeat that and have NO idea what I did to achieve it that one time, when I thought I had done the same shift/ctrl drag I had done every other time. Ideally I don’t want open ended holes like that, but any holes are better than the no holes I’ve achieved every other attempt.

Also, some of the time it will cut a nice wedge out my model and sometimes it cuts some random chunk out of the other side of my model where I don’t want it to. Why is that? Is it to do with the brush size versus model size? And if so, how do you work out the optimum brush size for your model?

All the video tutorials seem to be aimed at older versions of the software and the buttons and controls aren’t in the same places. The written tutorials either assume prior knowledge and have certain things set up differently from defaults. So where oh where is a tutorial that really explains this slice curve tool thoroughly and how to use it to delete sections? I don’t want to cut the head off a dog, imagine I need to carefully cut the dog’s tongue out whilst leaving the rest of the model and then gently part the dog’s mouth open more. That sort of effect. So cutting a wedge in, keeping edges closed off for 3d printing, and being able to manipulate what remains.

Someone please help. I have going crazy after 2 days of searching tutorials none of which show me accurately what to do on this version. x

Grouping is pretty powerful, you can easily create a group by masking a portion of your model then going into the polygroups panel and selecting group masked or from masking. When you slice, it creates groups. Shift+ctrl+L click on part you wish to keep, that hides all else. Or you can do that with the addition of alt and it will hide it, you can also drag rect around what you want to show(with Shift+ctrl) Works great when you want to see only a part of your model and to keep system load down. Keep plugging at it.

Thanks so much Doug, I was just coming back on to say I’d just managed to work that bit out, but you have confirmed what I just figured out by trial and error. But I’m still having the problem with controlling what is sliced. I see there is a shadow and it takes from the side the shadow falls. But if I’m cutting a wedge shape in something (so move the tool in and then out) I want what is inside the dotted line to be removed. With the shadow falling on the inside of my in movement but then it shifts to the outside of the second movement as I come back out to form the second side of my wedgecut it seems to do strange things. I am using ALT to change direction and create the curve, so I’m presuming I can’t change the shadow using alt. So how to change the direction of the shadow mid slice?

Also, this may well be related, but it’s still removing areas not within the area I have sliced but seemingly randomly from opposite (not in a symmetrical way, before you suggest I’ve got symmetry turned on). What causes this? Is there anywhere that has a really in depth tutorial on this particular brush?

Thank you so much Doug for your help. Feel slightly better for being one step forward but it is frustrating. Not helped by Zbrush repeatedly crashing despite having a new and powerful machine to run it on (is that normal?). x

I’m also having a problem with accuracy level of the slice. I want to make a really clean slice but it’s making it rather jagged and zipping along the odd bit to somewhere it shouldn’t be. Is there a way to improve the accuracy of the slice? x

Read all of their fine print, it does take some trial and error(gotta love undo). More points= better cut. Hide part you don’t want cut, you should be able to manage.

For best results with the slice curve, make sure you have perspective turned OFF, and snap your view to top, left, right, etc.

When drawing your curve, the shadow will fall based on which direction you start drawing from. For example if you draw from top to bottom of the canvas the shadow will be on one side, draw bottom to top, the shadow will be on the opposite side.

When drawing your curve, make sure you draw it long enough to include/exclude EVERYTHING on one side or the other of the curve. It is best to be zoomed out so you can see the entire model, and start your curve a distance away from the model… otherwise your curve may not be long enough which will result in stray groups being created/included in the slice.

In the middle of drawing your curve, you can reposition the whole curve globally by pressing the spacebar (without letting go of the other keys)

A screenshot of what you are trying to do would be helpful…

Thank you Thor. That is very useful. Although I’m still unconvinced I’m using the right tool for the job as Doug pointed out you can’t easily change direction to double back on yourself without causing unexpected results.

I’ll show you exactly what I need to do. I’m getting to the ready to cry stage as I’ve watched so many tutorials and read so much data and when I go to put it into practise it doesn’t seem to behave as it should. My deadline for conquering this little task is fast approaching so any more expert brains on the problem would be so welcome.

OK so what I have is quite a large file of a feather, created in Freeform, which I need to be able to edit in Zbrush (because that’s all I have). The kind of editing I need to do doesn’t seem too much to ask in theory. I need to be able to (in the near future) change the physical length and width of the feather whilst maintaining its main characteristics to create variations of the feather for 3d printing. But the thing which is causing me SOOOO many issues is that I need to create little nicks in the side of the feathery fronds, like in the picture shown. So in real world terms, I need to slice a line between the existing fronds and part them slightly and close up any holes in the geometry this causes so they can be 3d printed. I am very new to Zbrush but having watched so many tutorials and seen so many more complex things people can do with it I never dreamed it would be so hard to do something so simple as make a knife cut and push things over without messing everything up. I’ve tried so many tools but can’t get anything to do what it seems to on demos. So many of the help files and demos are for older versions of Zbrush. If I don’t figure this out (or at least something close to it) really soon then the consequences for my career could be really really dire. So I will be eternally grateful for anyone who can talk me through this step by step in as simple layman’s terms as possible.

I’ve managed to get the slice tool to slice off big bits of feather but I can’t control it enough to get it to cut out the delicate little shape I need. I’ve tried brushes that seem to score lines into the clay but then they just seem to be pushing it out the back of the feather (which has to remain flat). I’ve tried masking an area I don’t want touched and then removing little areas in between but it seemed to only have masked the upper most high points on the feather texture and was still leaving the bits in between the grooves exposed to be altered where I didn’t want.

I’ve just attached a photo for the first time and it’s looking teeny weeny in this message, so I’ve probably done this wrong. I need to go read the help files again to figure it out. So I hope you can see it. What you’re looking at is the feather tip with one ‘nick’ in the fronds to show you what I’m trying to achieve. This was done by someone else in Freeform but I need to do the rest of the splits in Zbrush to be absolutely clear. x

feather-help.jpg