ZBrushCentral

Brush Icons: How to do it best

Hi guys and gals,

I’ve been doing quite a bit of searching on the internet for the best way to make a quality Brush Icon for custom brushes. Unfortunately, the easy (fast) Alt-clicking “SelectIcon” button - routine, doesn’t result in the same high quality image you see for the default brush icons. It seems blurry, and looks to me grabs the subtool icon, not the canvas (if you have a larger object and want to show only a part of it in the icon, this is a problem).

There is a “BrushIconSample.psd” in the \ZStartup\BrushPresets folder. It has a seperated background, filled solid black.

  • It’s hard to fathom, but I, having been a ZBrush 4 user for years - don’t know how to grab a clean image of my doc, with a clean alpha!!! I’ve been searching the net. No luck. The only thing I found is to grab it with ZDepths, but that doesn’t give you a clean alpha, since it has gradients (obviously).

This is how far I got:

  1. set doc to 96x96
  2. background medium gray (128/128/128) or perhaps solid black ???
  3. use Toy Plastic as the material
  4. frame your object
  5. Perform best render
  6. ???
  7. open it in Photoshop, make a black background on a layer beneath, have it active (visible) and save

—> 6) How do I grab the image so I have a clean background for the .psd? The “BrushIconSample.psd” needs the black background active, on a separate layer. I tested it (via “SelectIcon” for a custom brush) with the black layer turned off and got a bright white background, not in line with the defaul brush icons.

Would be great if we could clear up the issue, so that when others search the internet, they find their answers here!

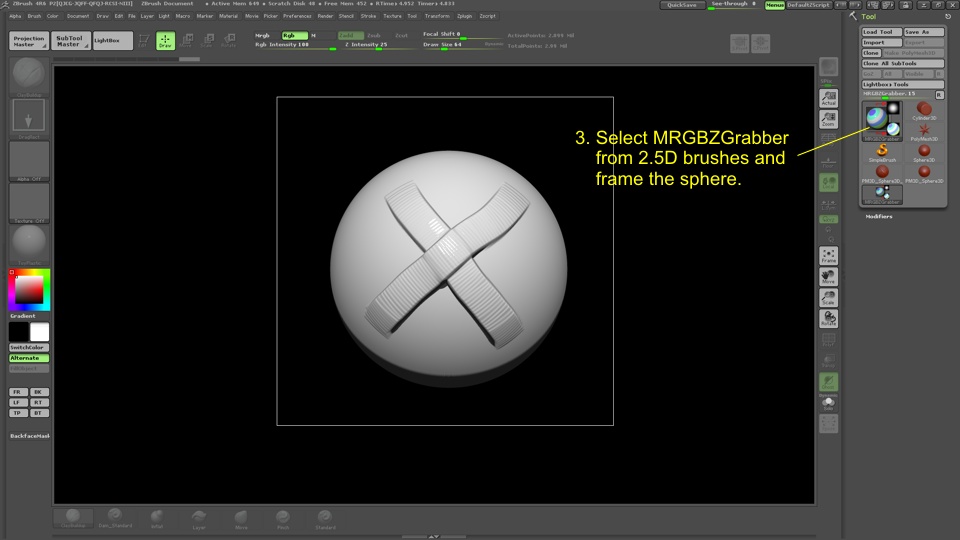
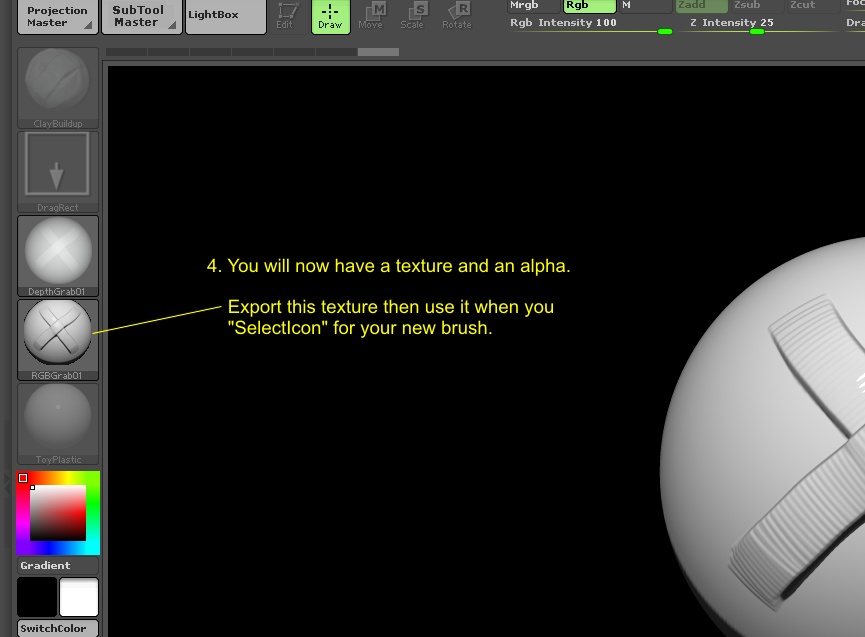
Here is one way you can do it. Don’t worry about document size because it doesn’t matter.

new-1.JPG

You can frame bigger than the sphere. The MRGBZGrabber will crop automatically.

new-2.JPG

Don’t worry about the texture size. It doesn’t matter.

new-3.JPG

iffy.jpg

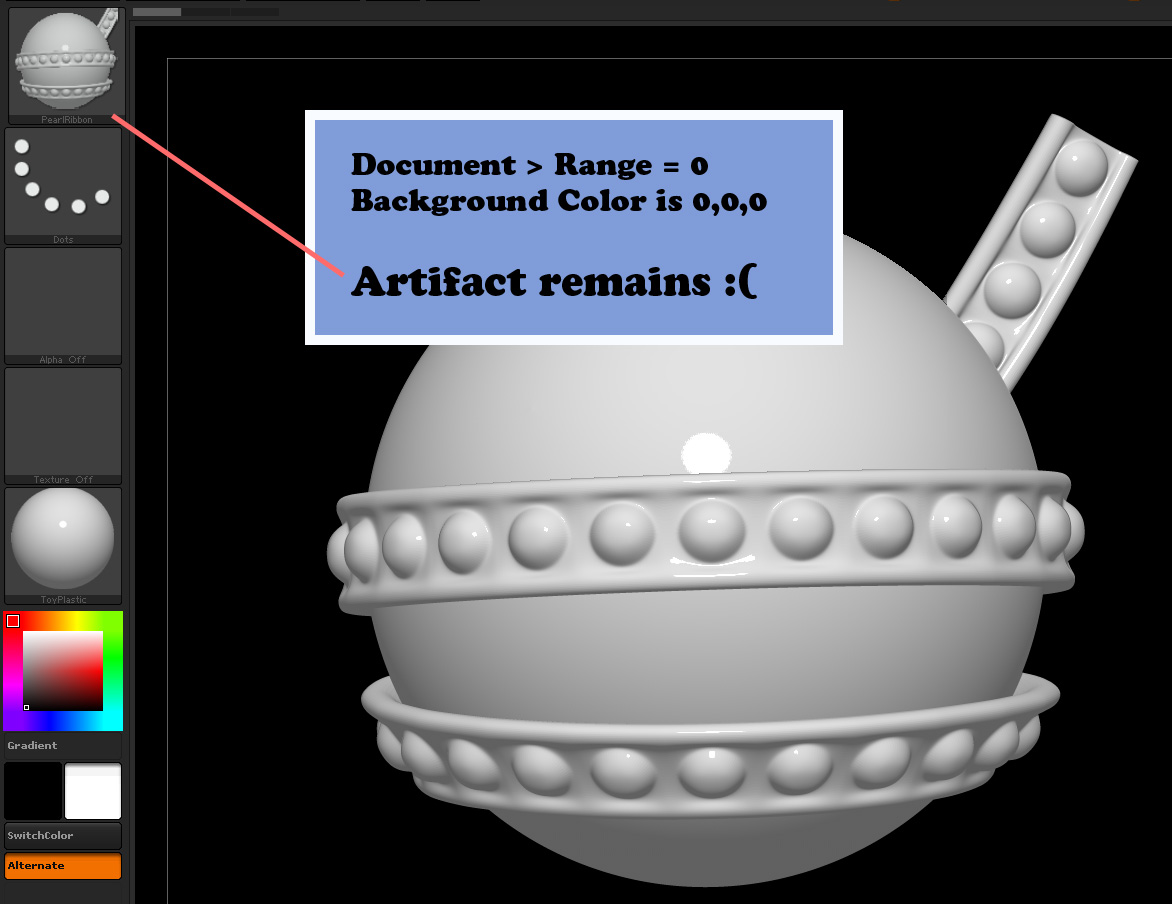
I doubt this is the ideal solution. I tried the Grabber-route, but as you can see, there are artifacts.

When I check the grabbed .psd, it’s nice in Photoshop though:

iffy_not.jpg

It’s lacking an alpha, so I assume this is the problem. It seems ZBrush will automatically delete black pixels, which results in the artifacts…
Is there a setting on the grabber I missed?

When you changed the document background to 0,0,0, was the document “Range” slider (Background Gradient Range) set to 0 ? That is what I meant by “solid black”. Judging by the second image you just posted, the bottom of the background looks lighter than the top.

I didn’t say it was! :wink:

I tested it, background gradient is set to off (Range = 0).

iffy2.jpg

Take the texture you got from my method to your 2d app and resize it to 96 x 96 and use that for the icon. To get better looking smaller images, it’s usually better to start big and resize them to smaller. ie: If your going to 96 x 96, start somewhere around 520 x 520. You probably already know this anyway.

ZBrush might be aliasing it by fitting it to the icon size.

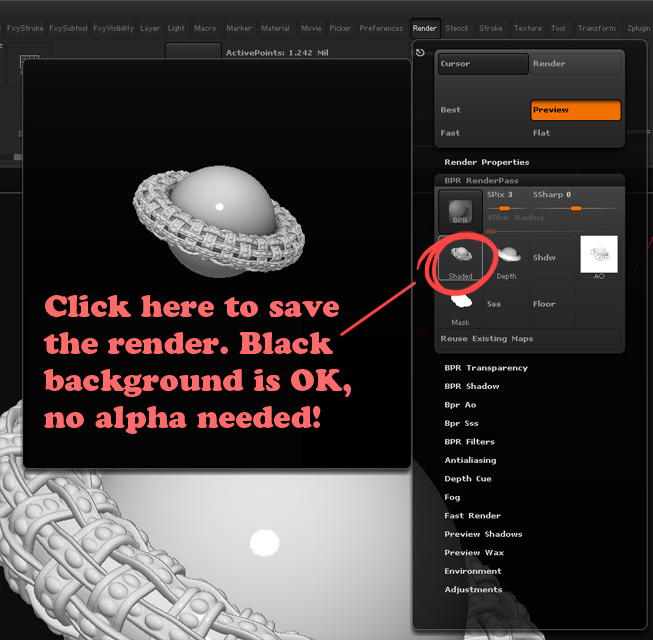
“Image from most recent BPR render” is the best way I have found to do this. It’s near the end of this video, around 8.40:

[video=youtube_share;9_MxUFsnsKg]http://youtu.be/9_MxUFsnsKg[/video]

Yes! Thank you very much!

  • so the answer is, you render it against a black background
  • crop the render to a square image
  • reduce to 96x96

No more atrifacts!

iffy_nomore.jpg

iffy_4.jpg