ZBrushCentral

Berserk - Guts the Black Swordsman

Hi everyone,
This is my first post. A year ago, I decided to really dig in and learn Zbrush
and its workflow. Virtually all the learning I have done has been in one way or
another connected to this website and this fantastic forum. There have been
so many amazing and inspirational posts I am unable to reference them all,
but I want to extend a most sincere THANKS! to all the posters here. And a
thank you to Pixologic for creating a program for us fools who think like artists
and not engineers!

So, enough blabbering and more pictures!

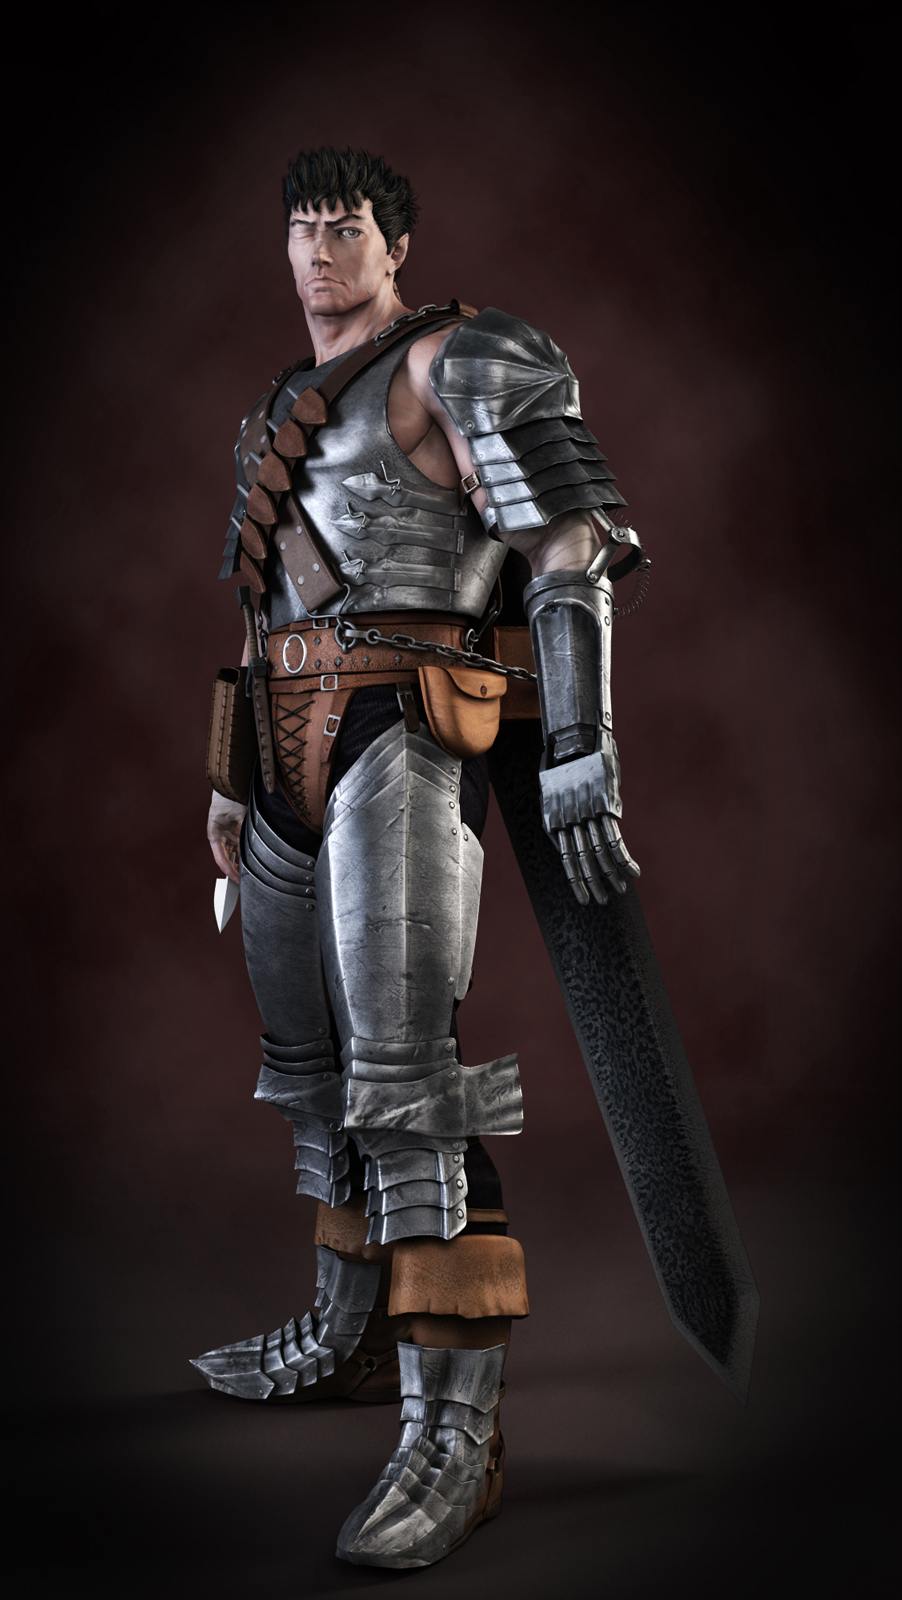
For my subject of study I chose Guts from the manga/anime series, BERSERK.
I love how the character mixes the real (the scale and placement of armor)
with the extreme (the sword). Also he has a ton of objects and details to
add. I intentionally didn’t go for the classic anime look or to emulate the
artwork of Kentaro Miura. Instead, I tried to give him a more realistic feel.
These are rendered in 3D Studio with Vray with Photoshop for compositing.
Only the hair is added after the fact. Farther down you will find Zbrush
captures both with bare models and polypaint textures.

The body was started from zspheres, then sculpted and retopo’d in Zbrush.
I tried a number of ways to re-topologize but I love how Zbrush can re-
project the details onto the new mesh. It was such a life saver! It took a
whole lot of effort to learn anatomy as you can see from the progress sequence.

I modeled the armor and equipment in 3D Studio Max then detailed and
textured everything in Zbrush. All the textures were hand painted with just a
little help from Zproject on some of the leathers. I tried to detail everything.
As a result, I ended up with around 45 subtools and 5 ztools to keep
everthing running smoothly. A little over-kill, I know, but the practice helped!

Hope you like. I have more close-up beauty renders I’ll post if people aren’t
sick of all this stuff! Of course, comments and critiques are appreciated!

ZBC-Thumb1.jpg
[attach=175242]Ruggiero_GUTS_layup_12.jpg[/attach]

[attach=175243]Ruggiero_GUTS_layup_13-small.jpg[/attach]

[attach=175244]Ruggiero_GUTS_layup_14a-small.jpg[/attach]

[attach=175256]Progression.jpg[/attach]

[attach=175245]Ruggiero_GUTS_layup_11.jpg[/attach]

[attach=175246]Ruggiero_GUTS_layup_1.jpg[/attach]

[attach=175247]Ruggiero_GUTS_layup_10.jpg[/attach]

[attach=175248]Ruggiero_GUTS_layup_8.jpg[/attach]

[attach=175249]Ruggiero_GUTS_layup_4.jpg[/attach]

[attach=175250]Ruggiero_GUTS_layup_2.jpg[/attach]

[attach=175251]Ruggiero_GUTS_layup_3.jpg[/attach]

[attach=175252]Ruggiero_GUTS_layup_5.jpg[/attach]

[attach=175253]Ruggiero_GUTS_layup_6.jpg[/attach]

[attach=175254]Ruggiero_GUTS_layup_7.jpg[/attach]

[attach=175255]Ruggiero_GUTS_layup_9.jpg[/attach]

Attachments

Ruggiero_GUTS_layup_12.jpg

1 Like

Fantastic looking Berserk!!! Love the series…you have done such fine job modeling and texturing!

Excellent job ! You perfectly captured the sad expression of Guts, and the character looks really medieval. The whole modeling and texturing is great !
Only two minor regrets: still your sculpt is pretty realistic, the hair looks very ‘manga’. They looks good themselves but breaks a bit the realistic approach.
The other point is about the bands at the arms, maybe you were too shy on it’s thickness, looks like it’s just polypainting, even if i saw it in the sculpt.

Do you plan other Berserk characters ? ^^

3D_Gattsu___Expression_Test_by_Konartist3D.jpg

he will looks wonderful with defirente expression

SolidSnakexxx – Thanks a lot! Love your work!
HellGrind – Thanks! I agree about the hair. I am not totally satisfied, but I got a little anxious about posting! I do have a list of projects to tackle and some of the other characters are at the top. I thought it would be cool to do either Griffith or a younger version of Guts, something that would be nice and new compared to this model which is all gritty and used looking.
adampof – Nice expressions and details. Kinda of wish it was mine (and on a different thread), but nice nonetheless. Guess I have something to compare too!

dude i love the series. this is a great model here. really really cool man!!
5 stars in my book :wink:

Pretty cool model :slight_smile: berserk is one of my favorite comics.

AWESOME. Berserk is my favorite comic. I like how you stayed true to the manga version. No offense to adampof, but his Guts’ face looks too much like just another barbarian as opposed to the clean-shaven character from the manga.
I would kill to see this character in the Berserk armor. :slight_smile:
I think a good balance between the raggedness of adampof’s version of Gut’s hair and your own would be good. Although I think in the first full size pic the hair looks fairly spot-on.
Kudos!

how did u do the farbic on the pants?

adampof – Nice expressions and details. Kinda of wish it was mine (and on a different thread), but nice nonetheless. Guess I have something to compare too!

You guys are more polite than I am… adampof… I’m kind of thinking that this was uncalled for, for you to post someone else’s work. I understand that you were giving an example, but you could have done it a little more tastefully.

I think that this artist has done a tremendous job, and has really captured the moment. Yes, the expressions and final result ARE something to look forward to, but not posting someone else’s work to show as a comparison.

Keep up the great work on this project… really impressive.

-kmkenpo

nerveink - Thanks! Your work is always inspiring!

MDGeist - Thanks!

CCSZ - Thanks! And I appreciate the feedback on the hair. I need to give it a bit more attention. And no killing, the armor is for sure on my list!

kmkenpo - Thank you for your support. Can’t tell you how much that means!

DanyBoy - Here is a quick how to. Keep in mind many great minds figured this out long before me, but its pretty simple really:

  1. Grab your favorite alpha. I grabbed wool weave from Pixologic’s alpha library (Thanks Pixologic!)
  2. Apply the alpha as a mask using drag rect. Overlap the alphas and cover the model as needed. In this case, I inverted the mask, but it’s not necessary.
  3. Go to the deformation roll out and using the slider, give it a little inflat.
    This will puff up the model a little and bring out the details.
  4. Enjoy!

Ruggiero-alpha-tutorial.jpg

That’s a great work! Very beautiful!
One question: if sameone wants to use this models, or others, to create a character or an armor in a videogame, these are downloadable somewhere in Forum? :smiley:

I have sent a private message to Bruggiero, but he does not connect from time and then I don’t think he will respond… :cry: