Well heres the candle video hot off the render.
I’ll answer the raj stuff here in a bit cause I’m running late for work;(
Buts thank you for all the kind feedback;)

thanks my dear friend…downloaded them all…:), take your own time mate…just keep them comming slowly…:)…
you see some day i am gonna be a master in maya…and all the credit goes to you…
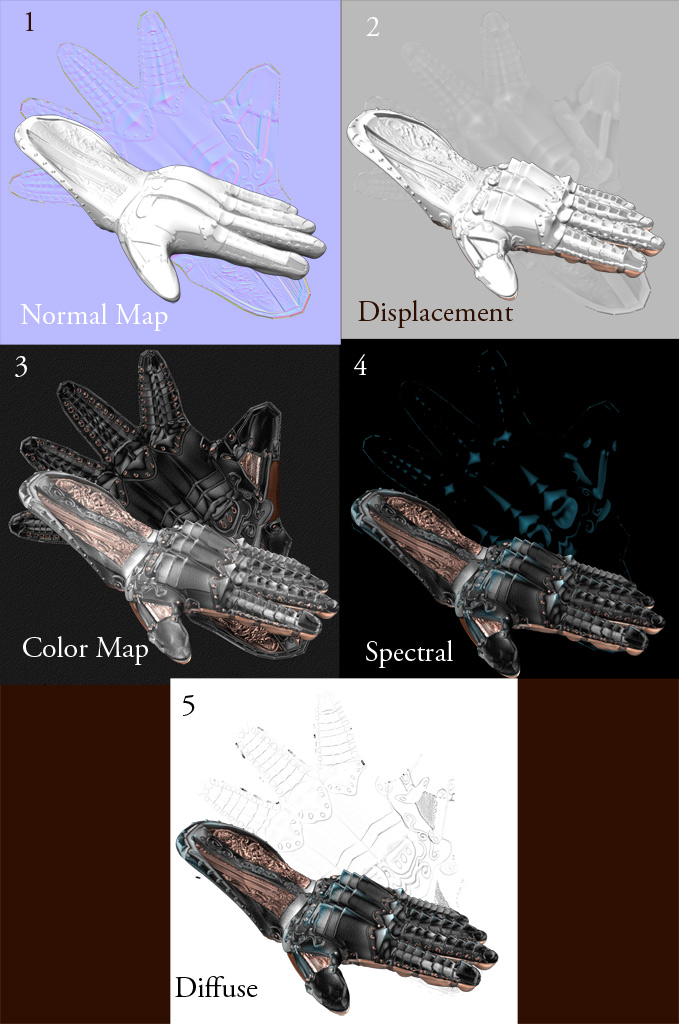
I am posting this here since I never see a breakdown of maps to what they do to your render.
All map making are covered under my Zbrush 101-104 series but here is a visual representation of what they actually look like being applied one at a time.
I used a final Gather in maya for lighting.

wow …wow …wow…
now i am getting animation stuffs…
by the way…i am still fiddiling with my new comp…tweaking setings and all…and lately playing games to glory that i have
u see…oblivion, carbon , fear…some that i could not play on my old rig…now plays happily on my system…i will take another couple of weeks.off to play them and later fully switch to work…now its like 3 to 4 hours a day only for games…
I have bought a new site and it won’t be ready for a few because their setting it up for me now.
It has twice the bandwidth and it can be upgraded very easy.
HouseofTutorials has been evaded by terriosts that won’t answer emails, I only have a chat window to comunicate with them if you call that communicating.
The site is down for now. And when its back up I will be switching hosts because nobody should do bad business like that.
So admins don’t destory this link I will post the updated site here when its up.
long live the freedom of knowledge and good will;)
http://www.schoolof3d.com/
Is now open. Not all the videos have finished uploading the date is 29th of dec I would give it another couple days to upload the 20 gigis of videos but at least this link is in place.
houseoftutorialsis still under the rule of my old host and im trying to get the domain name back, so I bought schoolof3d for now.
I have plans for schoolof3d anyway;)
happy new year mate…:), looks like you are having some bad time with the site…:(, me tooo…the reliance browsing center just blocked the access to the u.s.b …dont know what now…:(, i guess i still will be able to download at fairly decent rate…:((
hi…i am gonna check the site tomorrow…me back from long holiday…:), i hope i will find something interesting …
Well sory for meaningless spam, but I’d like to say ‘thanks’ for this.
Great tutorials, very informative - one of the best ones I’ve seen, big thanks for them 
thanks for the doom 3 for maya…:), finally after a busy schedule am back…
welcome back raj
You should try the unfold uv blender video also;)
I know you like maya. But blender is really good for UVS!
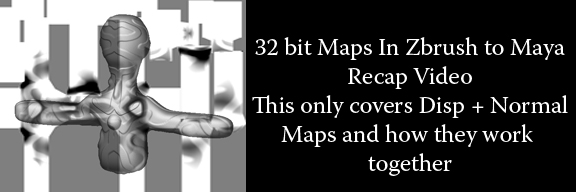
Wanted to Recap this video for awhile now.
This is super simple to follow. Learned a little more while I was working on the armor parts, (that someday I will finish) lol
Anyway enjoy.
not bad, thanks for the video.
I use a method I have, but I’ll give yours a try.
For the alphaGain on the displacement and normal maps, you can make a expression to auto -/2 your gain vs your offset. It’s usefull, makes it so you never have to calculate -/2 of your gain and offset, it does it for you.
I’ll made a pic of the explanation.
http://i16.photobucket.com/albums/b49/Kishr/alphaGain.jpg
Hey man,
Enjoyed your videos. Kinda hard to understand once you go to the maps, since I’m not that experienced in Maya. That process seems long, especially waiting an hour for the zmapper map. Do you really need to go through all of that to achieve a skin texture?, because Im sure you can achieve an exact look without the use of a 3d party app.
what video?
Zbush 104 ? maps and materials
If so then I would have to say yes there is a way to make skin easyier.
But Sub scattering light into the layers of a object replicating skin. Is fun;)
And it gave me a way of showing the not so common maps in 3d land.
For faster ways you should look at the second life videos or IMVU. They use more of a baking method. I have them seperated by topic so that you can just watch the videos that apply to Zbrush
Baking video is on the last IMVU video
http://www.houseoftutorials.com/page5.html
Baking video 2 is way at the bottom
http://www.houseoftutorials.com/page2.html
Can you please make a video on how to combine a mesh if you only have a head. For example, i created the head and now want to attach it to a body that will flow with the topology. I mean i can use the multi marker, but its not effective. I did get decent results with going back to lowest resolution and edge looping things. I would like the simplest way to do this, even in a 3rd party app.
Thank you
Playing frankenstein has always been a challenge for the Zartist.
you have 1 option.
- The head has already been sculpted with all the details probally. But when you make a body all those details will be washed away because you have to merge the edges on the first lvl in order for the topology to smoothly flow.
Its the order of things that are the most flustrating when it come to being a 3d artist. You have to think 12 steps ahead at all times. When all you really want to do is sculpt;)
I would keep the old Zhead export it at lvl 2 or 3 and watch my Maya 11-14 series which walks you through a biped body with good topology.
As far as a video being made sorry I’m retired until Z3 comes out.
I have moved on to the traditional art side until then.
Latest sketch
http://www.jasonwelsh.com/gallerys/displayimage.php?album=4&pos=3
But I will be back in season 3 and have a few plans up my sleave for this summer;)
Thank you.
However I did have some success with going back to a lower level and edge loop things, stretch them down and build a body, then going back to the higher division. My head still had all the details and i would manually add and sculpt the body that was just created Not my favorite way, but thanks for the explanation.