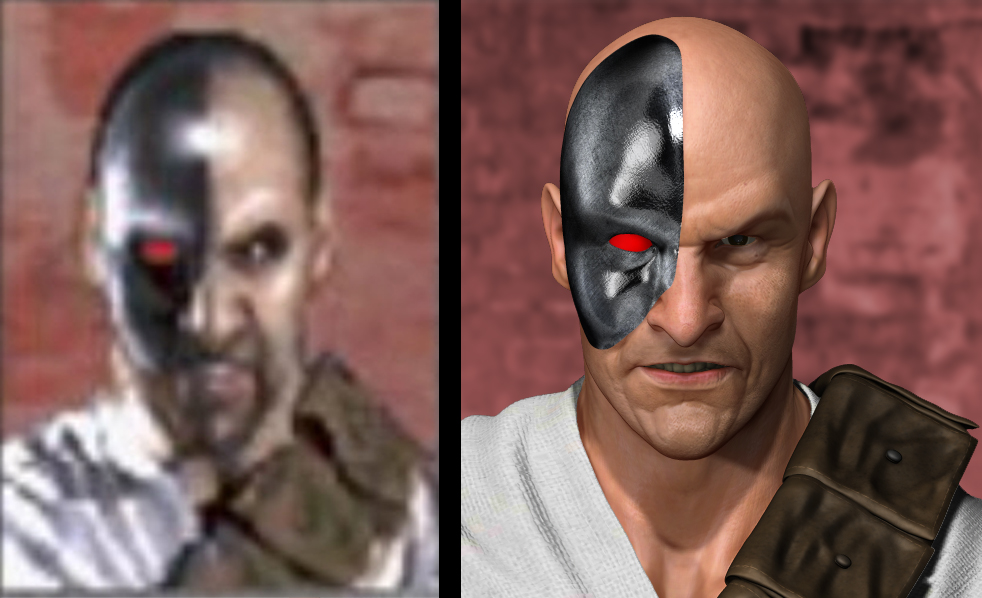
Here is a sculpt I am currently working on. Everything but the pouches were modeled by me:
Attachments


Here is a sculpt I am currently working on. Everything but the pouches were modeled by me:


If anyone knows of any good wrinkle tutorial, please let me know. Would like to understand the most practical way to retopo it and export it. Thanks
As you were asking about a tutorial on wrinkle (clothing), I would IMHO, find good ref of classical sculpture and or modeles in modern clothing and keep in mind the way that folds drape and hang over the surface of the body. Armpit, shoulder, mid-section torso…Curves at the center groin and knee/calf, all of these areas would have a certain amount of gravity and bend to them. Once you have a good look, compare them to your sculpt and perhaps go back down to some of your lower subdiv and start stroking them in, move, and apply. Check upper subdiv, and then back down. Soon I think you’ll get better results…
In PS grey scale a few images of wrinkles, paint black around outside (transparent area) and export as alphas for zbrush…import to ctrl (for masking) , chose drag rect or other stroke and draw out the alphas as a mask and use standard brush to lift the wrinkles, invert mask and selectively use standard brush to push in some parts…alphas are magical but i cant say how.
Digital tutors did one about this , i couldn’t find it.
Thank you both for the suggestions. Very cool
Update to Kano render. Trying out some hdri. Anyone know how to render out the image without the hdri background being visible?
Still working out the wrinkles. Also need to find a good process of transferring the details from zbrush to maya


I see a substantial improvement on the wrinkles and folds. I also like the look of that steel material.
<svg version=“1.1” baseProfile=“full” xmlns=“http://www.w3.org/2000/svg” style=“height: 0; width: 0; position: fixed”> <filter id=“bpm-darkle”> <feColorMatrix in=“SourceGraphic” type=“hueRotate” values=“180”></feColorMatrix> </filter> <filter id=“bpm-invert”> <feColorMatrix in=“SourceGraphic” type=“matrix” values=" -1 0 0 0 1 0 -1 0 0 1 0 0 -1 0 1 0 0 0 1 0"></feColorMatrix> </filter> </svg>How are you currently getting things from Zbrush to Maya at the moment?
For Normal map:
I drop the mesh to the lowest division to avoid uv warp and also because zbrush says so > open the Normal Map tab > highlight tangent, smooth UVs, and Snormals > generate the map at 4k > then flip V and export as .tiff.
For Displacement:
I do the same for above except with only Smooth UV highlighted.
Trying to replicate the character select portrait:


Messing around with the whole compositing rendering thing with Photoshop

the character select kano has visible hair?
Yeah, he did. All attempt I had with the hair fell kinda flat. I passed the render on to someone else for touch ups, like adding the hair
Playing around with a redesign


Impressive. I would give him meaner eyes though, he almost looks like a nice guy.
I agree the proportions are nearly perfect, keep us updated.

