ZBrushCentral

Maya 6/MR/NormalMapping -yes another one :) help!! plz

k Guys;

Couple of screen shots (they always help)

First things first;
Model exported from maya low rez mesh. Imported to ZBrush, brushed muscles and exported the tool.
I have been loading this tool back in for the normal map because I wanted to use a higher division level for the normal map mid disp high normal
So I have already exported my displacement maps at like a res 3 or so and they’re working VERY nicely.
I import the tool, save morph at low res, go back to lvl 3 and subdivide to 5, then paint my rough crappy normal test stuff.
Drop back to the lowest res
no flipping for now
Tangent and Adaptive selected, res 4096, switch to the morph target and then generate the Normal map. I then FLIP the texture in Y in the texture section so that it is the right orientation for maya, and export to TIFF.
From there I batch convert the TIFF to an IFF, load the IFF into this shading network for MRay in Maya6.0
http://www.headus.com/au/samples/norm-MR/graph2.fig.html
And I have done as tol, flicked the R back to X and the G back to Y so they are not switched (I get the SAME results mind you without this flipping of channels)
Turn off all my displacement mapping deleting nodes etc
and THIS is the friggin result!
I can’t for the LIFE of me get anything other than this crap going on…
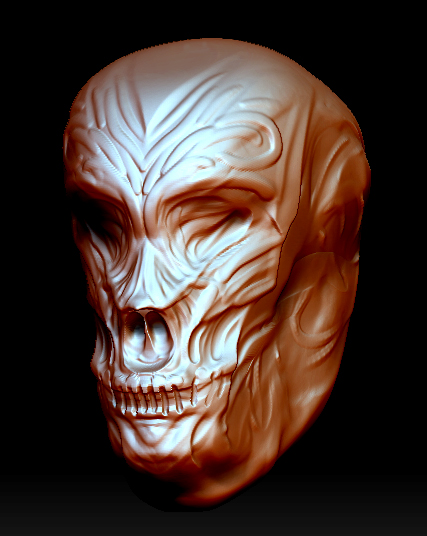
This is the Zbrush model with the crappy zbrush line

and now for the maya renderer using MR

Notice how the chest is negative and the arms are positive bumping… earlier I was getting this effect across the left and right sides… sigh
Edit
Oh yeah another thing to note is that when I plug the normal map directly into the shader normal camera, and then use the Highest Quality Rendering it looks EXACTLY the same too…
EDIT
Exporting the low res mesh from zbrush again and reimporting this into maya again doesn’t change anything either

if you don’t use tangent space, then plugging the normalmap into the shader’s normalcamera should work, but only if you don’t change the transforms, or deformation of your model.

as for where the rgb plugs into the xyz, i’ve been following the headus network, which plugs the R INTO Y, and G INTO X. Don’t know if this could be your problem. what’s your uv map look like? if you generate an automatic map in zbrush, say using guv tiles, does that give you a nicer render?

also, if you export out the morphed lores, rather than the saved older one, and then generate your normalmap from this morph, does that also give you the same problems?

also, are you using some kind of ambient occlusion/dirtmap for your rendering? try just using a standard lighting setup, and see what happens.

here’s a progression - the first in zBrush, the second WITHOUT normalmapping in mental ray, the third WITH normal mapping.

redBall_zBrushToMaya_0_1.jpg

if you don’t use tangent space, then plugging the normalmap into the shader’s normalcamera should work, but only if you don’t change the transforms, or deformation of your model.

Tried that yesterday and it didn’t help, I turned adaptive on late in the procress due to reading it somewhere to see if it would help with the problem but it didn’t change anything.

as for where the rgb plugs into the xyz, i’ve been following the headus network, which plugs the R INTO Y, and G INTO X

I followed your suggestion before I posted the images, and I’m still getting the same results.

also, are you using some kind of ambient occlusion/dirtmap for your rendering? try just using a standard lighting setup, and see what happens.

Just a GI_Joe lighting setup, lazy setup by me cause I’m working through the normal maps not lighting :). ALso get the same results without GI_Joe in the scene as well.

ZBrush with Maya 6.0 and MR :td:

One thing that you are not specifying in your workflow: were the UV’s generated in ZBrush, or in Maya? Did you export the low res model from ZBrush to Maya, or did you just apply the map to the existing model in Maya?

One thing that you are not specifying in your workflow: were the UV’s generated in ZBrush, or in Maya? Did you export the low res model from ZBrush to Maya, or did you just apply the map to the existing model in Maya?

Generated UV maps in Maya
Imported the mesh to ZBrush, made the Displacement maps and saved out the tool.
Loaded the tool in ZBrush again, dropped to lowest res, stored MT, upped res to lvl 5, applied details well the yucky big lines dropped to low res, switched to MT, generated Normal map, Flipped image vertically and exported for maya.
(Made sure the document was the same side and the tool was rotated and scaled to the document exactly the same so there were no pivot changes etc that I am aware of)
Note I have tried both exporting the Low Res Mesh from ZBrush, and importing that obj back into maya, and using the original exported mesh, and having applied normal map to either I get the same results.

I also want to stay away from having Zbrush generate the UV maps as we have 12 characters to build for this project and we will be using Photoshop for texturing as well.

Sorry if there are times I’m not making myself too clear, have tried literally dozens and dozens of combinations/tweeks/approaches now so I might be typing stuff out a little rushed / in a funny head space :slight_smile:

Welp I fixed it

I will run it through another test, and then post EXACTLY what I did here…
Thanks all for you help :slight_smile:

I don’t know Why Normal Map doesn’t run correctly on Maya…I Proceed on that way:

I model an object on Maya with Y up ( Rigth hand system ).
Export it as an OBJ to edit that mesh in Zbrush.
StoreMT and process to the normal map…and then see the effect on Maya High Quality Rendering on my Viewport. Arg…!!:cry: Dam…Normal Map doesn’t seems to work Correctly with a Directionnal Light.

For Info : I connect Normal mal RGB Color “File” to Normal Camera “Lambert”

So What I have to set on my preference window for Zbrush to Maya (RightHand System) and for later in other way Zbrush to DirectX (LeftHand System) :rolleyes: .

I serachin for some good params, and I test all Normal Map Flip.

I notice that the Directionnal Light seems to have a - 90 ° deficit to have good light effect…

Ok I have config my preference to iFlipY iFlipZ eFlipY & eFlipZ but when I generate my normal Map I discover back in Maya that the normal Map Texture of Zbrush Was Flipped on V…I dont understand…

Please let me learn a good Maya - Zbrush - Maya tutorial for Normal Map.

All textures must be flipped vertically when importing into ZBrush or exporting from. This includes normal maps.

You can do this in ZBrush by pressing Texture>Flip V before exporting the normal map.

That’s all there is to it!

Is anyone surprised at all that Alias hasn’t stepped up to the plate and wrote a shader that works in Maya software, Real-time and Mental Ray. (it would be really nice if a new spot was added in the shader attributes for normal maps as well. Imagine using a displacement map for larger shifts in model topology, a normal map for mid range topology shifts that really didn’t effect silhouette, and a bump map for finer detail.) It really sucks that Maya is falling behind these days. Built in Corrective blend shapes sure would be nice, but hey I can do a fluid simulation. (Fluid simulation is going to be the next big thing in character creation and animation for those of you that are out of the loop!!)

headkitchen, please conclude this thread by telling us what you did to fix it! I also had your original problem with the leftside/rightside mirror, one was correct, the other inversed. So, I’m very curious what your steps were to resolve the problem! Please post! thanks.

Personally, Flip Verticaly correct my problem. I do it before export my normal map from Zbrush…and prefer to control the result with my personnal test program in c++/D3D who use Pixel Shaders…:smiley:

Why alias don’t coorect is viewport shaders system to resolve realtime visualisation problem…?:td: trust me Zbrush Works well…Maya was not Mature at this time with N ormal Map. I hope a good shaders will be created by an interresting artist.:idea:

alex carbonero has written a tangent shader plugin for maya4/5/6, he has info on it over at spiraloid:

http://cube.phlatt.net/forums/spiraloid/viewtopic.php?TopicID=9&page=4 (towards the bottom of the page)

http://www.carboneros.com/examples/tangent_shader.jpg

Hey I was going to post here but someone beat me to it :slight_smile:

Anyways yeah, I got tired of dealing with the same issue, so I wrote a shader for Maya render, you can get it on my site

www.alexcarbonero.com just go to my Mel and Mll section and download my menu.

here is some conversation that have been going on @ cgtalk

http://www.cgtalk.com/showthread.php?p=1793178#post1793178

hope it helps it’s really easy to use and I made it specifically for noraml maps exported from zbrush using the flip vertical option.

Has anyone got both normal map and displacement silouete map to work in maya 6.5 Im refering to the killero scene at headus. I can render the normal only in metalray but not the old displacement and normal that was made for 5.0

Alejandro, Where is your shader? It is not on your site anymore?

Also, you spell knowledge wrong on your resume.
Ironically on purpose? Hope so.

Hello can someone tell me how can i generate a displasement . normal or a bump map for Max or Maya from this model

Attachments

1.jpg

i read ur thread and that encouraged me to ask u a ques. i am new to z brush i heard about normal maps a lot, but i didn’t know how to use them in maya so could u give me detailed description about that plz ?

This is how I learned, well worth the $8:

http://gnomonology.com/group/14

There’s also one on displacement maps which I would suggest picking up.

I hope that helps!!