ZBrushCentral

Juggernaut Orc

Thanks, Ambient! The low-res model was 22,000 polygons. Generally, most characters I create are about 5-8K polys (for games) but I thought I’d splurge on this one because I wanted it for a boss character. The Zbrush resolution was over 25 million polygons…I generally detail entire characters in about 2-4 million polys (in Zbrush) but, again, with keeping in mind this was going to be a boss character, I splurged and had fun with it.

Here’s wireframe shots of the low-res model and flat diffuse polypaint shots of the model from Zbrush.

jugwire1.jpgjugwire2.jpgjugpaint1.jpgjugpaint2.jpg

Thought I’d post the normals, greyscale w/normals and the lit render all from within Marmoset Toolbag…

Looks fantastic mate, i looked at your website, lots of cool stuff, im a fan …

The sculpt looks really great! Nice sense of bulk and mass with him. I’ve to say the materials/texturing could do with more work though. From the front he’s almost a solid mass of the same material, and it feels like the model would benefit with more areas of contrast to help define it. The back is great though, there’s areas of armor, flesh and leather that makes it all hold together.

Turned out great man!
I think you spent too many polys on the belt face… you could achive the same result with less imo.
great work!

Freewaldo, that you’re now a fan is one of the nicest compliments I think I’ve ever gotten! Humble thanks and glad you like the Juggernaut!

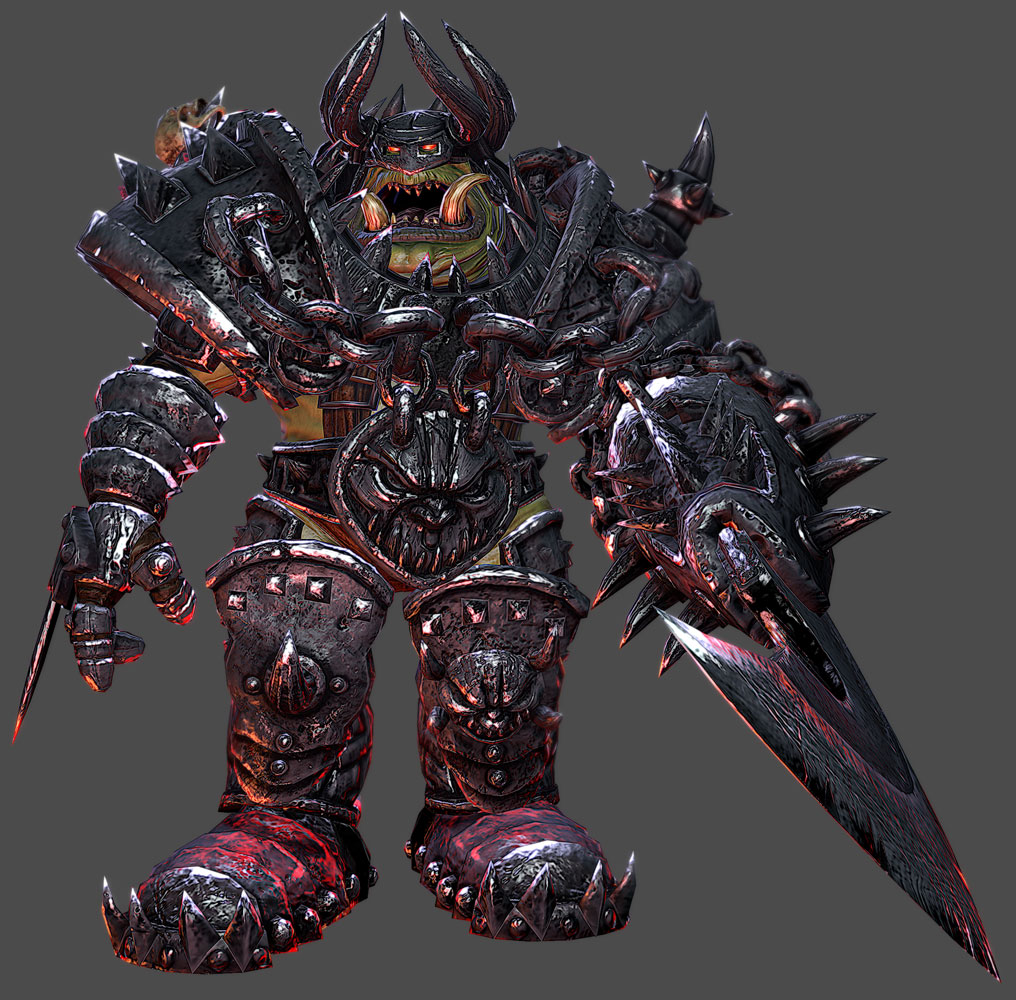
TanTeck, thanks for the compliments and I see your point but unfortunately, the leather straps that are in front (they match the ones in the back) just don’t show as well with all the heavier protection and the crotch-plate! I always try to balance things out but when I originally undertook this fun guy, in looking at real suits of armour, many had alot of openings in back (for leather straps etc) but the front was very well guarded so I tried to keep that in mind when I did the Juggernaut. Maybe in the next model, I’ll make sure to have a bunch of different materials to contrast with! :wink:

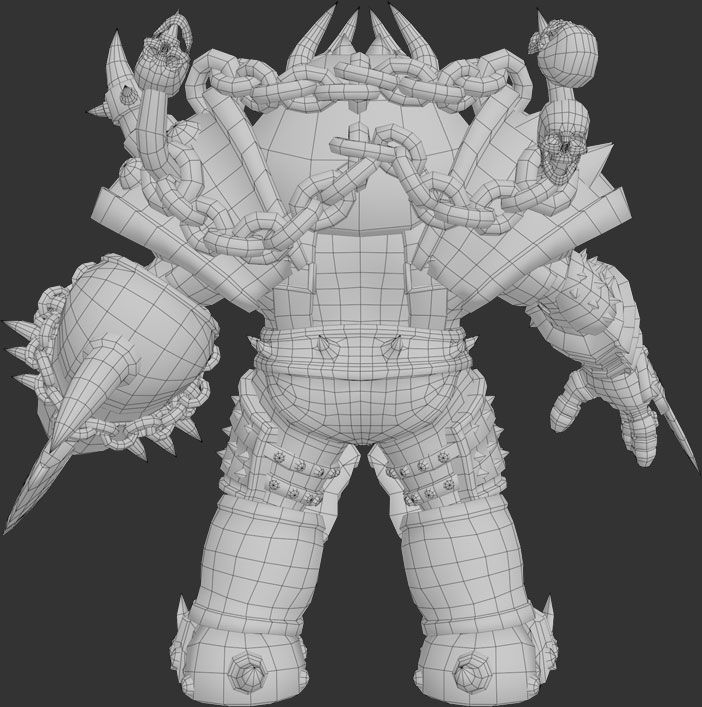
Mariano, many thanks! You’re right, I could have dropped a few polys out of the belt but since it’s not often I get to do big guys, I figured I’d splurge a little LOL (By the way, I always love your work, man! Always awesome stuff!)

I downloaded a little 3DSMax script called Autoweight (since I’m not a rigger/animator) and posed the Juggernaut in something with a bit more action!
jugaction1a.jpg

Very cool design, I dig him a lot! :+1:

Nah! this character is pure kickassatry … it looks radical, the color, the texture, everything rocks! :sunglasses:small_orange_diamond:+1:

Thanks, Freewaldo!

Santis, many thanks…always love your stuff as well…!

I’m having fun posing the Juggernaut (again, cuz I’m not an animator) so here’s another shot…more sedate and at ease with himself, not having to flaunt he’s a killing machine…

jugpose2a.jpg

Nice job mate! orc head reminds me an orc from 3D Motive tutorial about ZB:)) hehe anyway good job! btw i think its little bit bumpy :)) good luck

That’s because it’s the same one, Hermer! LOL I did the Orc Head and then the full Juggernaut body for the head for 3DMotive as part of their series…nice catch!

hehe. keep up good work!
i’d like to hear from u about your pipline u used for this guy!

Thanks, Hermer! The pipeline was pretty simple:

  1. modelled in 3DSMax (I wanted this as a low poly boss model that could be dropped into a game)
  2. exported into Zbrush for next-gen detailing and polypainting (used a little Spotlight as well)
  3. exported out the diffuse and normal maps to apply to game model
  4. used Photoshop to adjust levels to create a base specular map
  5. used Zbrush to paint more location-specific specular highlights and then exported those maps out and blended into the Photoshop spec maps
  6. exported everything into Marmoset to see a basic in-game equivalent for lighting etc
  7. felt like trying to rig/pose the Juggernaut and used biped and a 3DSMax plugin called Autoweight that skinned my mesh perfectly to the biped (no vertices left out)
  8. tried to create a couple of interesting poses to help give the usual static model a bit of ‘oomph’.

I can go into more detail if you’d like but that pretty well covers the steps I took for this model…hope that helps! :slight_smile:

Thanks mate! really good pipline! did u unwrap model in max on baze mesh?:slight_smile:

Hermer, I actually use a very quick, easy (free) unwrapper called Roadkill and have used it in my pipeline for years. I can unwrap entire characters in just a few minutes so it’s been one of those programs that I keep at my fingertips. It’s one I recommend to all my students, especially since everyone can afford free. It’s just a very easy approach to unwrap meshes. (Not taking away anything from unwrapping in 3DSMax, Maya, Headus, 3D Coat etc etc…it’s just what I use.)

Here’s a shot of the mesh and how the mesh looked with me using the Autoweight Maxscript (the colour coded mesh, upper right). I then combined it with the biped and since the armour was supposed to be rigid, I merely linked pieces to the specific biped bones so that they’d move with the biped when posed. The chains holding the two shoulders (at top, both front and back) mostly moved correctly, but I did have to re-orient some of them by hand.

jug_rigging1.jpg

im very glad that you shared with your pipline and workflow:)) i really appreciate it dude! Thanks

You’re very welcome, Hermer! That’s what we’re all here for, right?! :slight_smile:

Sure Wizzie! update your next work here im really interesting:))

This is a final pose I did for the Juggernaut Orc, since I was having so much fun posing him, and what should now be called “done”! LOL

(apologies to anyone who’s tired of seeing him one more time!)

jugpose3.jpg