Here a color. There an anaglyph.
Attachments

Here a color. There an anaglyph.
Wow man! With your amazing & incredible experiments, you really show that ZBrush and anagymph images are a veeery cool mix! Especially with that cool abstract shapes! 
I’m glad I have 3D glasses right here! :lol:
Good luck! Its really interesting to follow this!
-Gijs
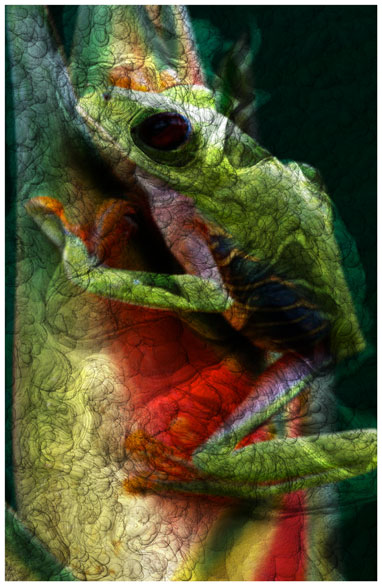
This one is an anaglyph, but i think it looks niceeven without the glasses.

Nice one! I agree it looks pretty slick with and without glasses. 
Well, because I can’t resist the shear “cool factor” of anaglyph images, I made one of my latest pic. (red=left, cyan=right) 

Excellent work safe05! You did a good job on the anaglyph as well. I see this is not your first time working with them.
This looks awesome. I think this out would render a little better at the left and right edges if you added a white boarder all the way around the image and your image depth map.
Set the pixol size of your boarder to be equal to whatever +/- DisplaceNumber you plan to use (borderSize = 8px).
Then, Displace the image with the (8px) image border merged to your artwork. This basically acts as a displacement margin, or ‘Distortion Gutter’ as we refer to it back on Regulon 4.
Awesome content BTW.

Thanks for the tip! When I add a border to my image prior to calculating the offsets I get a noticeable bar on each side as if the “displace” filter gets confused. You can see a little of this on the pen as well. Any idea why this happens?

I’m not sure exactly what phenonmen you are describing. It think what you have noticed has to do with the fact that this image isn’t exactly true 3D. I think you you notice is that along the edges where there is signifigant depth contrast (i.e. pixols high in eleveation right next to pixols with low elevation). The PhotoShop “Displace” filter is actually distorting the image to kind of fake 2 camera angles. The blurry edges come from the filter trying to fill the added distortion pixels to blend out those edges.
I hope that was help ful but it was probably confusing, because I certainly am confused right now. “Look out for the cliffs,” that’s all i’m trying to say.
That sounds about right since the effect happens around large changes in depth value. Thanks.
I think that’s why the original steps included adding a 50% gray layer in screen mode to the zbuffer, to cut down on the range of possible values so as to avoid any sudden change of depth too great.
Another way you could get 3D from your Zbrush work would be to take a tool, make an image, then rotate it a few degrees on its vertical axis and take another image. (This may necessitate marking and re-drawing or something. You then could blend those two images in a way similar to blending the two displaced images to get a good anaglyph, but I don’t know of a good way to get anaglyphs out of a zbrush scene.
Well, one thing comes to mind. MRGBZ grab the canvass and use it as a texture map, the Z-buffer as a displacement map on a plane in a full 3D program, and then have a pair of targeted cameras converge on a point, about middle depth in your image, with a ratio of about 12 to 1 of the distance between the cameras.
But not within Zbrush.
Well, I tried my own suggestions and I have a couple of results.
First, rotating a tool works just fine. You use the rotate gyro, and while it is still active you do a best render and then export a copy psd, then rotate and repeat. The difficult part of that process is making sure to rotate it by just a few degrees. Note that whatever is the pivot point of the object will be the effective convergence point, and thus, screen level.
If I sound like a bit of a know it all on this subject I can only plead that in 2000, my first 3D graphics job was working on a stereoscopic animation, where I was in charge of setting up the cameras, among other things. So I’ve been playing with this for a while.
Anyway, here’s how rotating the tool came out:

Using the Z-buffer to displace a plane inside 3DS Max didn’t fare so well. First, Max doesn’t get the whole 16-bit alpha thing. Second, even after you convert it the depth looks really weird. Its grainy, and tends to look squished. There isn’t enough resolution in the 8-bit map to simply increase the displacement strength and get some kind of roundness.
My conclusion?
Maybe if you’re going to try this hack you CAN do it inside of Zbrush after all. I’ve learned from experience that Zbrush can handle its own alphas and the polycount required to make 3D objects out of them.
Ah, yes. I forgot to do the grey layer over the depth map. I’ll try that and see if I can push the effect further. Btw: Nice effect on the image there. I’m not very comfortable with setting rotation points and rotating using the gizmo a fixed amount for both eyes so I’ll take your word for it. 
Clever idea of using the displacement map, but I think you’re still only going to get part of picture. (i.e. Don’t think it’ll be much different from what Photoshop can do since it doesn’t have the full 3D scene) If you used MentalRay for your displacement, the graininess sounds like a sampling issue. Easily fixed, but you’ll probably start to see long (re)render times making it a waste.
Well…sounds like Photoshop is the only real option right now…at least we can create some pretty nice effects pretty easily.
Btw: do you have any public videos and such of the anaglyph animation you did?
I don’t think you’ll get much better results either. 3D from Pixols is going to be a hack, since there is nothing behind, it isn’t true 3D in the sense that it lacks sufficient information to be displayed in a convergent stereogram.
BUT!
It will avoid some artefacts of the displacement process. There will be no double-images from things left behind on the canvass. At worst you’ll see the edges of things receeding back where you expected to see empty space behind something. It will look like the vacuum-formed plastic type shape that it is.
Yep. Exactly.
Btw. How did you end up making your animation project? I imagine two cameras…? We’ve done quite a few stereo movies & sims at my 9-to-5 but they have always used polarized light and rarely required any post work.
The company I worked with call themselves “The Motion Pixel Company”.
One of the partners, and my direct supervisor at the time, Harris Milam was a guy who had worked in stage, television graphics and various kinds of stereoscopic work for entertainment events. My first day on the job I spent a lot of time talking with him about 3D. He had many examples, including printed anaglyph, viewmasters, lenticular displays etc. I learned more in that conversation than I have ever learned about stereoscopic before or since.
Our working method was to use a pair of cameras in 3DS Max, both linked to a parent dummy, seperated by three units and converging on a point 36 units in front of them. Each time a scene was completed it would be rendered twice, once from each camera, producing two sequences of frames that recorded the identical action and time frame, with slightly diffrent perspectives. The movies would then be combined with a program written by the other partner, which would enable the movie to be previewed, in-house, on an ordinary television, while we edited the video using premiere.
The in house display system was a crystal eyes 3D viewing system. A pair of glasses with liquid crystal lenses which switched the lenses opaque alternating the left eye and right eye. This system was tied in to the video signal, so that the alternating opacity was synchronized to the field signal of the TV.
Lots of people today talk about progressive frames as if it makes a video any clearer, but old style televisions achieve something more like 60 frames per second by projecting the image as alternating fields. The TV projects horizontal row 1, then skips 2, projects 3, skips 4 and so on, until it reaches the bottom, and then goes back and projects the alternate fields that it skipped during the first pass. We used the alternate fields to present the two camera views in the same video signal.
Once editing was finished we told premiere to reference each source movie in turn, and rendered them. The edited, full-frame movies were then projected with polarized filters in our venue, The Children’s Museum of Houston. The color is excellent beyond anything you get from an anaglyph, of course.
The discussion I had with the boss on the first day was enough to teach me to make anaglyphs, cross-eyed and wall-eyed stereograms for home use, which I have been doing ever since, for my own amusement. when I happened upon the previous 3D anaglyph thread my glasses were right here on my keyboard. I’ve also been looking into lenticular and holographic marketing materials for my coming graduation. I believe I have a method for making holograms from CG.
It’s great to see others really into this and thinking of new ways of making “3D” imagery. Having been in stereoscopic imagery for several years now it’s easy to see 3D (in one form or another) as the natural extension of our current mainstream mediums. Can’t wait to see what you come up with for your thesis work. Sounds very interesting. Good luck!
Here’s a character from The Turing*Shop’s production of my opera, “K’ai”. Modeled in ZBrush by Bas Mazur, rendered in anaglyph by me.

Here’s the character with a normal render:


Nice one, Doc. Good strong effect on the front character. Getting a little ghosting on the back left, but overall a great image.
Excellent work Doc Eternal and Baz.
The 3D effect seems to work well for me.
Bas deserves all the credit for the model. Yeah, there’s some ghosting. I think I had the cameras too far apart.
Dr.E